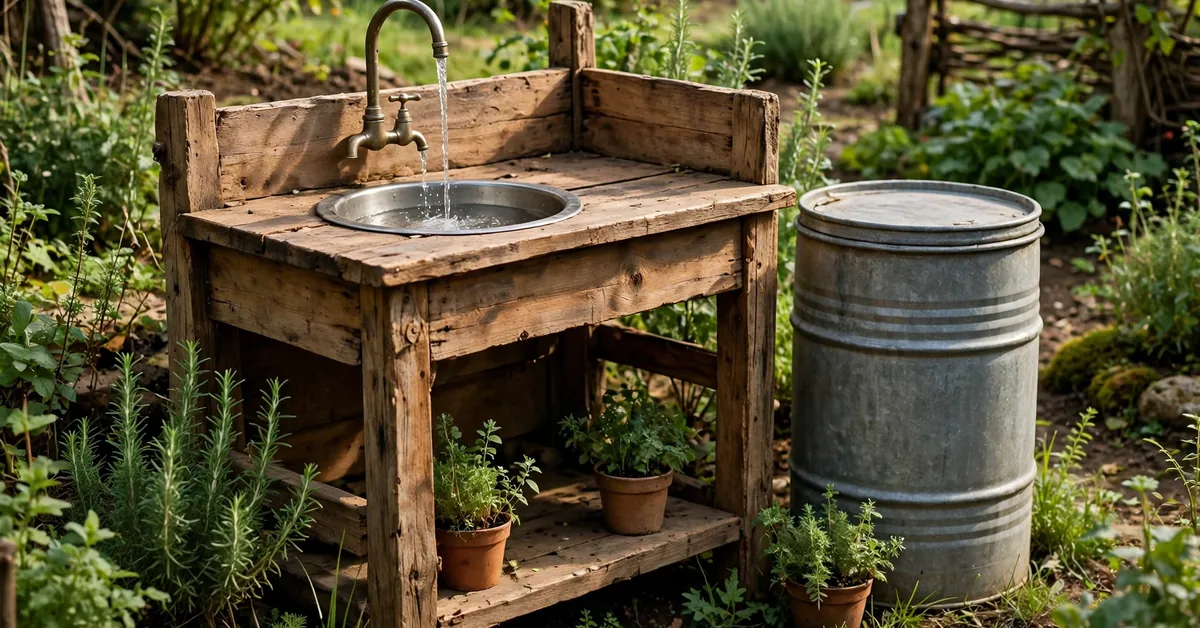
Of all the upgrades you can bolt onto a mud kitchen, running water is the one children vote for with both hands. Mud pies are good; mud pies you can rinse, fill, pour and flood are better. A tap turns a pile of dirt into soup, potions, car washes and “coffee” — and keeps them out there noticeably longer.
It’s also the upgrade parents most often overcomplicate. A mud kitchen “tap” just needs to deliver a small, controllable flow of water at head height for a small person — no pressure pumps or copper pipe required. There are five sensible ways to do it, from a ten-minute job to a proper plumbing project, and most families are happiest with the simplest one. Here’s each method honestly — cost, difficulty, and how much water ends up on the ground.
One thought before you start: every litre you put in at the top comes out at the bottom. Plan where the water goes (full section below) first, or you’ll build a swamp with a kitchen in the middle of it.
Method 1: A Drinks Dispenser or Water Container With a Tap
This is the classic, and the one I’d recommend to most families — it’s what we started with.
Buy a plastic drinks dispenser or camping water carrier with a tap on the front (the 5–10 litre kind sold for picnics and festivals). Mount it on a shelf above the sink, tap overhanging the bowl, and the “plumbing” is done. Gravity does the rest.
How to fit it: Fix a sturdy shelf so the tap sits roughly 15–25 cm above the sink bowl — high enough to fit a jug under, low enough for little arms to reach the lever. Screw a small lip or batten across the front of the shelf so the full, heavy container can’t slide off. A shelf beats cutting the worktop: simpler, and easier to remove for cleaning.
- Difficulty: Very easy. An hour at most, including the shelf.
- Typical cost: Roughly $10–$35 / £8–£25 for the container, plus a shelf bracket if you don’t have scrap wood.
- Water usage: Self-limiting. A 8-litre container is plenty for a session, and when it’s empty, play naturally wraps up — a feature, not a bug.
- Downsides: Flow slows as the container empties, and someone has to refill it. Lever taps can drip if small hands don’t close them fully — check at tidy-up time.
Building the kitchen from scratch? Design the shelf in from the start; it sits neatly in most mud kitchen plans and costs nothing extra at build stage.
Method 2: A Hand Pump or Siphon Pump Bottle
A manual hand pump (the kind sold for 5-gallon water bottles) or a simple siphon pump gives water on demand — nothing flows until a child pumps.
How it works: The pump sits on a water bottle below or beside the sink, its outlet tube routed up over the sink and clipped to the frame. A few strokes to prime it, and out comes a satisfying squirt.
- Difficulty: Easy. No tools beyond clips or cable ties for the tubing.
- Typical cost: Around $10–$20 / £8–£15 for a bottle-top pump.
- Water usage: The lowest of any method — water only moves when pumped, so a container lasts for days.
- Downsides: The flow pulses rather than running steady, which can frustrate a child filling a big pot. Young toddlers may lack the strength for it, though they enjoy trying. Pumps also wear out — treat them as a consumable you’ll replace every season or two. (Tap container or pump? The FAQ at the end settles it by age.)
Method 3: A Gravity-Fed Container With Tubing
This is Method 1 with more range: a larger container (15–25 litres) placed higher up — a fence-mounted shelf, a crate stack, a raised platform — with food-grade tubing running down to a simple tap or inline valve at the sink.
How to fit it: Height is everything: gravity pressure is gentle, so aim for the container’s base to sit at least 60–100 cm above the tap. Clip the tubing along the fence or frame so it isn’t a trip or yank hazard.
- Difficulty: Moderate. An afternoon of fiddling, mostly spent on brackets and clips.
- Typical cost: Typically $20–$45 / £15–£35 all-in for container, tubing and tap.
- Water usage: A 20-litre reservoir can fuel a whole weekend — which also means a tap left open can quietly drain the lot onto the ground.
- Downsides: Tubing needs a scrub inside every few weeks or it goes green. Keep the reservoir covered, too — open standing water is a mosquito nursery (see the safety section).
Method 4: A Garden Hose With a Tap Splitter and Trigger Nozzle
If the mud kitchen stands near your outdoor tap, this is the zero-storage option: endless water, proper pressure, nothing to refill or carry.
How to fit it: Screw a Y-splitter onto the outdoor tap so the hose doesn’t monopolise it, run the hose to the kitchen, and finish with a trigger nozzle or hose-end tap at child height. Some people mount a cheap plastic tap on a short upright pipe fixed to the frame, fed by the hose from below — it looks surprisingly like “real” plumbing. The trigger nozzle matters: water flows only while squeezed, keeping usage sane.
- Difficulty: Easy to moderate. No plumbing skills needed; it’s all screw-on fittings.
- Typical cost: Around $15–$40 / £12–£30 for splitter, a short hose and nozzle/tap.
- Water usage: The highest of the five if unsupervised — a tap left running is a tap left running. The trigger nozzle keeps it controlled; a plain open tap on a hose should be adults-only territory.
- Downsides: Supervision. A hose plus mud is enormous fun and enormous mess, and a determined six-year-old will eventually spray the windows, the dog and you.
Method 5: Plumbing Into an Outdoor Tap Properly
The permanent option: a fixed pipe run from your outdoor tap to a proper small tap on the mud kitchen, with an isolation valve so the branch can be shut off.
When it’s worth it: When the kitchen is a long-term fixture in one spot, older kids use it daily all summer, and you want it to just work like the kitchen sink. Genuinely lovely — and genuinely the most effort by a distance.
The honest basics: Any permanent connection needs a way to isolate it (a stop valve on the branch) and protection against backflow — dirty garden water flowing backwards into your drinking water. In many places an outdoor tap legally requires a double check valve or similar preventer. The outside run must also be lagged or drainable: a burst frozen pipe is how a fun project becomes an expensive one.
- Difficulty: Hard. This is real plumbing.
- Typical cost: Widely variable — roughly $80–$250 / £60–£200 in parts if you’re competent and doing it yourself; a plumber’s visit adds labour on top.
- Water usage: Unlimited supply, so discipline comes from the children, not the container. Teach the off habit early.
- My advice: For anything involving cutting into mains pipework, get a plumber to at least handle the connection and backflow protection. Treat this section as a starting point for that conversation, not a substitute for it.
The Five Methods at a Glance
| Method | Difficulty | Typical cost | Water control |
|---|---|---|---|
| 1. Tap container / drinks dispenser | Very easy | $10–$35 / £8–£25 | Good — self-limiting when empty |
| 2. Hand pump / siphon pump | Easy | $10–$20 / £8–£15 | Excellent — flows only when pumped |
| 3. Gravity-fed container + tubing | Moderate | $20–$45 / £15–£35 | Fair — depends on tap discipline |
| 4. Hose + splitter + trigger nozzle | Easy–moderate | $15–$40 / £12–£30 | Good with a trigger nozzle |
| 5. Plumbed-in outdoor tap | Hard | $80–$250+ / £60–£200+ | Fair — unlimited supply |
All prices are typical budget-to-midrange ranges, varying by shop and country — planning figures, not quotes.
Where the Water Goes: Drainage and Mud Management
This is the section that saves your lawn. A busy mud kitchen can put 10–20 litres of water into one patch of ground in an afternoon — without a plan, a permanent mud slick right where small feet stand.
Catch it first. Sink the bowl or bucket into the worktop so it catches the flow, and empty it onto a flower bed or the base of a tree when full. This alone handles most of the water for most families.
Give overflow somewhere to go. On grass, dig a shallow soak-away pit under or just behind the kitchen: a hole roughly 40 cm deep and 40 cm across, filled with gravel or coarse stones and topped with flat pavers to stand on. Water drains away slowly instead of pooling. Line the pit with landscape fabric on heavy clay, to slow it silting up.
Give the ground a rest. Rotate where emptied buckets go. If the standing patch still gets swampy, lay pavers at the front as a permanent “doorstep”, or spread play bark under the kitchen — it soaks up splash and tops up cheaply once a year.
Choose the spot with drainage in mind. That patch will become the muddiest, most beloved square metre of your garden. Put the kitchen where that’s an asset — near beds that appreciate the spare water — not beside the patio door where muddy footprints get tracked inside. Still choosing a spot and size? Check the standard mud kitchen dimensions before you dig anything.
Safety and Hygiene: The Non-Negotiables
Water play is safe play when a few habits hold. These are the ones that matter:
- Empty and refresh daily. Standing water grows bacteria quickly in warm weather, and children put muddy hands — and sometimes cups — straight in it. End each session by tipping out bowls and buckets, and empty what’s left in a tap container rather than leaving it for days. Never leave open containers of water standing overnight as a habit: a hygiene issue, a mosquito issue, and for the smallest children any container of water deserves respect.
- Supervise toddlers around water. You don’t need to hover, but under-threes and open water belong in the same adult sightline. Buckets get emptied and turned upside down when play ends.
- No drinking from the mud kitchen. Set the rule early and cheerfully: this water is for mud, not mouths. Stick to food-grade plastic containers.
- Winter freeze care. Before the first hard frost, drain everything: containers emptied and stored in the shed, hoses and tubing drained and coiled, any plumbed branch isolated and drained. A dispenser left full in a frost will split — ask me how I know.
Maintenance: Ten Minutes, Every Couple of Weeks
Running-water setups fail through neglect, not design. A tiny routine keeps them sweet:
- Scrub the container. Every one to two weeks in summer, empty the reservoir and scrub inside with a bottle brush, warm water and a splash of washing-up liquid, then rinse well. If it smells musty or looks slimy, that’s overdue.
- Check the tubing. A green tinge inside gravity-feed or pump tubes means algae. Flush with clean water, scrub with a thin pipe brush if you have one, and shade or replace tubing that stays green.
- Prevent mould. Store containers with lids off or ajar so they dry fully between uses. A container sealed while damp grows mould spots over winter; a wash with a mild vinegar solution sorts most of it.
- Test the tap. A drip can waste a container overnight. Washers on cheap plastic taps are rarely replaceable — if one drips persistently, replace the tap or dispenser; they’re inexpensive parts.
- Rinse the sink bowl daily-ish. Ten seconds with the hose prevents the grey sludge layer that puts everyone off.
Round out the setup with water-friendly extras — jugs, funnels, a colander for “washing” pebbles — mostly found for pennies second-hand; my mud kitchen accessories ideas list is a good place to start. Short on space or budget? Methods 1 and 2 both drop neatly onto a compact build like the IKEA mud kitchen — no plumbing, no hose run, just a shelf or a pump.
FAQs
How do I add running water to a mud kitchen without plumbing?
Use gravity or muscle. A drinks dispenser or camping container with a tap, mounted on a shelf above the sink, gives a real working tap with zero plumbing — the method most families end up happiest with. A hand pump on a water bottle is the other option and uses even less water. Both take under an hour.
How much water do kids actually use in one session?
Typically 5–15 litres for a good long session, depending on age and how splash-happy they are. That’s why a 5–10 litre tap container fits so neatly — and running out is a gentle, natural end to water play rather than a negotiation.
Is a pump or a tap container better?
For under-threes, a tap container — one lever, instant water, no strength needed. For children four and up, a pump is often more fun and uses far less water, because flow stops the moment pumping stops. Worried about waste or a soggy patch? Choose the pump. Worried about a toddler’s frustration threshold? Choose the tap.
How do I stop the area around the mud kitchen turning into a swamp?
Catch the water in a sink bowl and empty it onto beds or trees, then give overflow a gravel soak-away pit under or behind the kitchen so it drains instead of pooling. Pavers or play bark where children stand help too. Most swamp patches are one spot receiving every litre, every day — spreading the water out solves it.
Can I leave water in the container between play sessions?
For a day, sealed with a lid, it’s generally fine in cool weather — but make daily emptying your habit anyway. In warm weather, standing water grows bacteria and attracts mosquitoes fast, and children dip cups and hands straight in. Fresh water each session keeps things worry-free, in two minutes.