By Owen Brooks
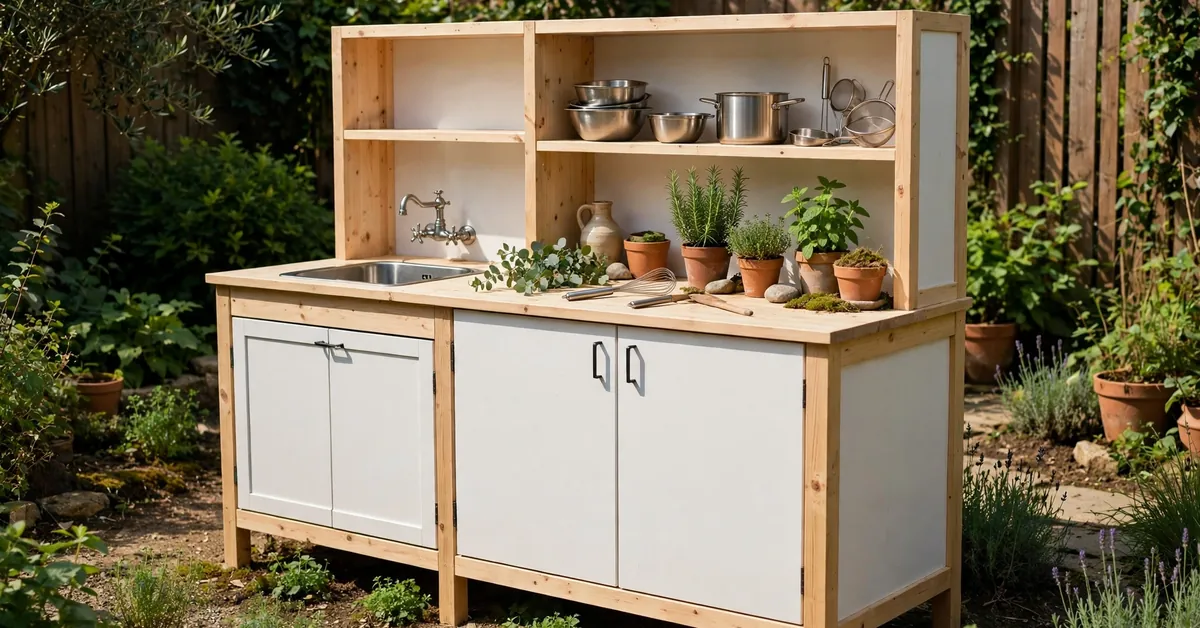
Watch a toddler ignore an expensive toy and spend forty minutes stirring a puddle with a stick, and you understand the appeal of a mud kitchen: an outdoor pretend kitchen where children scoop, pour, mix and “cook” with mud, water and leaves. Messy in the best possible way, and one of the cheapest forms of open-ended play you can set up.
You do not need woodworking skills to build one. Some of the best mud kitchens I have seen started life as flat-pack IKEA furniture — inexpensive, sturdy for the price, replaceable if a part weathers badly, and just the right size for small children. I built our first from a step stool and a storage frame in one weekend, my daughter “helping” by testing every surface with a ladle.
This guide covers the whole build: pieces, tools, assembly, a sink and safe water supply, typical costs, and weatherproofing.
Why IKEA Furniture Works So Well for a Mud Kitchen
A mud kitchen needs to be sturdy, low, easy to clean, and cheap enough that you will not mind it getting covered in mud. IKEA basics tick every box:
- Low cost. A basic setup can cost roughly the price of a family takeaway, and replacing a damaged piece costs very little.
- Surprisingly sturdy. The solid-wood BEKVÄM step stool is built to hold an adult’s weight on its top step, so it shrugs off daily toddler use.
- Made to be modified. Flat-pack pieces are simple in construction, so they are easy to cut, drill and repaint.
- Child-sized proportions. The heights and depths suit small children far better than a full-size workbench, and you can add shelves, hooks or bins later.
One caveat: these are indoor furniture. Left untreated outside, wood and particleboard weather and swell — hence the sealing steps below.
The IKEA Pieces Parents Use Most (and What Each One Is For)
You do not need all of these. Pick a base first, then add storage and extras as budget allows.
BEKVÄM Step Stool — the classic compact base
Turn the two-step solid-wood stool around and the steps become two work levels: the top holds a mixing bowl at a comfortable height for a toddler, and the lower step works as a shelf for pots and utensils. It suits balconies and small gardens, and sands and seals beautifully.
LACK Side Table — the budget worktop
The LACK costs very little and gives you a flat, lightweight work surface. Parents often use two side by side, or one as the counter and a second cut down as a shelf. Be realistic: it is particleboard with a honeycomb filling, so it is the least weather-resistant piece here. Seal every edge carefully, keep it under cover, and accept you may replace it after a season or two.
TROFAST Frame and Bins — the storage and “sink” system
TROFAST is where an IKEA mud kitchen really comes together. The frame gives you a counter-height base, and the removable plastic bins slide in and out like drawers. Use them three ways: as storage for cups, spoons and sieves; as a removable sink — a shallow bin works as a washing-up bowl that lifts out for emptying, with no plumbing; and as play stations — one for water, one for mud, one for “ingredients”. Frames come in pine or particleboard, so seal yours accordingly.
DUKTIG Play Kitchen — the ready-made option
If building is not for you, the DUKTIG is the shortcut: already a child-sized kitchen with a hob, sink bowl and storage. Seal the wood parts, move it outside, and pretend cooking becomes real mud cooking. It costs more than the DIY routes and offers less worktop space, but there is almost no building involved.
A sensible starter combination is a BEKVÄM or TROFAST frame, one or two bins, and a cheap set of hooks and utensils. If you prefer measured drawings to adapting furniture, our printable plans pair well with this build: mud kitchen plans PDF
What You Will Need
Tools
- Tape measure and pencil
- Sandpaper (medium ~120-grit, plus a finer 180–220-grit sheet)
- Drill/driver with bits
- Jigsaw or hole saw (only if cutting a hole for a sink bowl)
- Paintbrush or small roller; screwdriver
Materials
- Your chosen IKEA piece(s)
- A mixing bowl or washing-up bowl as the sink — measure it before cutting anything
- Exterior stain, outdoor paint or clear exterior sealer — non-toxic when dry, suitable for children’s items
- Outdoor screws (stainless or coated)
- A spare offcut of wood for an added shelf, if wanted
- Hooks for utensils
- Child-sized utensils: ladles, spoons, sieves, jugs, old pots — thrift shops are ideal
- A water container with a tap, or a large pump-action bottle
- Wall anchors or a fence bracket to secure a tall piece
Before You Start: Getting the Height Right
The biggest factor in whether a mud kitchen gets used daily or ignored is worktop height. The main surface should sit between your child’s knee and hip height, so they can stir a bowl without hunching or reaching up. Most parents find a counter around 40–55 cm suits toddlers through early school age, with a lower shelf for little ones. BEKVÄM and TROFAST setups land naturally in that range. For exact measurements by age, see: mud kitchen dimensions
Choose your spot before you build: flat ground on paving, decking or gravel rather than lawn, close to a tap, visible from the house.
Step-by-Step: Building Your IKEA Mud Kitchen
Step 1 — Assemble the furniture first
Build your IKEA piece exactly as its instructions say, on a flat surface, before modifying anything. Check every joint is tight and the piece stands level — a wobble is far easier to fix now than later.
Step 2 — Prep and sand every surface
Sand all wooden surfaces, especially edges, corners and anywhere small hands will grip. Start with the medium paper, then finish with the finer sheet. Wipe off the dust and let it dry. Solid wood like the BEKVÄM needs this most.
Step 3 — Seal for outdoor use
Apply your paint, stain or sealer to every surface, including the underside and any cut edges, and let it dry fully before a second coat. Two thin coats protect far better than one thick one — this step is the difference between a kitchen that lasts one summer and one that lasts four. On particleboard like the LACK, seal the edges thoroughly: that is where moisture gets in.
Step 4 — Add a worktop and shelf (optional, but worth it)
If your base feels small, fix an offcut board or a second inexpensive table top across part of the frame with outdoor screws. A low shelf underneath keeps bowls off the ground. Pre-drill pilot holes in thin panels so they do not split.
Step 5 — Fit the bowl or sink
Two easy options:
- Drop-in bowl: Place the bowl on the worktop, draw around its rim, then draw a second line about 1–2 cm inside the first. Cut along the inner line with a jigsaw or hole saw, sand and seal the edge, and drop the bowl in so its rim rests on the surface. Measure twice — this cut cannot be undone.
- Bin sink: Skip the cutting and use a removable TROFAST bin or washing-up bowl in the frame or on the counter. It lifts out for emptying, which many parents find easier.
Step 6 — Add hooks and storage
Screw a row of hooks along the back or side for ladles and spoons. Slide the TROFAST bins into place. Add utensils, pots, and natural “ingredients” — pinecones, shells, stones, leaves. A small hand-painted sign finishes the look: mud kitchen signs
Step 7 — Anchor it and do a final safety check
If your setup includes anything tall — a shelving frame, a stacked unit, a DUKTIG a child could climb — fix it to a wall or fence with brackets or anchors so it cannot tip.
Adding Water — Simply and Safely
Water turns mud play from good to irresistible — no plumbing needed. The two setups parents use most:
- Container with a tap. A drinks dispenser or water container with a small tap, set above the sink, lets children turn water on and off themselves — that independence is half the fun. Choose a modest size, around 3–5 litres, so it is not too heavy when full.
- Pump bottle. A large pump-action dispenser gives a gentle flow for rinsing hands and tools, and suits very young toddlers best.
Position the container where it cannot be pulled down, and — this part matters — empty, rinse and refill the water every day. Standing water in sun-warmed plastic gets unpleasant quickly. More setup ideas here: mud kitchen accessories ideas
Safety: The Checks That Matter
A mud kitchen is low-risk play, but it involves water, wood and small objects, so a few basics deserve care:
- Anchor tall pieces. Any unit a child could climb or pull on should be fixed to a wall or fence. Check fixings every few weeks.
- Deal with splinters. Sand properly at build time, then run your palm over edges monthly, especially after wet weather. Re-sand rough patches.
- Use a safe finish. Choose finishes labelled non-toxic once dry and suitable for children’s items. Never use old, unknown paint, or creosote-type preservatives.
- Supervise water play. Even a few centimetres of water in a bowl or bin needs an adult nearby — always, full stop.
- Fresh water daily. Empty bowls, bins and the tap container at day’s end, rinse, and refill next time. Do not let children drink play water; keep a separate drink bottle handy.
- Watch the small stuff. Stones, shells and bottle tops make wonderful “ingredients” but can be choking hazards for under-threes.
What It Typically Costs
Prices below are typical and approximate — IKEA prices vary by country and change over time, so treat these as planning figures, not exact or current prices.
| Item | Typical / approximate price |
|---|---|
| BEKVÄM step stool | ~$20–30 / ~£15–20 |
| LACK side table | ~$10–15 / ~£7–10 |
| TROFAST frame | ~$30–50 / ~£25–40 |
| TROFAST bins (each) | ~$3–6 / ~£2–4 |
| DUKTIG play kitchen (ready-made route) | ~$90–110 / ~£70–90 |
| Mixing bowl / washing-up bowl | ~$3–8 / ~£3–6 |
| Outdoor paint, stain or sealer | ~$10–18 / ~£8–14 |
| Hooks, screws and fixings | ~$5–10 / ~£4–8 |
| Utensils and pots (thrift store finds) | ~$5–15 / ~£4–10 |
| Water container with tap or pump bottle | ~$8–15 / ~£6–12 |
Most parents land in one of three bands, all approximate: a basic build (LACK or BEKVÄM, bowl, hooks, utensils) around $40–70; a mid-range build (TROFAST frame and bins, sealer, water container) around $80–130; and the DUKTIG route around $100–140. Buying second-hand can cut these figures substantially.
What Age Is an IKEA Mud Kitchen For?
Roughly 18 months to 6 years, sweet spot ages 2–5:
- 18 months–2 years: Simple scooping, pouring and splashing at the lower level. Keep accessories large and stay within arm’s reach around water.
- 2–4 years: The golden age. Stirring “soups”, filling and emptying, pretend cooking and serving — when the sink, hooks and bins earn their keep.
- 4–6 years: Play gets more elaborate — recipes, menus, cafés, measuring and “baking”. Raise the challenge with scales, funnels and recipe cards.
The low, stable pieces also suit siblings of different ages side by side.
Outdoor Care: Keeping It Going Season After Season
A few minutes of care now and then doubles its life:
- Wipe down weekly. A quick rinse and brush-off stops mud baking into the grain and keeps bins from getting slimy.
- Re-seal once a year. A fresh coat each spring is the best thing you can do for wooden pieces. If water no longer beads on the surface, it is time.
- Cover or shelter in winter. A waterproof cover, or a spot under an eave or in a shed, protects particleboard pieces in particular.
- Store small parts dry. Utensils and the water container are happiest in a lidded box over winter.
- Tighten and check. Each season, tighten screws and check anchors and hooks.
Frequently Asked Questions
What IKEA items do I need for a mud kitchen?
At minimum, one base piece: a BEKVÄM step stool or a TROFAST frame are the most popular choices, and a LACK side table is the cheapest option. Add TROFAST bins or a simple bowl for the sink, hooks, and basic utensils. The DUKTIG play kitchen is the ready-made alternative.
How much does an IKEA mud kitchen cost?
It depends on the route you take, and all figures here are typical and approximate, since prices vary by country. A basic build usually lands around $40–70, a TROFAST-based build around $80–130, and the DUKTIG route around $100–140.
What height should a mud kitchen be?
The worktop should sit roughly between your child’s knee and hip height, so they can work comfortably without stooping or reaching up. For most toddlers and preschoolers that means a main surface around 40–55 cm, with a lower shelf for the youngest children.
What age is an IKEA mud kitchen for?
Most children get the most from a mud kitchen between about 18 months and 6 years, with ages 2–5 the peak. Young toddlers need close supervision, especially around water and small play items, while older children enjoy elaborate pretend play — cafés, recipes and serving games.
How do I make it weatherproof?
Sand the wood smooth, then apply two coats of an exterior paint, stain or clear sealer labelled non-toxic when dry — including undersides and cut edges, where water sneaks in. Particleboard like the LACK needs its edges sealed especially well and does best under cover. A yearly re-coat, a winter cover, and emptying water daily keep it sound for seasons.