By Owen Brooks
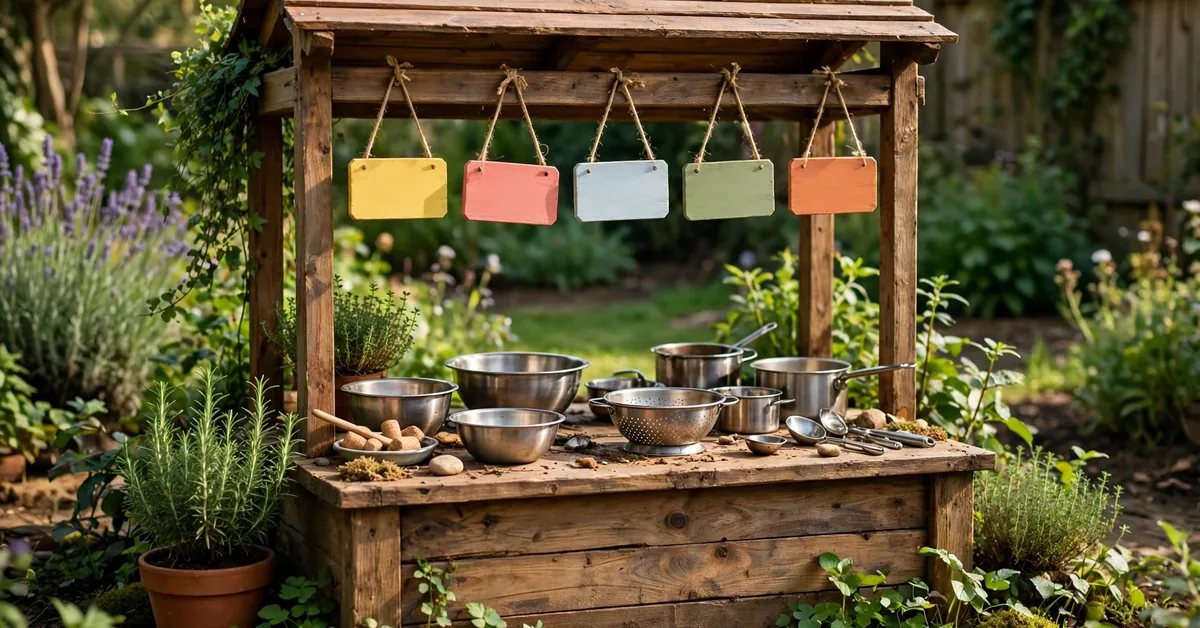
Hang a sign on a mud kitchen and something changes. The pile of planks and old pots stops being a pile of planks and old pots — it becomes Rosie’s Café, open for business, with a menu, a special of the day, and a small chef who takes the whole thing very seriously. Of everything we’ve added to our mud kitchen, the signs have earned their keep the longest — they hand the children a story to step into.
This guide covers the lot: painted wooden signs you can make in an afternoon, chalkboards that change with the day’s “specials”, printable signs for when you want the finished look in ten minutes, and what to look for if you’d rather buy one ready-made. Everything here uses outdoor-friendly materials, because a sign that peels by half-term is nobody’s friend.
Why a Sign Makes Such a Difference
Adults barely notice it, but children read a mud kitchen the way they read a shop. A name over the counter tells them this is a café. A menu board tells them there are things to order — which means someone gets to be the customer, someone gets to be the cook, and the play suddenly has parts for everyone who wanders over.
Signs also quietly pull in the learning stuff. Menus get “read” and “written” by children who’d run a mile from a worksheet. Prices appear. Opening times get negotiated. I’ve watched our mud pie café hold a four-year-old’s attention for the best part of an hour on the strength of one chalkboard and a queue of patient teddy bears.
DIY Painted Wooden Signs
The painted wooden sign is the classic for a reason: it looks the part, costs almost nothing if you’ve got offcuts, and children can help make it.
What you’ll need
- A plank, offcut or piece of pallet wood — roughly 40–60cm long works well for a main sign
- Sandpaper (medium grit is fine)
- Outdoor acrylic paint or exterior wood paint for the background
- Acrylic paint pens for lettering — far easier than a brush for words, for adults and children alike
- A pencil for sketching the words first
- Clear exterior varnish or yacht varnish for sealing
- Screws or strong outdoor fixings for mounting
If you’re building the kitchen itself from scratch, the sign is the perfect use for the best-looking offcut — the sizes that suit a sign are covered in the plans most builders start from. mud kitchen plans
Making it, step by step
- Sand it properly. Take the edges and corners down until you can run a hand over the whole board without catching. This matters more than the painting.
- Paint the background. Two thin coats of exterior paint beat one thick one. Pale backgrounds with dark lettering read best from across a garden; dark green or navy with white lettering looks smart too.
- Pencil the words on lightly. Lay out the whole sign before any paint touches it. Big letters, fewer words. A name and nothing else is plenty for a main sign.
- Letter with paint pens. Go slowly, and don’t chase perfection — a slightly wobbly hand-painted sign has more charm than a stencil-perfect one, and the children will not be grading it.
- Seal it. Once fully dry, add two coats of clear exterior varnish. This is the step people skip, and it’s the step that decides whether the sign lasts one season or five.
Paint pens give you a second chance that a loaded brush doesn’t — one reason I’d hand them to a child helping with their own café sign.
Chalkboard Signs: The Menu That Changes Daily
If I could only pick one sign, it would be a chalkboard. A fixed sign names the kitchen; a chalkboard runs it. Today’s special, the soup of the day, “sold out” over the mud pies — it resets the game every single morning.
You can buy small chalkboards cheaply, but making one is barely more work than the painted sign: a smooth board, two or three coats of chalkboard paint, and a batten-wood frame if you want it finished-looking. Hang it at child height, within reach of the worktop — a menu board the chef can’t reach is just decoration.
Two practical notes from experience. First, ordinary chalk washes off in the rain — treat that as a feature (a fresh menu every dry day) rather than fighting it. Second, if you want the day’s lettering to survive a shower, chalk markers last far better outdoors, though they’re harder for small hands to wipe clean. Keep a pot of chalks in a lidded jar nearby and the board will get used constantly.
Printable Signs: The Ten-Minute Option
Not every sign needs to be handmade. Printable signs are the fastest way to get a mud kitchen looking like a proper little café, and they’re brilliant for the fiddly, wordy signs — menus, price lists, rules — that are hard work to paint.
The types that earn their place:
- Café name signs — the big one over the counter: the café’s name in a proper typeface, which looks surprisingly professional once mounted on board
- Menu boards — mud pies, stone soup, leaf tea, and the rest, with space for prices
- Open / closed signs — double-sided, hung on a hook by the counter; the flipping of this sign becomes a ritual
- Rules signs — “Wash your hands”, “No eating the mud pies (really)”, “Chefs only behind the counter” — funny for adults, deadly serious business for children
- Labels and jar signs — for the potions shelf and ingredient jars
Print them on the thickest card your printer takes, then mount each one on board or stiff plastic and seal it (see the weatherproofing section below). Bare paper will be pulp by the weekend — mounted and sealed, the same printable lasts seasons.
Personalised Name Signs
“The” mud kitchen becomes “theirs” the moment their name goes over the door. Ella’s Kitchen, The Muddy Spoon by Jack, Chef Amara’s Café — a personalised name sign is the single most-loved addition on any mud kitchen I’ve built, and it makes the whole thing giftable: grandparents, take note.
Painted or printable both work. If you’re painting, sketch the name in pencil and let the child choose the colours and add their own decorations around the edges — handprints in the corner are a classic for a reason. If you’ve built from a kit or flat-pack furniture, a name sign is also the quickest way to make it feel one-of-a-kind rather than off-the-shelf. IKEA mud kitchen
Wording Ideas: Names and Menus
Stuck on what to write? Here are the names and menu wordings that have actually been chalked, painted and ordered from at our kitchen — steal freely.
Café and kitchen names
- The Muddy Spoon
- Mud Pie Café
- The Puddle Café
- Stone Soup Kitchen
- The Wonky Carrot
- Leaf & Twig Café
- The Messy Chef
- Potion Bar (for older children who’ve moved beyond pies)
- [Child’s Name]’s Garden Kitchen
- Café Splodge
Menu wording that gets “ordered”
- Mud pies — plain, extra muddy, or with leaf sprinkles
- Stone soup — today’s stones, served warm
- Leaf tea — mint, grass, or mystery brew
- Flower salad — petal mix, chef’s choice
- Potion of the day — ask the chef what’s in it (she won’t tell you)
- Worm spaghetti — twigs standing in bravely
- Berry crumble — berries strictly pretend, always
- Hot chocolate — finest mud, whipped mud topping
Prices are half the fun: “2 pebbles”, “1 leaf”, “a song” all work as currency, and writing them on the menu is a first taste of numbers meaning something. Keep wording short on painted signs — three to five items max — and save the full menu for the chalkboard or a printable.
Where Signs Go: Backboard, Hanging and Standing
On the backboard. The main name sign belongs on the backboard of the kitchen, centred above the worktop, at roughly adult waist height — which puts it in a child’s eyeline while they play. This is the sign’s prime spot, and it’s worth measuring before you drill: worktop heights and backboard sizes vary between builds. mud kitchen dimensions
Hanging signs. Smaller signs — open/closed, the menu, the rules — work best hanging. Two small screw-in eyelets and a length of twine or a couple of cup hooks will do it. Hanging signs swing in the wind, which children love and which does the sign no harm if the fixings are sound. Hang them from the backboard edge, a side post, or a nearby fence.
Standing signs. A little A-frame or a sign on a short stake beside the kitchen — “Café Open” at the garden path — extends the play beyond the kitchen itself. Stake signs are also the easiest to move when the game relocates. Push the stake well in and round off the top corners.
Weatherproofing and Fixing
Outdoor signs fail in predictable ways, and all of them are preventable:
- Start with the right materials. Exterior paint, exterior varnish, and wood that’s sound to begin with — not the split, spongy end of a pallet.
- Seal every face, including the back and edges. Water gets in through the unsealed side and lifts the paint from behind. Two coats of clear exterior or yacht varnish, all over, is the single best thing you can do.
- Printables need a hard backing and a seal. Mount on board or rigid plastic, then varnish over the face or slip the whole thing into a clear outdoor document sleeve screwed at the corners.
- Fix with screws, not hope. A main sign wants two screws into the backboard. Outdoor-rated hooks and eyelets for hanging signs. Glue alone will let go by autumn.
- Bring chalkboards in for winter if you can — they’re the only signs that genuinely suffer in frost, and a shed wall keeps them going for years.
A Quick Word on Safety
Signs are near the top of the “harmless” list, but a few basics are worth the two minutes they take:
- Smooth every edge and corner — sand until a hand passes over without catching, especially on signs at child height.
- Secure fixings properly — a sign that falls onto a small chef is a bad day; screws over nails, and check hanging signs’ twine each spring.
- Non-toxic paints only — use water-based, non-toxic acrylics and child-safe paints wherever little hands (and mouths) are involved, and let painted signs dry fully before play.
- Watch the small parts — eyelets, hooks and screws should be firmly seated, never loose in little fingers’ reach.
Buying Ready-Made Signs Instead
Making signs is fun, but it isn’t compulsory — a bought personalised sign can be better than most of us can paint. Here’s what to look for:
- Outdoor-rated material: solid wood, aluminium composite or exterior-grade acrylic last; thin MDF and unsealed plywood are indoor materials wearing a costume.
- How it’s printed or finished: engraved, routed or UV-printed lettering outlasts vinyl stickers and surface paint outdoors.
- Personalisation quality: check whether the name is added in the same durable process as the rest of the sign, not an afterthought sticker.
- Fixings included: pre-drilled holes and proper screws provided, or at least a sensible way to hang it.
Typical prices, so you know what’s reasonable (prices vary by maker and country; treat these as a guide, not a quote): small hanging signs and chalkboards typically run about $8–20 / £6–15; personalised wooden name signs are usually around $20–45 / £15–35 depending on size; full printable sign sets to download and print at home are typically $4–10 / £3–8. Anything far above those ranges should be offering size, materials or craft to match.
FAQs
What do you write on a mud kitchen sign? Start with a name — the café’s name, or the child’s name plus “Kitchen” or “Café”. After that, a short menu (mud pies, stone soup, leaf tea), an open/closed sign, and one funny rules sign cover most of the play value. Short and big beats long and detailed on anything painted.
How do I make a sign weatherproof? Use exterior paint, seal every face and edge with two coats of clear exterior or yacht varnish, and fix it with screws. For printables, mount them on board or rigid plastic and seal the face. Sealing the back matters as much as the front — that’s where the water gets in.
What paint lasts longest outdoors? Exterior-grade acrylic or wood paint under a clear exterior varnish is the reliable combination. Acrylic paint pens are fine for lettering provided they’re sealed over. Indoor craft paint on its own will fade and peel within a season.
Can I print signs at home? Yes — print on the thickest card your printer handles, then mount and seal. A home-printed sign on bare card won’t survive a weekend outdoors, but the same sign mounted on board and varnished will last seasons. Laminating works too, though sealed varnish tends to outlast pouches that can split at the edges.
Where should the sign hang? The name sign goes on the backboard, centred above the worktop, in the child’s eyeline as they play. Menus and open/closed signs hang at the side of the counter where the “customers” stand; a small standing sign by the path is a nice extra.
The Finishing Touch That Isn’t Optional
Of all the upgrades a mud kitchen can get — an extra sink, a working tap, a shelf of shiny pots — the sign is the one that turns equipment into a place. It costs the least, takes an afternoon at most, and it’s the bit children point at and read out loud to every visitor. Make one, print one, or buy one — just don’t leave the café unnamed.