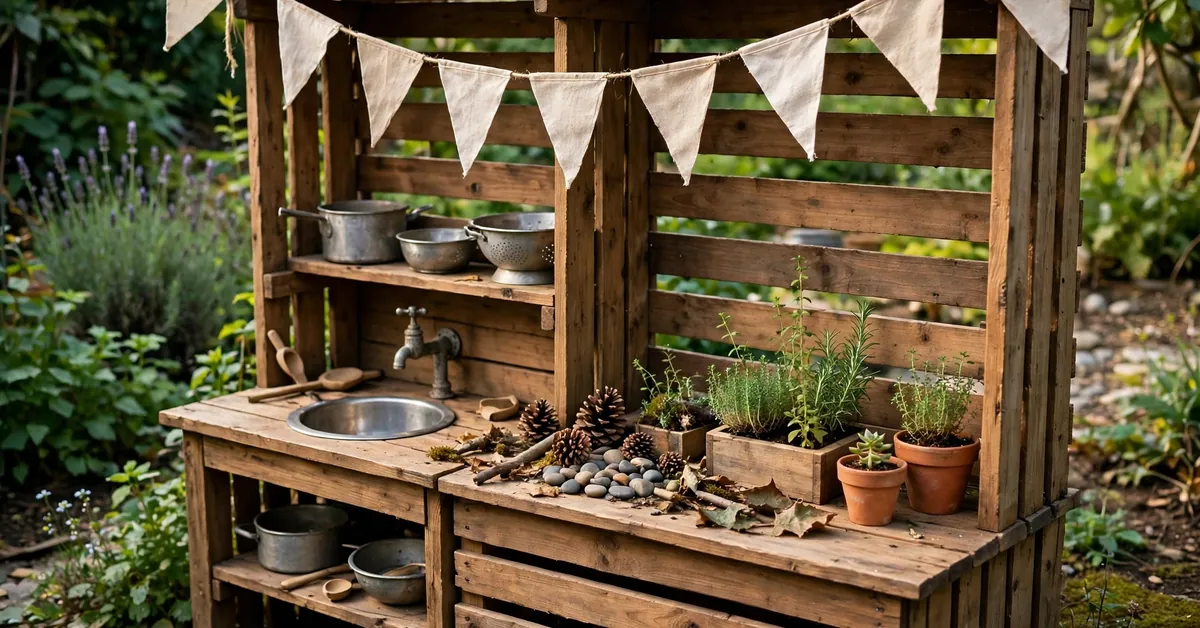
Ask any child what happens when you mix mud, water and a few old pots, and you’ll get the same answer: magic. A mud kitchen gives that magic a home — a corner of the garden where pies get baked, soups get stirred and nobody minds the mess. Best of all, you don’t need a big budget or a big garden to build one. Whether you’re starting from scratch or giving an old setup a new lease of life, one of these ten ideas will fit your space, your tools and your kids.
1. The Classic Wooden Mud Kitchen
If you picture a mud kitchen, this is probably it: a sturdy wooden bench with a worktop, a sink bowl, shelves underneath and hooks along the back for hanging spoons and pans. It’s popular for good reason — it’s simple to build, looks great in the garden, and grows with your child.
You can build one from new timber or reclaimed wood, with a stainless steel bowl dropped into the worktop as a sink and a spare board painted with chalkboard paint for writing up the day’s “menu.” If you’d rather follow a step-by-step build than design your own, start with ready-made mud kitchen plans and adapt the measurements to your space.
Tip from my build: Seal or stain the wood before the kitchen goes outside. One coat now saves you a rebuild in two winters’ time.
2. The Eco-Friendly Kitchen, Built from What You Already Own
Before you buy anything, raid the shed, the garage and the back of the kitchen cupboards. An old cupboard makes a fine base unit, a washing-up bowl or retired baby bath becomes the sink, and yoghurt pots, tin cans and plastic bottles turn into pans, jugs and measuring cups in seconds.
Kids absorb the lesson without a lecture: things don’t have to be new to be useful. My two claimed the “treasure hunt” through the junk drawer as the best part of the whole project — and the kitchen cost us almost nothing.
Tip: Park a small bucket by the kitchen for scraps and spent mud pies. It becomes the “bin,” and curious kids get an easy introduction to composting.
3. The Adventure Kitchen for Little Explorers
Some children don’t want a kitchen — they want a pirate galley, an explorers’ camp or a jungle outpost. Lean into it. Add a ship’s wheel to the back panel, hang a rope and a toy telescope nearby, and paint a simple treasure map across the worktop with outdoor paint.
The frame is the same as any basic kitchen; it’s the dressing that changes the game. Suddenly the mud pies are rations for a long voyage, and the puddle by the fence is the ocean. Themed play like this stretches a session far longer than you’d expect, because there’s always another chapter of the story.
Tip: Hide a few “treasure ingredients” — pinecones, shells, smooth stones — around the garden before playtime and let the crew forage for them.
4. The Mud Kitchen with a Working Water Pump
Water is what turns dry dirt into proper mud, and a kitchen with its own water supply feels wonderfully real to a child. The simplest setups use a drinks dispenser with a tap, a hand pump fitted into the sink, or a hose-fed tap mounted on the back panel. Add a bucket underneath to catch the runoff and you’ll save water as well as puddles.
If you’re planning a plumbed or pump-fed design, it helps to see what’s possible first — have a look at what’s involved in a mud kitchen with running water before you commit.
Tip: Turn tap time into a gentle lesson. A marked bucket shows kids exactly how much water they’ve used, and most will challenge themselves to use less tomorrow.
5. The Farmhouse Kitchen, Garden to Table
A farmhouse-style kitchen sits happily beside the vegetable patch, and it teaches the loveliest lesson of all: food comes from somewhere. Give the chefs a small raised bed or a row of pots with herbs, lettuce or strawberries, and a little crate or stand where they can “sell” the day’s harvest.
Wooden signs, a rustic basket and a couple of toy farm animals complete the picture. In our garden, the mint and parsley get picked more carefully than anything I plant for actual dinner — small hands take the job of farmer very seriously.
Tip: Hand over a child-sized watering can and a trowel. Tending their own plants builds patience, and it keeps the kitchen busy even on days when nobody feels like mud.
6. The Nature-Connected Kitchen
Instead of building a kitchen that sits in the garden, build one that belongs to it. Use tree stumps as stools and side tables, let a climbing plant or a canopy of branches form the roof, and decorate the shelves with whatever the seasons drop — conkers in autumn, petals in spring.
Tucked under a tree, this kind of kitchen stays cool and shady on hot days and feels like a secret hideout, which is half the appeal. Because the “ingredients” are gathered rather than bought, children start noticing the natural world around them: which leaves tear into ribbons, which stones stack best, which flowers stain the mud pink.
Tip: A nature kitchen needs almost no shopping list. Walk the garden together first and let the finds decide the design.
7. The Mini Chef’s Kitchen
For the child who watches cooking shows and narrates everything they stir, build a miniature professional kitchen. Think real, child-safe versions of proper tools: measuring cups, mixing bowls, a rolling pin, whisks and ladles. Add a painted hob on the worktop, a little pretend oven beneath it, and a chalkboard for the menu of the day.
Because the equipment feels grown-up, play gets surprisingly focused — orders are taken, recipes are “followed,” and measuring mud by the spoonful sneaks in early maths without anyone calling it that. Short on utensils? A handful of thrift-shop finds rounds out the kit nicely mud kitchen accessories ideas.
Tip: Join in for five minutes as the world’s most enthusiastic restaurant critic. Then step away and let them cook.
8. The Portable Kitchen for Small Spaces
Renting, short on room, or simply want the play to move with the sun? Build the kitchen on wheels. A bar cart or rolling shelf unit makes a ready-made base; a simple bench design on castors works just as well. Buckets and trays lift out for washing, and the whole thing parks against a wall or in a shed when playtime ends.
Portable kitchens are also the answer for balconies and patios, where a permanent build isn’t an option. Just check the total weight once it’s loaded with water and mud — lighter timber and plastic tubs keep it genuinely movable rather than theoretically movable.
Tip: Locking castors are worth the small extra cost. A kitchen that rolls away mid-service, chefs aboard, is funny exactly once.
9. A Kitchen Big Enough for Several Children
Anyone who has refereed a dispute over the one good spoon knows the golden rule of group play: duplicates of everything. A kitchen designed for siblings and playdates has two workstations or a long shared worktop, two sink bowls if you can manage it, and at least two sets of pots, pans and utensils.
The payoff is bigger than peace and quiet. Cooking side by side, children naturally split roles — one mixes, one serves, one runs the “café” — and practise sharing, turn-taking and negotiation without any adult scripting. Our double setup ended the spoon wars overnight and turned solo play into a small business.
Tip: Suggest a restaurant game: one chef, one waiter, one customer. Then rotate. It gives every child a turn at the popular jobs.
10. The Upcycled Pallet Kitchen
Pallets are the DIYer’s gift to mud kitchens: cheap or free, widely available, and already roughly the right shape. Stand one upright as a back panel and its slats become instant shelving and hanging rails. Stack and fix two or three flat, and you have a worktop at child height. A fourth, cut down, makes a side counter or a little shop front.
Sand everything thoroughly — pallet wood is rough — and check for protruding staples before small hands arrive. A coat of outdoor paint or stain ties the whole thing together and helps it survive the weather. Short of space for a from-scratch build? A flat-pack frame gets you surprisingly close IKEA mud kitchen.
Tip: Look for pallets stamped “HT” (heat treated) rather than “MB,” and give your finished kitchen a fresh colour each spring — the kids will treat it as a grand reopening.
Let Your Child Help Choose — and Build
Whichever idea you pick, save a job for your child. Let them choose the colour, sand a board smooth, paint their name on a sign or decide where the hooks go. It doesn’t slow the project down much, and it changes everything afterwards: a kitchen they helped build is theirs, and they’ll return to it far more often. You’ll also be surprised how seriously a five-year-old takes a paintbrush when the result matters to them.
Why Mud Play Is Worth the Mess
It’s easy to see mud kitchens as pure fun, but there’s quiet learning happening in the mess. Scooping, pouring and stirring build fine motor skills and hand strength. Playing alongside siblings and friends develops language, patience and cooperation. And measuring mud pies, counting spoonfuls and testing what floats is early science and maths, learned the way children learn best — by doing. The honest trade-off is laundry. In our house, that’s a price worth paying.
Safety Basics Worth Five Minutes
Mud kitchens are simple, but a few checks keep them worry-free:
- Make it solid. Tall or shelf-heavy kitchens should be fixed so they can’t tip — against a fence or wall where possible.
- Sand and inspect. Run a hand over edges and shelves; remove splinters, sharp staples and cracked plastic.
- Choose utensils carefully. Avoid anything with sharp edges, and check thrift-shop finds for damage before play.
- Mind the water. Empty tubs and bowls after play, provide drainage so the area doesn’t turn into a swamp, and supervise younger children around water as you would anywhere else.
- Wash up afterwards. Hands washed, tools rinsed — make it part of the game and it becomes habit.
Conclusion
Ten kitchens, ten different gardens — and not one of them needs to be expensive or complicated. Start with the idea that suits your space: a classic wooden bench, a pallet build, a cart that rolls away, or a full farmhouse setup by the vegetable patch. Then let your child help shape it, stock it with old pots and found treasures, and stand back. The mud pies are coming either way. You might as well give them a beautiful place to bake.
FAQs
What do I need to build a basic mud kitchen? Very little: something to serve as a worktop (a bench, pallets, an old table or cupboard), a bowl or tub for a sink, shelves or hooks for storage, and a starter set of utensils — old pots, pans, spoons and jugs. Everything else, from water pumps to chalkboard menus, is an optional extra you can add over time.
Can I buy a ready-made mud kitchen instead of building one? Yes — plenty of ready-made mud kitchens are available, and they’re a perfectly good option if DIY isn’t your thing. Building your own is usually cheaper, lets you size the kitchen to your garden and your child, and gives you the upcycled, made-from-what-you-have charm that bought models rarely match.
Are mud kitchens safe for toddlers? With supervision, yes. Keep the structure low and stable, choose large, sturdy utensils with no sharp edges or small detachable parts, and empty water containers after play. Toddlers tend to play side by side rather than cook elaborate meals, so a small, simple setup at their height is all they need.