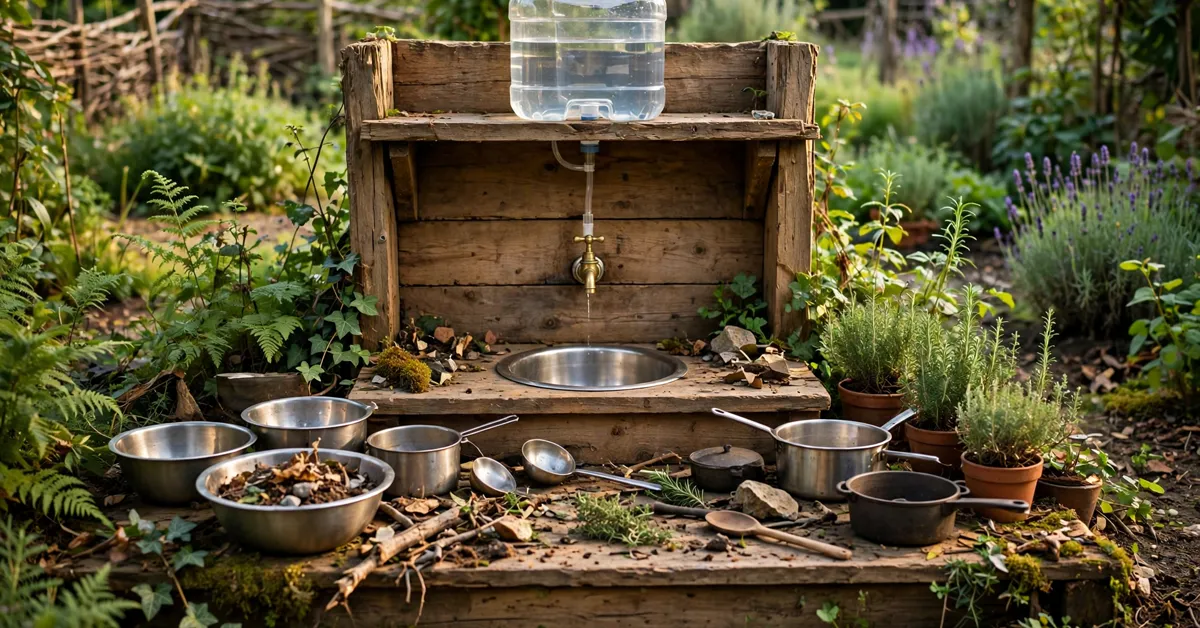
Plenty of mud kitchens have a tap. Very few of them do anything. The tap on our first build was a wooden offcut shaped vaguely like a faucet, and my daughter turned it hopefully twice a day for a week before concluding it was broken. She was right, in every way that matters. A working tap — one that actually delivers water when a small hand turns it — is the single upgrade that changes mud play from mixing dirt to running a café.
This post is the deep dive on the tap itself: the four types worth fitting, how to mount each one so it survives a four-year-old, how to connect it to a container or a hose, and — the bit I got wrong first time — how to control the flow so “a drink for teddy” doesn’t become ten litres on the ground in four minutes. For the wider picture (containers, pumps, drainage, hygiene), see my guide to a mud kitchen with running water.
What “Working” Actually Has to Mean
A tap on a mud kitchen has a harder job than the one on your kitchen sink. It must:
- Deliver water on demand, at a height a child can reach standing at the worktop — outlet 15–25 cm above the sink bowl, so a jug fits underneath without little arms stretching.
- Be operable by small hands. Wet, muddy, not-very-strong small hands. If a child can’t turn it alone, an adult becomes the tap, and the magic dies.
- Be controllable. A gentle stream, not mains pressure. Toddlers need a trickle they can aim; older children need a flow that fills a pot before next Christmas.
- Survive abuse. It will be over-tightened, hung off, left dripping and frozen at least once — cheap and replaceable beats beautiful and fragile.
Keep those four tests in mind and the options below sort themselves out.
The Four Tap Types Worth Fitting
1. The Lever Tap on a Drinks Dispenser
The tap that comes on a plastic drinks dispenser or camping water carrier: a short plastic spigot with a flip lever or a quarter-turn handle. It’s the tap most mud kitchens end up with, because it arrives attached to the container and asks nothing of you.
- Difficulty: None — it’s built in. Your only job is the shelf it sits on.
- Typical cost: Included with the container, roughly $10–$35 / £8–£25 all-in.
- Flow control: Gentle gravity flow, and it slows as the container empties — which is honestly a feature with under-fives.
- Downsides: The lever is the weak point. Small hands flip it rather than ease it, and the washers inside cheap spigots are rarely replaceable. Budget on swapping the tap (it unscrews in minutes, about $4–$7 / £3–£5 for a spare) every season or two.
Best for: Toddlers and first builds. Instant success, zero plumbing.
2. The Push-Button Self-Closing Tap
The kind fitted to water coolers and some camping carriers: press the button, water flows; let go, it stops. As flow control it’s unbeatable — physically impossible to leave running.
- Difficulty: Easy. Usually bought as part of a container; replacements screw into standard container necks.
- Typical cost: Containers with push taps run about $15–$35 / £12–£28; a standalone replacement tap is around $6–$10 / £5–£8.
- Flow control: Perfect. Water only moves while a thumb is on the button, so a session uses a fraction of the water.
- Downsides: It needs thumb strength and coordination most under-threes don’t have, and the stream is modest — filling a big mixing bowl takes patience. Older children sometimes wedge them open with a stone, which tells you everything about older children.
Best for: Ages four and up, small gardens, anywhere water use needs to stay tiny.
3. A Real Garden Tap on a Short Standpipe
The most convincing option: an actual brass outdoor tap — crosshead or, better, a lever ball-valve tap — mounted on a short upright pipe fixed to the backboard or a post, fed by a hose or by tubing from a raised container. Children recognise it instantly as the real thing, because it is.
- Difficulty: Moderate. The tap screws onto a threaded pipe or wall-plate elbow — standard fittings, but real plumbing parts.
- Typical cost: A brass lever tap is roughly $12–$25 / £10–£20; add $8–$15 / £6–£12 for the upright pipe, elbow and fixings.
- Flow control: This is where you earn your money. Fed from a raised container, flow is gentle. Fed from a garden hose at mains pressure, the same tap will blast mud across the patio — see the flow control section first.
- Downsides: Brass is heavy, so the mounting must be solid. Crosshead handles need grip strength some little hands don’t have; a lever ball-valve (quarter turn, big handle) is far easier. Metal taps also suffer in frost if water sits in them — drain down in winter.
Best for: Ages three and up, permanent builds, anyone whose child has requested “a proper tap like Grandad’s.”
4. An Inline Valve on Gravity Tubing
No formal tap at all: a raised container, food-grade tubing down to the worktop, and a small inline valve (the type sold for irrigation drip lines and aquariums) clipped at child height. Pinch, twist or flip the valve and gravity does the rest.
- Difficulty: Easy. Push-fit or barbed fittings, cable ties, done.
- Typical cost: A few dollars — valve and tubing together typically $8–$15 / £6–£12.
- Flow control: Excellent and adjustable. You can set the valve’s maximum opening yourself and the child just opens it fully.
- Downsides: It looks like what it is — a compromise. The tubing run needs clipping so it can’t be yanked, and a determined child can pull a barbed fitting apart (once, in my experience, comprehensively). It also has the slowest flow of the four at low container levels.
Best for: Tight budgets, portable kitchens, and testing a layout before committing to drilling anything.
Mounting the Tap So It Stays Mounted
Where and how you mount the tap decides whether it lasts a season or a childhood.
Height first. Measure from the sink bowl, not the ground. The outlet wants to sit 15–25 cm above the bowl’s rim: room for a jug underneath, no stretching to reach the lever. If your kitchen serves a wide age range, mount for the youngest — taller children cope with a low tap far better than toddlers cope with a high one. (Worktop heights by age: mud kitchen dimensions guide.)
Three mounting options, in order of sturdiness:
- Through the backboard. Drill for the tap’s threaded tail, push it through, and tighten a backnut behind the board with a rubber washer each side — immovable, and the board spreads the load when the tap gets hung off. My default for a real garden tap.
- On an upright post or pipe. A short pipe or sturdy batten fixed to the frame with two screws, tap on top. Good when the backboard is thin pallet wood that won’t take a backnut’s torque.
- Overhanging a shelf. The dispenser-tap arrangement: the container sits on a shelf and the tap hangs over the bowl. Add a screwed batten lip across the shelf front so the full, heavy container can’t slide or be pulled off — a full one is 5–10 kg and will get leaned on.
Whatever you choose, do the wobble test before first play: grip the tap and push sideways. Any flex at the mount gets worse, never better, so fix it now with a bigger washer, a second screw or a thicker board.
Sealing. A wrap of PTFE tape on threaded joints and a rubber washer anywhere a thread meets a container stops the slow drip that empties a container overnight. Hand-tight plus a quarter turn is enough on plastic threads; over-tightening cracks them — another lesson I learned the expensive way.
Connecting Containers and Hoses
To a container. Dispenser taps screw straight into the container’s neck. For a real tap fed from a raised container, fit a tank connector (a threaded bulkhead fitting) through the container wall, then run food-grade tubing — 10 mm internal diameter is the common, easy size — from the connector to the tap, secured on barbed fittings with small jubilee clips, the run kept short and clipped along the frame.
To a garden hose. Screw a Y-splitter onto your outdoor tap so the hose doesn’t monopolise it, and use standard click-connect fittings at both ends so the whole thing can be disconnected in seconds. Two rules from experience: never leave a hose-fed tap pressurised overnight, and fit a simple non-return valve so garden water can never be sucked back toward the house supply.
Child-Safe Flow Control: The Section That Saves Your Lawn
My first hose-fed tap went like this: brass tap, mains pressure, one excited five-year-old, and roughly ten litres of water on the ground — and on the cook — in about four minutes. The fix isn’t telling children to be careful. It’s setting the tap up so full blast isn’t physically possible:
- Fit a flow restrictor. A small restrictor washer in the tap inlet (a few dollars for a pack) caps the flow no matter how far the handle turns. On gravity setups you rarely need one — gravity is its own restrictor.
- Use an adult-set inline valve. Put a second valve upstream, out of easy reach, open it part-way, and let the child’s tap be on/off. You set the maximum once; they play.
- Add a lever stop. On a lever tap, a small block of wood screwed beside the lever limits how far it can travel. Crude, effective, removable when they’re older.
- Mark the container. A “max fill” line keeps weight manageable on shelf-mounted dispensers, and a smaller container is itself flow control — when it runs out, water play ends without negotiation.
- Keep an isolation point. Whatever the setup, one clearly adult-only shut-off — the splitter at the house tap, the upstream valve — means you can kill the water in seconds when (not if) something gets pulled apart.
The Four Taps at a Glance
| Tap type | Difficulty | Typical cost | Flow control | Best age |
|---|---|---|---|---|
| 1. Lever tap on a dispenser | None (built in) | $10–$35 / £8–£25 (with container) | Gentle, fades as it empties | 18 months+ |
| 2. Push-button self-closing | Easy | $15–$35 / £12–£28 (with container) | Perfect — flows only while pressed | 4 years+ |
| 3. Real brass garden tap | Moderate | $20–$40 / £16–£32 (tap + pipe) | Needs a restrictor on hose feed | 3 years+ |
| 4. Inline valve on tubing | Easy | $8–$15 / £6–£12 | Excellent — adult-set maximum | 2 years+ |
Prices are typical budget-to-midrange ranges, varying by shop and country — planning figures, not quotes.
Safety and Hygiene Notes
The tap doesn’t change the rules from any other water setup — fresh water in, standing water out — but two tap-specific points matter. Lever taps and valves get mouthed by toddlers; give the tap a wipe when you scrub the bowl, and never use a second-hand tap from a chemical container. Drain everything down before the first hard frost: a tap left full of water splits, plastic or brass. The full drainage and hygiene routine is in the running water guide.
FAQs
What is the easiest working tap to fit on a mud kitchen?
The lever tap on a drinks dispenser, by a distance. It arrives fitted to the container, needs no tools, and a toddler can work the lever. Put the dispenser on a sturdy shelf with the tap overhanging the sink bowl and you’re done in under an hour.
How high should a mud kitchen tap be?
Measure from the sink, not the floor: the outlet should sit about 15–25 cm (6–10 in) above the bowl’s rim — enough room to fit a jug underneath, low enough for little arms to reach the lever. Mount for the youngest child who’ll use it.
How do I stop my child emptying the whole container in five minutes?
Set the maximum flow yourself rather than relying on small hands: a flow-restrictor washer in the inlet, an adult-set inline valve upstream opened part-way, or a wooden stop block beside a lever tap. On container setups, a smaller container (5 litres instead of 10) is flow control too — when it runs out, water play winds down on its own.
Can I connect a mud kitchen tap to the garden hose?
Yes — use a Y-splitter on the outdoor tap and click-connect fittings, and restrict the flow, because full mains pressure is far too much for mud play. Shut off at the splitter after play rather than leaving the line pressurised, and fit a non-return valve if water could ever be sucked back toward the house supply.
Why does my mud kitchen tap keep dripping?
Usually a worn washer or grit in the seal — both common once mud enters the equation. Dispenser taps rarely have replaceable washers, but the whole tap unscrews and swaps for a few dollars. On brass taps, unscrew the head, rinse out the grit, replace the washer. Keeping containers covered prevents most of it.