By Owen Brooks
Every mud kitchen starts the same way: a parent (usually me, standing in the garden with a cup of tea going cold) decides the kids need somewhere proper to make their mud pies. What comes next is where it gets interesting — because there are at least six honest ways to build one, and the “best” plan depends entirely on your budget, your tools and how much of your weekend you’re willing to hand over.
This guide compares all six routes side by side: what each one costs, how hard it really is, how long it takes, and who it’s best for. It won’t walk you through any single build step by step — that’s what the detailed plan posts are for. Think of this as the choosing page. By the end, you’ll know exactly which build is yours.
1. The Pallet Mud Kitchen — Cheapest and Most Rustic
Difficulty: Easy to moderate · Typical cost: roughly $0–40 / £0–30 if the pallets are free · Time: half a day to a day · Best for: tight budgets, rustic gardens, first-time builders
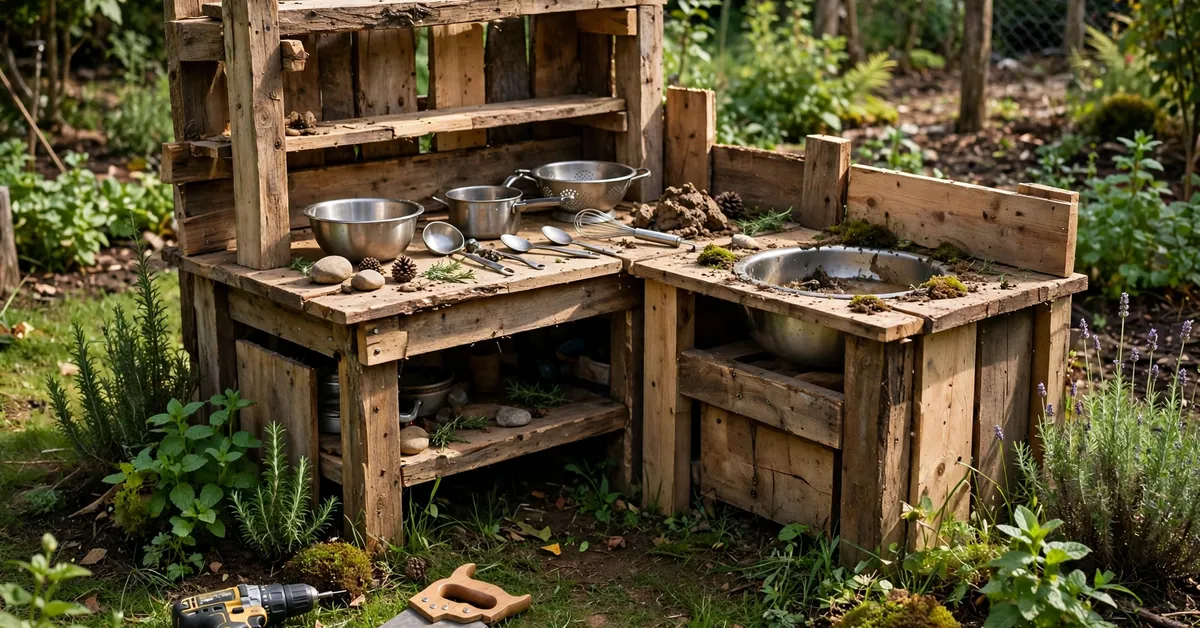
The classic. Two or three wooden pallets — one for the backboard, one cut down for the worktop frame — plus a washing-up bowl dropped into a hole for a sink. If you can get pallets free (ask local builders, garden centres and warehouses; many are glad to be rid of them), your only real costs are screws, sandpaper and something to seal the wood with.
The honest downsides: pallets vary wildly in quality, dismantling them without splitting the boards is a small skill in itself, and the finish will always look homemade — charming homemade, but homemade. You’ll also spend more time sanding than building, because pallet wood is rough and little fingers find every splinter.
Choose this if: money matters more than looks, and you like the reclaimed-wood character.
2. The IKEA Hack Kitchen — Neatest Finish, No Big Tools
Difficulty: Easy · Typical cost: roughly $40–140 / £35–120 depending on new or second-hand pieces · Time: 2–4 hours · Best for: beginners, small gardens, anyone who wants it to look “bought”
Instead of building a frame from raw timber, you start with furniture that’s already square, sanded and finished: a BEKVÄM step stool as the base, a LACK side table as a worktop extension, TROFAST bins as removable sinks and storage. Add hooks, a shelf and a bowl, and it reads as a proper little kitchen rather than a DIY project.
Because everything arrives pre-finished, there’s almost no cutting and no structural work — a drill/driver and a sander are all you truly need. The full walkthrough, including which pieces work best together, is in the IKEA build guide. how to build an IKEA mud kitchen
The trade-off is flexibility: you’re working to IKEA’s dimensions, not your child’s height or your space, and soft indoor pine won’t last as many winters outdoors as pressure-treated timber unless you seal it well.
Choose this if: you want the cleanest result with the least building.
3. The Timber-Frame Kitchen from a Full Plan — The Weekend Project
Difficulty: Moderate · Typical cost: roughly $80–180 / £60–150 in new timber · Time: one full weekend · Best for: confident DIYers, a “proper” long-lasting build, gifts for grandchildren
This is the build most people picture: a framed kitchen in pressure-treated timber, built from a measured plan — worktop at the right height, backboard with shelves, a fitted sink, hooks for utensils. Because every cut is specified, there’s no guesswork and no mid-project trip back to the timber merchant (well, fewer).
Working from a plan also means the dimensions are already thought through — worktop height, shelf spacing and overall footprint suit real children rather than whoever happened to hold the saw. If you’re deciding on size before you commit, the dimensions guide breaks down the heights that work for each age. mud kitchen dimensions and heights
Ours walks you through the whole build with a cut list and a printable version you can take into the garden. printable mud kitchen plan
Choose this if: you enjoy building, own (or can borrow) a saw and a drill, and want one kitchen that lasts the whole of childhood.
4. The Upcycled Furniture Kitchen — Fastest of All
Difficulty: Easy · Typical cost: roughly $10–50 / £10–40 · Time: 2–3 hours · Best for: bargain hunters, small budgets, instant results
An old dressing table, TV stand or changing unit already has the hard parts done: a worktop at roughly the right height, drawers or shelves for storage, and a back you can screw hooks into. Cut a hole for a bowl, sand it back, seal it for outdoor life, and you’re most of the way there. Charity shops, marketplace listings and kerbside freebies are full of candidates — solid old pine furniture is ideal, as it survives weather far better than chipboard or MDF, which swell and crumble outdoors.
Watch out for wobbly legs (fix them before anything else), peeling lead-era paint on very old pieces (strip and repaint, or walk away), and sharp drawer runners once drawers are removed.
Choose this if: you want a kitchen this weekend with almost no building at all.
5. The Portable or Folding Kitchen — For Renters and Small Spaces
Difficulty: Easy · Typical cost: roughly $30–90 / £25–75 · Time: half a day · Best for: renters, balconies, small gardens, taking to grandparents’ houses
Not everyone can bolt a permanent structure into the garden. A portable kitchen — essentially a sturdy folding table frame or a compact bench-top setup with removable bins, a bowl sink and a crate of utensils — packs away into a shed, garage or cupboard when it’s not in use. Some families build a simple hinged frame that folds flat against a wall; others keep it even simpler with a low bench and everything stored in one lidded box.
You give up the fixed backboard, shelves and “proper kitchen” feel, and younger toddlers can push a lightweight setup around if it’s not weighted or wedged. In return you get zero commitment: no holes in the fence, nothing for a landlord to object to, and mud play that travels.
Choose this if: space is rented, shared or tiny — but the mud pies are non-negotiable.
6. The Deluxe Double-Sink Kitchen with Running Water — The Big Build
Difficulty: Moderate to advanced · Typical cost: roughly $150–300+ / £120–250+ · Time: a full weekend or more · Best for: big families, childminders, anyone building a garden centrepiece
The flagship: a wide timber frame with two sinks side by side (so siblings stop arguing over the one bowl), proper shelving, and a working tap. The “running water” is simpler than it sounds — usually a water container with a tap mounted above the sink, refilled from the hose or a watering can, rather than plumbed mains water — but to a four-year-old it is pure magic, and it transforms the play from mixing to washing, pouring and “cooking” properly.
If the double-sink layout is the part calling to you, the dedicated guide covers sizes and layouts in detail. double sink mud kitchen guide And for the tap setups themselves — containers, pumps and what actually works with toddlers — see the running water guide. mud kitchen with running water
Budget honestly: this build uses two to three times the timber of a basic kitchen, and the extras (second bowl, tap container, hooks, utensils) add up. It also needs the space — measure your spot before you fall in love.
Choose this if: you have the room, the budget and more than one small chef.
All Six Builds at a Glance
| Build | Difficulty | Typical cost* | Time | Best for |
|---|---|---|---|---|
| Pallet kitchen | Easy–moderate | $0–40 / £0–30 | Half a day–1 day | Tightest budgets, rustic look |
| IKEA hack | Easy | $40–140 / £35–120 | 2–4 hours | Beginners, neat finish |
| Timber frame (full plan) | Moderate | $80–180 / £60–150 | One weekend | A lasting, measured build |
| Upcycled furniture | Easy | $10–50 / £10–40 | 2–3 hours | Speed and bargains |
| Portable / folding | Easy | $30–90 / £25–75 | Half a day | Renters, small spaces |
| Deluxe double-sink | Moderate–advanced | $150–300+ / £120–250+ | A weekend or more | Siblings, big gardens |
*Costs are typical ranges only, based on new materials at 2025–26 prices in the US/UK; second-hand finds can cut any of them dramatically. They are a planning guide, not a quote.
How to Choose: Three Quick Questions
1. What’s your real budget? Under about $50: pallet or upcycled furniture. Mid-range: IKEA hack or portable. Happy to invest in something that lasts years: the timber-frame plan build — or go deluxe if the garden (and the sibling count) justifies it.
2. What tools do you actually own? Just a drill/driver: IKEA hack or upcycled furniture. A saw, sander and drill: everything on this page is open to you. No tools at all: upcycle — you’ll only need a screwdriver, sandpaper and paint.
3. How much space — and is it yours? Renting or short on room: portable/folding. A permanent corner of your own garden: any build, sized to fit. Two or more children playing at once: stretch to the double-sink if you can; the squabble reduction alone is worth it.
Still torn between two? Pick the easier one. A finished simple kitchen gets played with this weekend; an abandoned ambitious one gets played with never.
Tools Reality Check: What You Truly Need vs Nice to Have
Tool lists on DIY posts have a habit of quietly assuming a full workshop. Here’s the honest split.
You truly need:
- A drill/driver and a handful of screws — every build on this page uses one
- A saw for pallet and timber builds (a basic hand saw works; it’s slower, not impossible)
- A sander or plenty of sandpaper — non-negotiable around small hands
- A tape measure, pencil and a square or straight edge for marking cuts
- A jigsaw only if you’re cutting a sink hole into a worktop yourself (upcycle and pallet builds) — or ask the timber merchant to cut it
Nice to have, not essential:
- A mitre or circular saw (faster, straighter cuts on the timber builds)
- A pocket-hole jig (tidier joints on the framed builds)
- An orbital sander (turns an hour of sanding into fifteen minutes)
- A staple gun (handy for fixing a fabric skirt or backing, purely decorative)
Borrow before you buy. Half the street owns a jigsaw that’s used twice a year, and tool-hire shops rent the big items for a day for less than the cost of a cheap one.
Safety Essentials, Whatever You Build
The details live in each build guide, but these five apply to every kitchen on this page:
- Anchor it. Tall backboards and framed kitchens get fixed to a wall or fence, or firmly staked — a kitchen a toddler pulls themselves up on must not tip.
- Sand everything. Every edge, every cut, every pallet slat. Run your own palm over it; if you’d hesitate, sand more.
- Check pallet stamps. Only use pallets stamped HT (heat treated). Avoid any stamped MB (methyl bromide) — and if there’s no stamp at all, give that pallet a miss for a children’s build.
- Water hygiene. Bowls and water containers get emptied daily and scrubbed regularly. Standing water goes green and slimy fast in summer, and toddlers drink anything.
- Supervise water play. Even a few centimetres of water in a bowl deserves an adult nearby with under-threes — and finishes on old paint or wobbly legs you’ve “been meaning to fix” get fixed before the first play, not after.
Frequently Asked Questions
Which plan is easiest for a total beginner?
The IKEA hack or an upcycled dressing table. Both start from furniture that’s already built, so your job is assembly and finishing rather than construction — no frame to square up, no cuts that can ruin the project. If you can use a drill and sandpaper, you can finish either in an afternoon.
What is the cheapest way to build a mud kitchen?
A pallet kitchen with free pallets, or an upcycled piece of furniture from a charity shop. Either can come in under roughly $10–40 / £10–30 if you already own screws and sandpaper — the main investment is your time, especially sanding pallet wood smooth.
Do I need power tools?
No. Every build here can be done with a drill/driver as the only power tool, and even that can be borrowed. A hand saw and sandpaper handle the rest — more slowly, but they handle it. The one job that’s genuinely awkward by hand is cutting a neat sink hole; a borrowed jigsaw solves it in minutes.
How long does each build take?
Upcycled furniture and the IKEA hack: an afternoon (2–4 hours). Portable/folding and pallet kitchens: half a day to a day, with pallet builds leaning longer because of dismantling and sanding. The timber-frame plan build: one honest weekend. The deluxe double-sink: a weekend or more, especially if you’re adding a tap setup.
Where do I get the printable plan?
The full timber-frame build — measurements, cut list and step-by-step — has a printable plan you can take outside with you, which beats scrolling a phone with muddy hands. printable mud kitchen plan Start there if the weekend project is your pick; the other builds on this page link to their own detailed guides.
Six builds, one right answer — yours. Pick the one that matches your budget, your toolbox and your Saturday, and the mud pies will handle the rest.