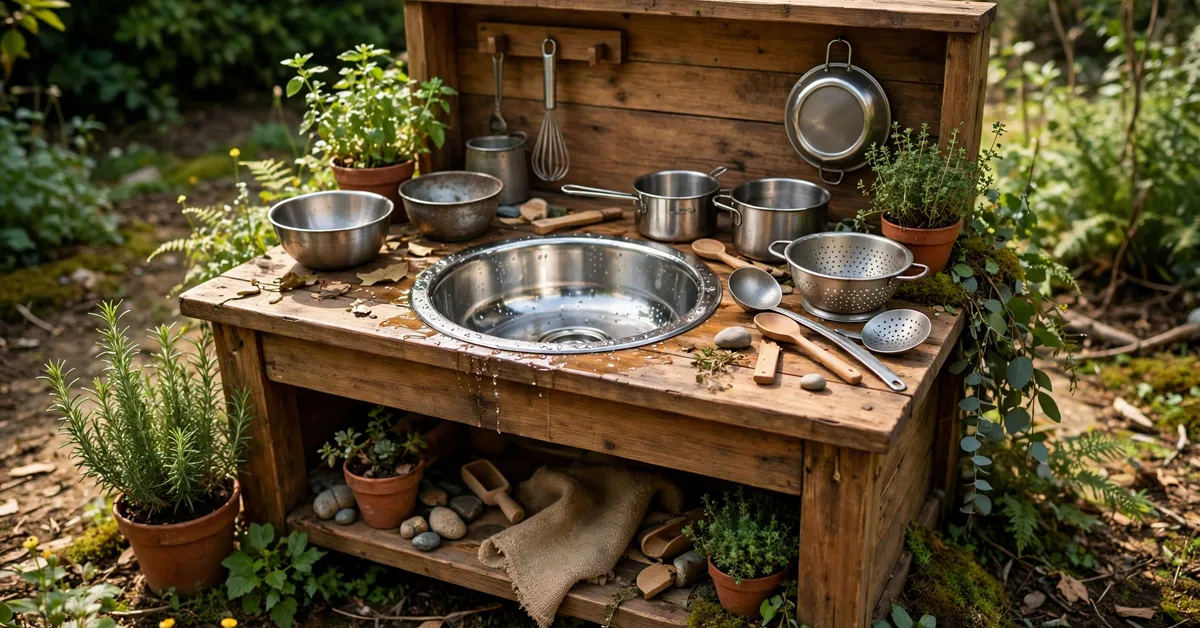
The sink is where a mud kitchen actually happens. The worktop is just a stage; the bowl is where pies get soaked, pebbles get washed, potions get stirred and “the washing up” gets done with far more enthusiasm than it ever gets in my actual kitchen. Which is why a sink that doesn’t work — too shallow, too wobbly, impossible to empty without wearing half of it — quietly kills the whole setup.
A working sink isn’t complicated. It has to catch water under the tap, hold enough of it to play in, sit at a height small arms can reach into, and empty without a wrestling match. This post covers the four sink types I’ve fitted or watched in action, how to cut and fit one into a worktop properly, the three drainage options (from “just lift it out” to a proper plug hole), and the heights and depths that actually work — the full sizing tables by age are in my mud kitchen dimensions guide.
What Makes a Sink “Work”
Four tests, learned the hard way:
- It catches the water. The bowl sits under the tap or the pouring zone, wide enough that enthusiastic pouring mostly lands in it. A bowl narrower than about 25 cm catches nothing but disappointment.
- It holds a useful depth. Deep enough for proper splashing and washing-up play — 10–15 cm (4–6 in) is the sweet spot. Shallower and there’s nothing to submerge a pot in; deeper and small children can’t reach the bottom and the full bowl gets seriously heavy.
- The rim sits flush. A lip sticking up above the worktop catches every forearm and tips every cup. Inset into the worktop with the rim resting on the wood is the finish you’re after.
- It empties without drama. Either it lifts out easily (finger room around the rim, not sealed in), or it has a drain. A full 10-litre bowl weighs about 10 kg — if emptying it is a two-adult job, it won’t get emptied, and stale water is where hygiene problems start.
The Four Sink Choices, Honestly
1. The Plastic Washing-Up Bowl (Inset)
The default, and still hard to beat: a standard rectangular or round washing-up bowl dropped into a hole cut in the worktop, rim resting on the wood.
- Typical cost: $3–$8 / £2–£6. Practically free if you retire the one from your kitchen.
- Strengths: Light, so a child can help lift it out for emptying; rounded corners scrub clean in seconds; if it cracks after a few seasons of sun, replacing it costs less than a coffee.
- Downsides: Cheap plastic goes brittle outdoors — expect two to four seasons, less if it lives in full sun. Very light bowls can skate around in the hole if the cut is generous; cut snug (below).
2. The Stainless Steel Basin
A stainless mixing bowl, a proper inset sink basin, or — my favourite budget find — a large stainless pet bowl with a flat rim. This is the sink that outlives the kitchen.
- Typical cost: $12–$30 / £10–£25 for a decent bowl or small basin; purpose-made inset sinks run more.
- Strengths: Effectively indestructible, never rusts (if it’s genuinely stainless), doesn’t go brittle, and the weight keeps it planted. Scrubs back to shiny, which matters when the “soup” has been in there since Tuesday.
- Downsides: Costs more, and a steel bowl in full sun gets hot to the touch in high summer — position matters. Thin, cheap steel can oil-can and flex; pick one you can’t easily bend by hand.
3. The Trough or Storage Tub
A long plastic trough — a storage box, a planter trough, a toy tub — sunk into a wider frame. One big shared sink instead of a round bowl.
- Typical cost: $8–$20 / £6–£15.
- Strengths: Room for two children at once and for long things (a whole “car wash” of toy cars fits). Rectangular shape suits a bench-style kitchen, and the flat base sits stably on battens.
- Downsides: The flat base is also the weakness — thin tubs flex and crack at the corners under a full load of water, and a big trough holds a lot of water to empty. If you go this route, support the base on battens rather than hanging it by its rim alone.
4. Enamel or Ceramic Bowls
Beautiful in photos. I fitted an enamel bowl once, and I’ll give you the honest version: it looked wonderful for a month, then chipped where a stone got dropped in it, and the exposed metal under the chip started to rust. Ceramic is heavier still and simply breaks.
- Typical cost: $10–$25 / £8–£20.
- Verdict: Fine for a sheltered, supervised setup with older children. For a working sink that lives outside and gets stones thrown in it — which is all of them — steel or plastic serves you better.
Fitting the Sink: Cutting the Hole Properly
This is the part people rush, and the part that decides whether the sink feels built-in or bodged.
- Choose the bowl first, cut second. Never cut a hole for a bowl you haven’t bought — “standard size” is a rumour. Trace around the bowl’s rim on the underside of the worktop plank, then draw your cut line about 1 cm inside the traced line, so the rim rests on solid wood all the way round.
- Drill a starter hole just inside the cut line, then cut with a jigsaw, slowly, supporting the offcut so it doesn’t tear out at the end.
- Sand the cut edge smooth and round it over slightly — little hands run along this rim daily, and it’s where water soaks into the wood, so a coat of your exterior finish on the raw edge is worth two minutes.
- Add a support batten under the worktop beneath the bowl if the plank spans a wide frame. A full bowl is heavy and children lean on rims; the rim should carry the load on wood, not on hope.
- Leave finger room. The bowl needs to lift out for emptying and scrubbing, so don’t seal it in permanently. If the rim overhangs enough to grip, a snug cut is all the fixing it needs.
Fitting time, honestly: about an hour including the swearing, most of it on marking and test-fitting. Test-fit, adjust, test-fit again — a millimetre of patience here saves a sloppy, rattling sink forever.
Drainage: Three Honest Options
Option 1: No drain — lift it out. The bowl lifts out and gets tipped onto a flower bed or the base of a tree. Zero plumbing, nothing to block, and the sink gets scrubbed as part of the routine. This is what most families, including us, end up doing — and it only works if you followed the finger-room rule above.
Option 2: Plug hole to a bucket below. Fit a bowl or basin with a standard plug hole, run a short length of flexible hose from the waste down into a bucket under the worktop, and pull the plug at tidy-up time. The bucket catches the worst of the mud, the water gets reused on the garden, and nobody lifts anything heavy. Cost: about $8–$15 / £6–£12 for waste fitting and hose. Downside: plug holes block with mud and leaf bits — expect to poke them clear, and keep the run short and straight.
Option 3: Plug hole to a soakaway. Same waste fitting, but the hose runs to a shallow gravel soakaway pit behind the kitchen (roughly 40 cm deep and across, filled with coarse gravel). Best for a permanent kitchen with a tap that runs a lot of water. The honest warning: a soakaway under a mud kitchen slowly silts up with — predictably — mud. On clay soil expect to dig it out and refresh the gravel every year or two.
Whichever option you pick, the rule is the same: the sink gets emptied at the end of the play day. Standing mud water goes stale and slimy fast in warm weather, and that’s a hygiene issue, not just an aesthetic one.
Heights and Depths That Work
The bowl choice is only half of it; position is the rest.
- Worktop height comes first — the sink is used standing at the worktop, so the worktop heights by age in the dimensions guide govern everything. As a quick reference: roughly 40–48 cm (16–19 in) for 18 months to 3 years, and 48–55 cm (19–22 in) for ages 3–5.
- Rim flush with the worktop, so forearms slide over it and cups don’t catch.
- Bowl depth 10–15 cm (4–6 in). The child’s hands work at the bottom of the bowl, which is that far below the worktop — one reason “just below elbow height” is the right worktop target rather than exactly at it.
- Under the sink: if you’re fitting a waste and bucket, leave at least 30 cm (12 in) of clear space beneath for the bucket, or the drainage plan collapses into a kicked-over bucket.
One Sink or Two?
If two children will use the kitchen together regularly, the single most peace-keeping upgrade is a second bowl — one for washing, one for rinsing, and no queue for the sink. I’ve written the whole case, with sizes, layouts and conversion steps, in my guide to a double sink mud kitchen. The short version: allow roughly 110–130 cm of width, and everything in this post about fitting and drainage simply happens twice.
Care: Keeping the Sink Sweet
- Scrub weekly with hot soapy water and a brush; the grey slime film appears faster than you think in summer and puts everyone off.
- Winter: plastic bowls come indoors or into the shed (frost plus brittle plastic plus one dropped stone equals a crack). Steel can stay, emptied and upturned.
- Check the rim and cut edge each spring for lifted finish or soft wood — two minutes with sandpaper and a coat of oil beats a new worktop.
FAQs
What is the best sink for a mud kitchen?
For most families, a stainless steel basin or a plain plastic washing-up bowl, inset into the worktop. Steel lasts indefinitely and scrubs spotless; plastic costs almost nothing and lifts out easily for emptying. Choose steel if the kitchen is a permanent build, plastic if you want the lightest, cheapest option you can replace without a thought.
How deep should a mud kitchen sink be?
About 10–15 cm (4–6 in). That’s deep enough for proper splashing, soaking and washing-up play, but shallow enough that a small child can reach the bottom and the full bowl stays liftable. Remember the child’s hands work at the bottom of the bowl, well below worktop height — another reason the worktop itself should sit at or just below elbow height.
Does a mud kitchen sink need a drain?
No — most mud kitchens have no drain at all, and the bowl simply lifts out and gets tipped onto a bed or tree base at the end of play. A plug hole draining to a bucket underneath is a genuine convenience on a bigger, permanent kitchen, and a soakaway suits a high-water setup, but both are upgrades, not requirements. What is non-negotiable is emptying the sink daily; standing mud water goes stale fast.
How do I cut a hole in the worktop for the sink?
Buy the bowl first. Trace its rim on the underside of the worktop, draw the cut line about 1 cm inside the traced line so the rim rests on wood, drill a starter hole, and cut with a jigsaw. Sand the edge smooth, seal the raw wood with exterior finish, add a support batten underneath if the span is wide, and leave the bowl unsealed so it lifts out for emptying.
Can I use a bowl that just sits on top of the worktop?
You can, and it’s the zero-cutting option for testing a layout. But a bowl on top slides, tips when leaned on, and raises the working height by its full depth — which matters for small children. If the kitchen is a keeper, cutting it in flush is an hour’s work that improves every single play session afterwards.