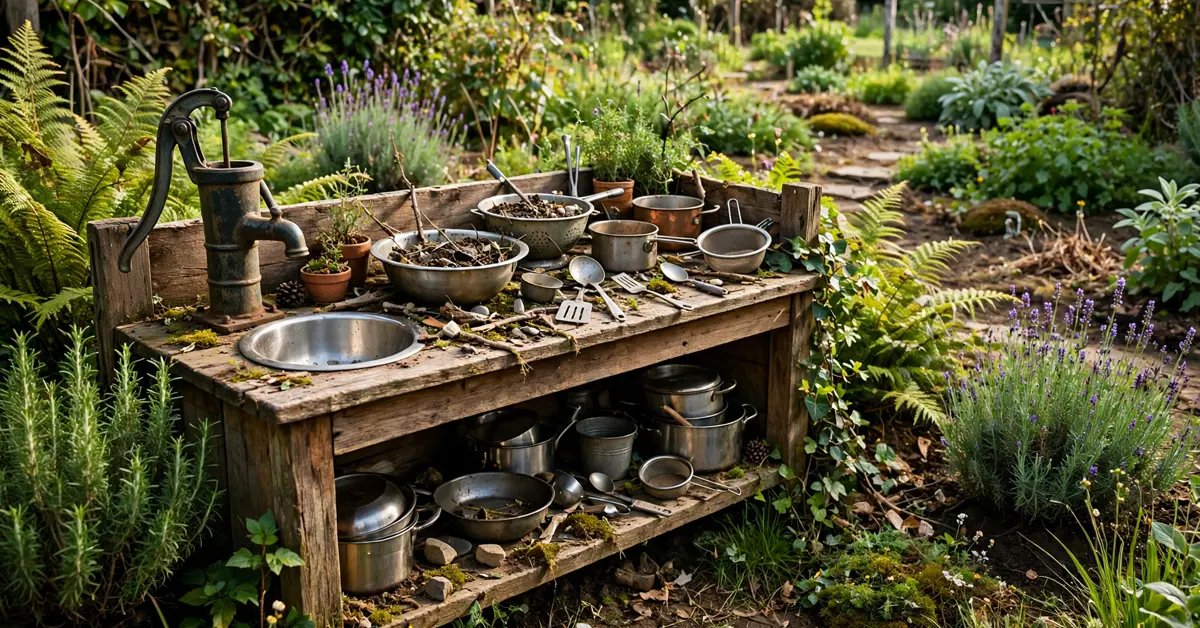
A pump is the water supply for people who don’t trust their children with a tap — and having watched a five-year-old hold a tap open “to see what happens” for most of a water container, I understand those people completely. A pump only moves water while somebody is pumping. The moment the pumping stops, the water stops. No floods, no quietly drained containers, no swamp.
I gave pumps a short section in my guide to a mud kitchen with running water — this post is the full version: the five pump types you can actually buy, how each one works, what priming really involves (the bit the product photos never mention), fitting, and the winter care that decides whether your pump works in April or gets thrown in the bin in April.
How a Mud Kitchen Pump Works (In Thirty Seconds)
Almost every pump here is a suction pump. An intake hose drops into a container of water below or beside the kitchen. Working the pump creates a vacuum, water climbs the hose, and comes out of the spout over the sink. Two consequences follow from that simple fact:
- The pump must sit above the water, but not far above. Most small hand pumps can lift water about 1–1.5 m vertically. Keep the container low — under the worktop or beside the frame — and the outlet a short hop from the pump.
- The system must be airtight. Any loose fitting on the intake side lets air in, the vacuum escapes, and the pump “loses its prime” and pumps nothing. Nine out of ten “broken pump” complaints are an air leak or dry seals, not a broken pump.
The Five Pump Types
1. The Bottle-Top Press Pump
The pump that sits on top of a big 5-gallon-style water bottle: press the top down, water squirts from the spout. It’s sold for camping and water coolers, and it’s the cheapest way into pumped water.
- Typical cost: Around $10–$20 / £8–£15.
- Effort and flow: A rhythmic press-press-press gives a pulsing stream. Filling a jug takes a while; filling a small cup is quick.
- Honest downsides: It needs downward force that most under-threes can’t manage (they adore trying). The flow pulses rather than runs, and the pumps are consumables — expect a season or two before the mechanism gets sloppy. Ours lasted one full summer and half of the next.
- Best for: First pump, tight budgets, children aged four and up.
2. The Lever-Action Hand Pump
A proper little pump with a handle you work back and forth, mounted on the backboard or a post, with an intake hose down into a container. Some are sold for boats and caravans, some as garden “feature” pumps; the working ones are simple piston pumps.
- Typical cost: Around $20–$45 / £15–£35 for one that will survive outdoors.
- Effort and flow: The best hand-pump flow of the lot — a steady stream while you work the handle, several litres a minute if you’re keen. The handle length does the work, so children from about four can manage it, and two-handed pumping is half the fun.
- Honest downsides: It costs real money, it needs bolting down solidly (it will be worked hard), and the decorative cast-iron lookalikes sold for garden ornaments are often barely functional — buy from a marine, caravan or water-supply seller, not a gift shop.
- Best for: A permanent kitchen and children four and up who want “a real pump.”
3. The Rotary Hand Pump
A handle you turn in circles, like an old-fashioned coffee grinder. Smooth, continuous flow while you crank.
- Typical cost: Around $18–$35 / £14–£28.
- Effort and flow: Gentle, steady stream — less per minute than a lever pump, but no pulsing. Turning is easier for smaller arms than pressing.
- Honest downsides: Cranking to fill a big pot takes genuine patience, and the cheaper rotary pumps have plastic internals that wear quickly with gritty water. Keep the intake filtered (below) or the mechanism grinds itself away.
- Best for: Calmer children, sensory play where a gentle stream is the point.
4. The Bellows Foot Pump
The foot pump sold for inflating air beds and paddling pools can move water too, connected between the container and a short outlet hose clipped over the sink. Stomp, squirt. Stomp, squirt.
- Typical cost: Around $8–$15 / £6–£12.
- Effort and flow: Legs do the work, hands stay free to hold the pot — a real advantage. Flow is a squirt per stomp, so it’s for rinsing and splashing rather than filling.
- Honest downsides: The hoses and connectors are made for air, not water; expect dribbles at the joints and a pump that fills with water and needs shaking out. Toddlers, though, consider all of this hilarious and will stomp long after an adult would have given up.
- Best for: Toddlers and under-threes who lack hand strength, and anyone whose child needs to burn energy before lunch.
5. The Battery (USB-Rechargeable) Pump
The electric dispenser pump that sits on a water container and runs at the touch of a button. Strictly speaking the child isn’t pumping at all — but it belongs in this round-up because it delivers the same on-demand, no-plumbing water supply.
- Typical cost: Around $12–$25 / £10–£20.
- Effort and flow: Zero effort, a steady modest stream, usually auto-stops or runs while pressed. A charge lasts weeks of mud-kitchen use.
- Honest downsides: It is an electronic gadget living in a wet, muddy place. It must come indoors to charge and really should come indoors every night; left out in rain, it dies. Water flow is also the weakest here — fine for cups, slow for buckets.
- Best for: Convenience, grandparents’ gardens, and children who can’t yet work a manual pump.
Priming: The Bit Nobody Tells You
A suction pump rarely works the instant you first work the handle, and that moment has convinced many people their pump is faulty. What’s happening: the pump and hose are full of air, and the seals — leather or rubber cups inside — make their seal best when wet.
The priming routine that works:
- Drop the intake hose into the container and make sure its end is fully underwater, weighted down if it curls.
- Pour a cup of water into the pump outlet (or over the mechanism, depending on type) to wet the seals.
- Work the pump steadily — not frantically — for 20–30 strokes. You’ll feel resistance change as water climbs the hose.
- Still nothing? Check the intake fittings for air leaks (the usual culprit), confirm the container isn’t empty, and re-wet the seals.
After the long winter break, expect to do this again: seals dry out and shrink in storage, and a cup of water plus a minute of patience resurrects most “dead” pumps. I nearly binned a perfectly good lever pump in our second spring before learning this. Nearly.
One fitting that prevents most priming grief: a simple foot valve or strainer on the end of the intake hose (a few dollars). It stops water draining back out of the hose between sessions, keeps grit and leaves out of the pump, and means the pump holds its prime for days at a time.
Fitting a Pump to the Kitchen
- Mount it at the end of the backboard, within easy reach of the sink but not directly over it — pumped water arcs, and you want the spout over the bowl, not the child leaning across.
- Height: handle or press-top at roughly the child’s chest height at the worktop, so they can put body weight into it. For a lever pump, leave swing room for the full handle travel plus enthusiastic overshoot.
- Container placement: below the pump and as close as practical — under the worktop shelf is ideal, out of kicking range, with the intake hose clipped along the frame so it can’t be pulled out mid-play.
- Bolt, don’t screw-and-hope: a lever pump in full use takes real force. Two bolts through the backboard or post, with washers, or it will work itself loose by half-term.
Winter Care: Ten Minutes That Save the Pump
Pumps die in winter, not summer. Water left inside freezes, expands and cracks housings and splits seals — and damp storage grows mould in the hose.
- Disconnect the pump and drain it completely: work the handle until nothing comes out, then tip it every way it will tip.
- Drain and coil the hoses. A green, slimy hose in spring is a hose that went away wet.
- Store the pump indoors — shed is fine, house is better — somewhere dry. Battery pumps must come into the house for charging anyway.
- In spring, prime patiently (above), and check seals: cracked or rock-hard rubber washers are pennies to replace and are the difference between a pump that works and a pump that gets cursed.
Troubleshooting, Quickly
- Pumps but no water: Prime it (wet seals, steady strokes). Then check: container empty? Intake end actually underwater? Any fitting loose on the intake side? That list fixes nearly everything.
- Weak, spluttering flow: Air leak at a joint, or the strainer is clogged with leaf bits. Clean, tighten, re-prime.
- Handle suddenly stiff or squeaky: Grit inside. Flush the whole line with clean water; a drop of food-safe oil on the pivot points (not in the water path) quiets the squeak.
- Water drains straight back: The foot valve has failed or is jammed with grit — rinse it or replace it.
The Pumps at a Glance
| Pump type | Typical cost | Flow | Effort | Best age |
|---|---|---|---|---|
| 1. Bottle-top press pump | $10–$20 / £8–£15 | Pulsing squirts | High for small arms | 4 years+ |
| 2. Lever-action hand pump | $20–$45 / £15–£35 | Strong, steady | Moderate | 4 years+ |
| 3. Rotary hand pump | $18–$35 / £14–£28 | Gentle, steady | Low–moderate | 3 years+ |
| 4. Bellows foot pump | $8–$15 / £6–£12 | Squirt per stomp | Legs, hands free | 18 months+ |
| 5. Battery/USB pump | $12–$25 / £10–£20 | Weak, steady | None | Any (adult-managed) |
Prices are typical budget-to-midrange ranges, varying by shop and country — planning figures, not quotes.
FAQs
Why won’t my mud kitchen pump pick up water?
Almost always one of three things: it needs priming (wet the seals with a cup of water and work the pump steadily for 20–30 strokes), there’s an air leak at a fitting on the intake side, or the intake hose end isn’t staying underwater. Work through those in order before concluding the pump is broken — genuinely broken pumps are the rarest cause.
Which pump is best for a toddler?
A bellows foot pump. Toddlers usually lack the hand strength for press and lever pumps, but stomping is a skill they practise all day anyway — and legs pumping means hands free to hold the cup. A battery dispenser pump is the other toddler-friendly option, as long as an adult manages it and it lives indoors between sessions.
How long do mud kitchen pumps last?
Bottle-top press pumps are consumables: one to two seasons is normal. A decent lever or rotary pump, drained and stored dry each winter, should give you four or five seasons at least — the failures are almost always dried or cracked seals, which are cheap to replace, rather than the pump itself. Battery pumps typically last a couple of seasons if they’re kept dry and charged.
Can a pump fill a big mixing bowl, or is it just for rinsing?
A lever-action pump fills a bowl in a minute or so of steady pumping. Rotary and battery pumps will do it slowly. Press and foot pumps are realistically rinsing-and-cup-filling tools — which, honestly, is most of mud kitchen play. If your child is running a high-volume soup operation, a tap container will serve them better than any pump.
Does the container have to be below the pump?
Yes — these are suction pumps, and they lift water rather than push it. Keep the container below the pump (under the worktop is ideal) and the vertical lift under about a metre where you can; every extra bit of height makes priming harder and flow weaker. If your only container spot is up high, you don’t need a pump at all — you need a tap on the container.