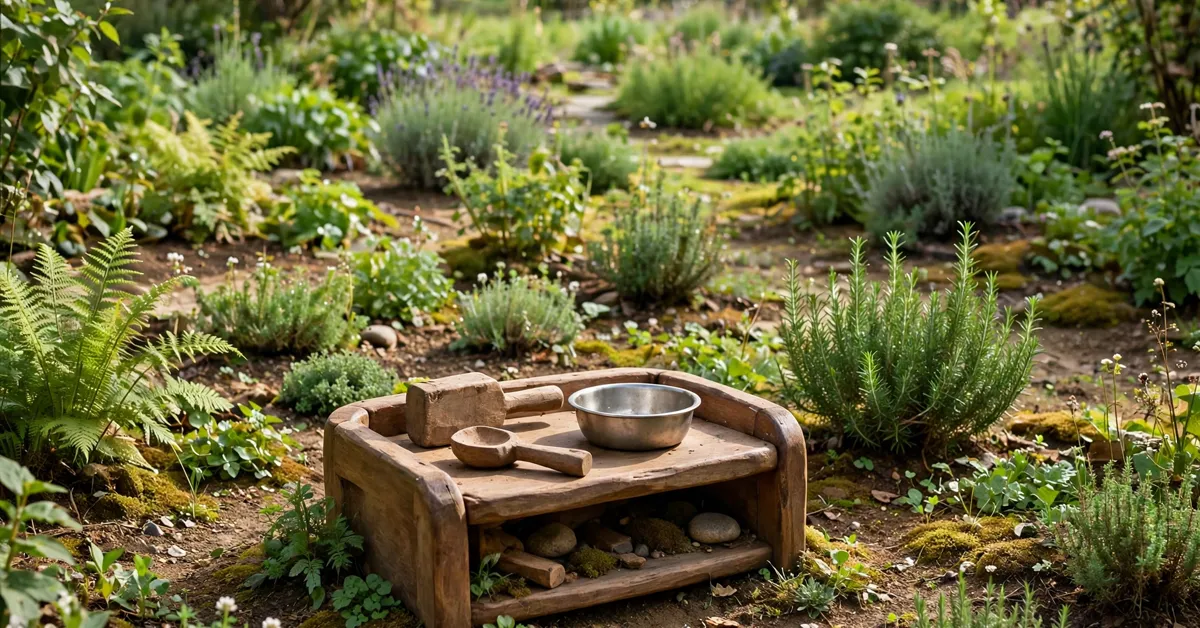
Our mud kitchen was built for a four-year-old, which nobody told my youngest. At seventeen months she would haul herself up at the worktop, stand on tiptoe, and stir whatever she could reach with total commitment and a wooden spoon nearly as long as her arm. She was happy. But everything was slightly too high, slightly too deep, and slightly too interesting at the edges — and I spent more time hovering than drinking my tea.
So I built a second, smaller kitchen: lower, simpler, and honestly a bit scruffier. She used it more in its first week than the big one in a month. This post is everything I learned doing it — the heights that actually fit toddlers (with the numbers), the setups that work at this age, utensils that are safe in small, mouthy hands, and the water and hygiene rules that let you relax instead of hover. The development side of all this — why mud play is so good for this age group — is covered in my post on the benefits of a mud kitchen.
The Heights That Fit Toddlers
A standard mud kitchen worktop (around 50 cm) suits a four- or five-year-old. For a toddler, it’s a climbing frame with a bowl on top. The full sizing table for every age is in my mud kitchen dimensions guide, but the toddler rows are the ones you need:
| Age | Worktop height | Overall width | Worktop depth |
|---|---|---|---|
| 12–18 months | 35–40 cm (14–16 in) | 60–80 cm (24–31 in) | 35–40 cm (14–16 in) |
| 18 months–3 years | 40–48 cm (16–19 in) | 80–100 cm (31–39 in) | 40–45 cm (16–18 in) |
The principle behind the numbers is the elbow rule: stand your child upright, arms hanging relaxed, and the worktop should sit at or just below their elbow. Two toddler-specific notes:
- Err low. A worktop an inch too low costs nothing — they crouch happily. An inch too high means tiptoes, stretched arms, and everything interesting happening just out of reach. If you’re choosing between two heights, take the lower one; they’ll grow into next year’s soon enough.
- Depth matters as much as height. Little arms are short. A worktop deeper than about 40 cm for an under-two puts the back third — and the bowl, if you’ve centred it — effectively in another postcode. Keep the sink toward the front edge.
- The bowl counts as height. Hands work at the bottom of the bowl, 10 cm or so below the worktop. A shallow bowl or tray (8–10 cm deep) suits toddlers better than the standard family bowl.
Three Setups That Actually Work
A toddler mud kitchen is not a smaller version of the big one. It’s a different, simpler thing — because toddler play is different: less cooking, more transporting, filling, emptying and tipping.
1. The Low Bench and Bowl
The one I built: a low, sturdy bench — ours is a shortened pallet section with a proper top, about 38 cm high — with a single shallow bowl inset near the front edge, a couple of hooks at toddler height, and a low shelf for two or three utensils. That’s it.
- Typical cost: $0–$30 / £0–£25 if you’re using offcuts and a retired washing-up bowl.
- Time: A couple of hours.
- Why it works: Everything is reachable, nothing needs climbing, and the whole thing is too low to fall off of anything.
2. The Two-Tub Ground Station
No building at all: two big tubs or storage boxes on the ground or a patio — one with water, one with soil or sand — plus a small crate of utensils beside them. Toddlers play at floor level anyway; this just organises it.
- Typical cost: $10–$20 / £8–£15 for tubs if you don’t own any.
- Time: Ten minutes, of which nine are finding the tubs.
- Why it works: Zero tipping height, fully portable (grandparents’ gardens, the park end of your own), and you can start today. The honest downside: you’ll do the playing crouched or sat on the ground beside them, because they will not play at a station you can’t join.
3. The Low Table Conversion
A toddler-height table you already own — a small outdoor table, a low bench, even a sturdy upturned crate — with a washing-up bowl on top and a jug of water. Add nothing else for the first week and see what they actually do with it before building more.
- Typical cost: Practically zero.
- Time: Minutes.
- Why it works: It teaches you what your toddler wants (mine wanted, exclusively, to pour water from the bowl onto the patio and watch it run downhill) before you’ve spent a weekend building the wrong thing.
Utensils That Are Safe in Toddler Hands
Toddlers explore with their mouths, throw things when excited, and fall over while holding whatever they’re holding. The utensil rules follow from that:
- Big enough not to choke on. Nothing with small detachable parts, no loose lids, no small bottle tops. If it could fit through a toilet-roll tube, it doesn’t go in the toddler kitchen.
- Short and chunky. Short-handled wooden spoons, chunky silicone spatulas, sturdy plastic or metal measuring cups. Long utensils become levers, weapons and eye-level hazards when their owner trips.
- Unbreakable, or honestly breakable. Metal, wood, silicone and thick plastic survive being thrown on paving. Glass and ceramic do not belong anywhere near a toddler mud kitchen — check charity-shop finds for chips and thin, brittle plastic before they make the team.
- Nothing sharp, nothing pointy. No skewers, no forks with real tines, no old knives of any description. Butter spreaders with rounded ends are as edgy as it needs to get.
- A short list, not a crateful. Four to six pieces — two spoons, a cup, a small jug, a bowl scraper, a muffin tin for “baking” — beats a mountain of kit. Toddlers repeat the same action forty times; variety is for older children.
Water Safety and Hygiene: The Rules That Let You Relax
Water is the whole point of a mud kitchen, and with toddlers it deserves straight talk rather than anxiety. Shallow bowls at a toddler kitchen hold a few centimetres of water — but the rules are the rules because toddlers are fast, top-heavy, and silent when they’re busy.
- Supervise within arm’s reach. Not from the kitchen door, not while answering emails. Under-threes and water — any water — belong in the same sightline, and at this age, within grabbing distance. This is the one non-negotiable on this page.
- Shallow, always. A few centimetres in the bowl is plenty for pouring and splashing. Never a full bucket left standing beside the kitchen — buckets and containers get emptied and turned upside down the moment play pauses.
- Fresh water every session, emptied at the end. Standing water grows bacteria fast in warm weather and attracts insects. At toddler scale this takes one minute: tip the bowl onto a flower bed, rinse, refill tomorrow.
- Hand washing is part of the game. Soap and water after play and before any snack, every time, done cheerfully and without drama — at this age you’re building the habit, not just removing the mud.
- Mind what goes in the “ingredients.” Everything at a toddler kitchen will be tasted. Use plain garden soil from a spot pets don’t use, or fresh shop-bought compost; keep small stones, conkers and berries out of the toddler setup (choking hazards and, in some cases, not safe to eat) and offer big, safe nature items instead — pinecones too large to mouth, leaves, petals, sticks longer than the child is tall is too much, but you take the point: big.
- Sun and slips. A hat and shade on hot days, and put the kitchen on ground that doesn’t become an ice rink of mud — a mat, pavers or grass underfoot, because a toddler’s whole business model is falling over.
Stability: The Boring Section That Matters Most
Toddlers pull themselves up on furniture. That is their job. So:
- Anchor it or make it un-tippable. A low, wide bench is stable by design; anything with a backboard or shelves gets fixed to a fence or wall. Push test from toddler height, at toddler angles, before first play.
- No climbing invitations. Keep hooks and shelves low and boring; a high shelf with an interesting pot on it is a climbing route.
- Sand everything, then sand it again. At this height, the front edge of the worktop is face height. Every edge gets rounded and smooth — run your own cheek-height hand along it if you want the real test.
- Check weekly. Screws loosen, plastic cracks, wood splits. A thirty-second once-over while the bowl fills is the whole maintenance programme at this scale.
What Play Actually Looks Like at This Age
Set expectations kindly: a toddler at a mud kitchen mostly fills things, empties things, carries water three metres and pours it out, and stirs. This is not failed mud play — it is the play, and it’s building exactly the skills the benefits post describes: fine motor control from scooping and pouring, early maths from full and empty, and a great deal of very serious concentration. Sessions of ten to twenty minutes are normal and complete. The kitchen being permanently set up and ready — rather than a special event — is what turns those short sessions into a daily habit.
Growing With Them
The low kitchen isn’t a dead end. When your child starts standing tall at it (somewhere around age three for most), you can:
- Raise the whole bench on solid blocks or longer legs — 5–10 cm buys another year or more.
- Move the bowl and hooks to the big kitchen if you have one; the toddler bench retires gracefully into a potting bench, plant stand or grandparent-garden spare.
Build the toddler version cheap and simple precisely because its prime is two glorious years, not ten.
FAQs
What age can a toddler start using a mud kitchen?
From around 12–15 months — once they’re standing confidently and cruising along furniture — with you right there. Expect filling, emptying and pouring rather than cooking, keep the water shallow, and choose utensils with the mouthing stage firmly in mind. Some families start with water and sand only, and add mud once the taste-everything phase calms down.
How high should a mud kitchen be for a 2-year-old?
Around 40–48 cm (16–19 in) to the worktop for most two-year-olds, with the lower end better for smaller toddlers. Check it with the elbow rule: the surface at or just below your child’s elbow, arms relaxed. Remember their hands work at the bottom of the bowl, so a shallow bowl (8–10 cm deep) helps too. Full sizes for every age are in the dimensions guide.
Is mud play safe for toddlers who put everything in their mouths?
With sensible set-up, yes. Use clean play soil (fresh compost, or garden soil away from anywhere pets toilet), keep small stones, conkers and berries out of the toddler kitchen, supervise within arm’s reach, and wash hands with soap after play and before eating. Some mud will get tasted — that’s expected at this age, and the aim is a clean starting point and good habits, not sterility.
How deep should the water be for a toddler?
Just a few centimetres in the bowl — enough to splash, pour and float a leaf. There is no play benefit to deeper water at this age, and buckets of standing water should never be left beside the kitchen: empty them and turn them upside down whenever play pauses, and refill fresh each session.
Does a toddler need their own mud kitchen, or can they share the family one?
They can share, if the family kitchen isn’t too tall — but a worktop at 50 cm leaves an under-three on tiptoe with everything interesting out of reach, and in practice the older child’s kitchen gets used by the older child. A cheap, low second setup (even the two-tub ground station) gets used far more, and it costs less than a takeaway to put together.