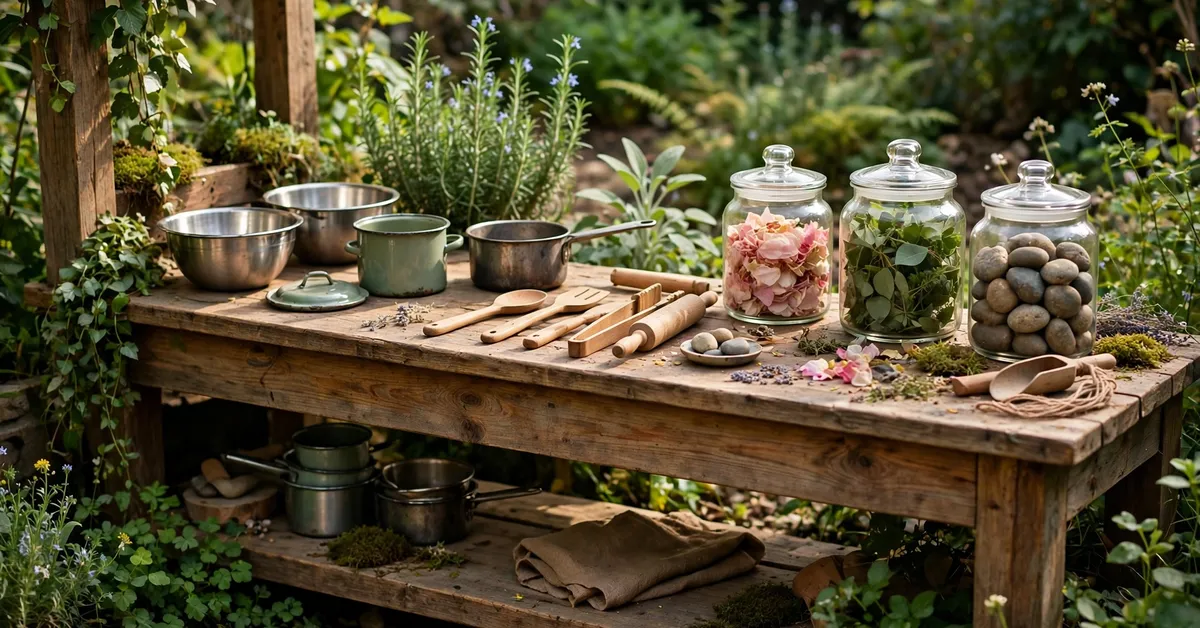
An empty mud kitchen is a bench with a bowl in it. What turns it into the place your child disappears to for an hour is the stuff on it — and the good news is that a proper setup costs far less than most parents expect. Almost everything on this list came from our own kitchen drawers, charity shops and the garden itself.
The mistake I made at the start was buying a matching “mud kitchen accessory set” online for about $35 / £28. Half of it was too small to hold anything, the whisk snapped in a week, and the little plastic cups blew away. The setup that actually works is a mix of real kitchen tools (sized down), cheap second-hand finds and free things from the garden — organised so a child can find what they want without emptying everything onto the ground.
Here’s the complete list, organised by zone, with what to buy first if you’re starting from zero.
Start Here: The 10-Item Starter Kit
If the kitchen is new and you want it playable this weekend, these ten items cover 90% of what children actually do out there. Everything else on this page is an upgrade.
- A big mixing bowl — stainless steel if you can. It’s the sink, the mixing bowl and the bath for pebbles, all in one.
- A smaller bowl or saucepan — for “cooking” what the big bowl is holding.
- Two jugs or measuring cups — pouring is half the point of a mud kitchen. One big, one small.
- A wooden spoon — the universal tool: stirring, serving, digging at a push.
- A whisk — for potions, muddy coffee froth and general drama.
- A sieve or colander — washing pebbles, draining “pasta”, sifting dry soil.
- Cups and a teapot or kettle — the café game starts the moment these appear.
- A bucket — for carrying water, soil and important stones from A to B.
- A paintbrush (the 5 cm / 2-inch decorating kind) — painting the fence, the kitchen and rocks with water.
- A muffin tin or ice-cube tray — mud pies, potion portions, sorting tiny treasures.
Bought second-hand, that whole kit cost me under $15 / £12. Bought new from budget shops, budget around $25–$40 / £20–£30 — and skip anything sold as a miniature; real utensils that happen to be small beat toy versions every time, because they don’t snap.
Zone 1: The Cooking Zone
This is the heart of the kitchen — the worktop either side of the sink.
- Pots and pans: one saucepan with a lid if you can find it (the lid matters — “cooking” needs a reveal moment). Old camping pans are ideal: light, tough, already dented.
- A ladle and a slotted spoon: serving soup is a whole game in itself.
- A potato masher: deeply satisfying with wet mud, and nobody misses the one from the kitchen drawer.
- Baking trays and a loaf tin: for mud cakes that hold a shape.
- A chopping board and a butter knife: for “chopping” leaves, petals and soft weeds. Blunt only — this is pretend prep.
- Storage jars with lids: two or three jam jars or plastic tubs of dry ingredients — soil grades, sand, gravel. Label them if your child is at the writing stage; café owners take this very seriously.
The fuller tour of add-ons — including the themed extras and the nice-to-haves — is in my mud kitchen accessories ideas post. This page is the working core; that one is the expansion pack.
Zone 2: The Water Zone
Water is what separates a mud kitchen from a dirt table, so this zone earns its space.
- The water source itself — a tap container, pump or hose setup (a whole decision of its own).
- Funnels, two sizes: filling bottles is a precision skill children will practise for twenty minutes straight.
- A watering can, small: the garden-to-kitchen supply run.
- Tubes and guttering offcuts: a 50 cm length of guttering or wide tube, propped at an angle, becomes a water slide for boats, leaves and corks.
- Floating things: corks, bottle tops, a rubber duck if one is going spare.
- A spray bottle: “cleaning” the kitchen with a spray bottle is, in my house, the single longest-running game a mud kitchen supports.
Zone 3: Baking and Decorating
This is the zone that turns cooking into presenting — and it’s the one that makes mud kitchen photos look like a magazine shoot.
- Muffin tin and silicone cupcake cases: reusable, unbreakable, perfect pie moulds.
- Cookie cutters, chunky plastic: stamping shapes in flattened mud.
- Decorating supplies: pebbles, shells, flower petals, leaves and short sticks — the “sprinkles”, “cherries” and candles of the mud world.
- A cake stand or a flat board: every café needs a display surface. A charity-shop cake stand is the single most fought-over item we’ve ever added.
- Chalk: for writing the day’s menu once the café opens — a piece of chalkboard or a slate offcut leans against the backboard nicely.
Zone 4: Storage — The Zone Everyone Forgets
Without storage, every session ends with you carrying armfuls of wet utensils indoors, and within a month the kitchen looks abandoned. Ten minutes of storage planning fixes it permanently.
- Hooks along the backboard: six to eight cup hooks at child height hold the spoon, whisk, ladle, brush and masher — visible, reachable, and off the worktop.
- A crate or basket that lives outside: the drain-and-store box for everything else. Choose one with holes (a plastic stacking crate is perfect) so rain drains through instead of pooling — I learned this after fishing a crate of floating, slimy utensils out from under an inch of green water.
- A lidded tub for dry ingredients: soil, sand and gravel each get their own, stored under the worktop or in the shed, so “stock” doesn’t become one grey mixture.
- Shelves: one shelf under the worktop for the tubs, one above for the tap container if you use one.
Everything above came second-hand for us — the hooks, crate and half the utensils were a single charity-shop trip. The full story of what to hunt for (and what to leave on the shelf) is in my post on mud kitchen accessories you can find at a thrift store.
Zone 5: Nature Finds — The Free Zone
The best-stocked mud kitchens lean on the garden itself. These cost nothing and get replaced by the seasons:
- Sticks — stirring, building, “candles” on mud cakes.
- Pebbles and stones — soup ingredients, currency, decorations.
- Pinecones, conkers, acorns and shells — seasonal treasure; a small basket for collecting is half the fun.
- Leaves and petals — salad, tea, wrapping paper for mud parcels.
- Herbs from the garden — a snip of mint, rosemary or lavender turns water into a potion a child can actually smell. This one change doubled potion-play at our house.
- Grass clippings and fallen flowers — tomorrow’s ingredients, free forever.
A quick word on soil: the mud itself is an ingredient. A bucket of decent topsoil or compost near the kitchen beats scraping at hard ground, and a bag costs about $5 / £4 if your garden soil is mostly clay or rubble.
What NOT to Put in a Mud Kitchen
Just as important — the things that look like a good idea and aren’t:
- Glass or ceramic anything. It will break, outdoors, where bare feet walk. No exceptions, however sturdy it looks.
- Electrical items (old kettles, toasters). Sharp internal edges, rusting parts, sometimes worse. Skip the whole category.
- Anything with small detachable parts for under-threes — lids that pop off, wheels, tiny screw-on caps. Under-three rules are stricter; big and chunky only.
- Real cleaning chemicals or garden chemicals in lookalike bottles. Empty, washed-out bottles for pretend potions are fine; anything that held bleach, weedkiller or fertiliser is not, even rinsed.
- Heavy cast iron. A real skillet is a dropped-toe injury waiting for a small cook. Aluminium camping pans give the same clang for a quarter of the weight.
- Sharp “real” tools — proper knives, graters with exposed teeth, skewers. Blunt and pretend is the rule at this station.
- Your good kitchen gear. It will not come back in the condition it left. Ask me how I know — the decent stainless whisk still has a bend in it.
Restocking by Season
A mud kitchen goes stale when the ingredients never change. A five-minute restock each season keeps it feeling new:
| Season | Add | Retire or check |
|---|---|---|
| Spring | Fresh herbs, flower petals, a new bag of play sand or topsoil | Anything that cracked in the frost; scrub containers before first use |
| Summer | Ice cubes and frozen flowers in water, spray bottle, shade-side water play extras | Algae in tubes and containers — scrub fortnightly; top up the dry stores |
| Autumn | Conkers, acorns, pinecones, leaf piles for “cooking”, waterproof crate check | Drain and store pumps before the first frost |
| Winter | Ice-play days (frozen bowls, coloured ice), hot-water-bottle-warm water for short sessions | Empty all standing water; bring battery pumps and anything freezable indoors |
FAQs
What are the absolute essentials for a mud kitchen?
Ten things: a big bowl, a smaller pan, two jugs, a wooden spoon, a whisk, a sieve, cups and a teapot, a bucket, a wide paintbrush and a muffin tin. That kit covers mixing, pouring, cooking, serving and decorating — everything a child actually does — and costs under $15 / £12 second-hand.
How much does it cost to stock a mud kitchen?
Almost nothing if you start with your own drawers and charity shops: $0–$15 / £0–£12 for the starter kit is realistic. A full all-zones setup bought new from budget shops lands around $40–$70 / £30–£55. The expensive route — matching boutique accessory sets — costs more and, in my experience, breaks faster.
Can I use real kitchen utensils in a mud kitchen?
Yes — real utensils are better than toy ones: they work properly, feel substantial and don’t snap. Two rules: nothing glass, ceramic or sharp, and nothing you’d mind never using indoors again. Old, spare and second-hand is the sweet spot.
What should never go in a mud kitchen?
Glass and ceramics (breakage where bare feet walk), electrical items, anything that held chemicals, heavy cast iron that a child could drop on a foot, real knives and sharp tools, and small detachable parts for under-threes.
How do I stop the mud kitchen looking messy and abandoned?
Storage, not tidiness rules. Hooks for the five most-used tools, a draining crate for the rest, lidded tubs for dry ingredients, and a two-minute tidy-up ritual at the end of each session (child’s job, not yours). A kitchen that puts itself away gets used daily; a pile of wet utensils doesn’t.