If you want a creative and fun way to get your kids outdoors, to learn, and to play, how to build a mud kitchen might be just the right project for you! A mud kitchen provides an experience where children can explore nature and grow their creativity while picking up some elementary skills in a kitchen, all in great messy fun!.
This great guide will provide you with an easy step-by-step DIY process on how to create your very own mud kitchen at a reasonable cost and can be fun during your weekend project. Not a problem at all if you have a huge back yard or a smaller outdoor setting. You can definitely make the perfect version of a mud kitchen, which fits your needs. So get your tools ready, gather your materials, and let’s start!
How to Build a Mud Kitchen?
Before we go on to building, let’s just take a sec to talk about the benefits of a mud kitchen. How to Build a mud kitchen provides much more than just gooey fun—it supports a child’s development in some very important ways:
Imaginative Play: Kids can pretend to be chefs, bakers, or scientists, which gets that creativity and role-playing imagination really going.
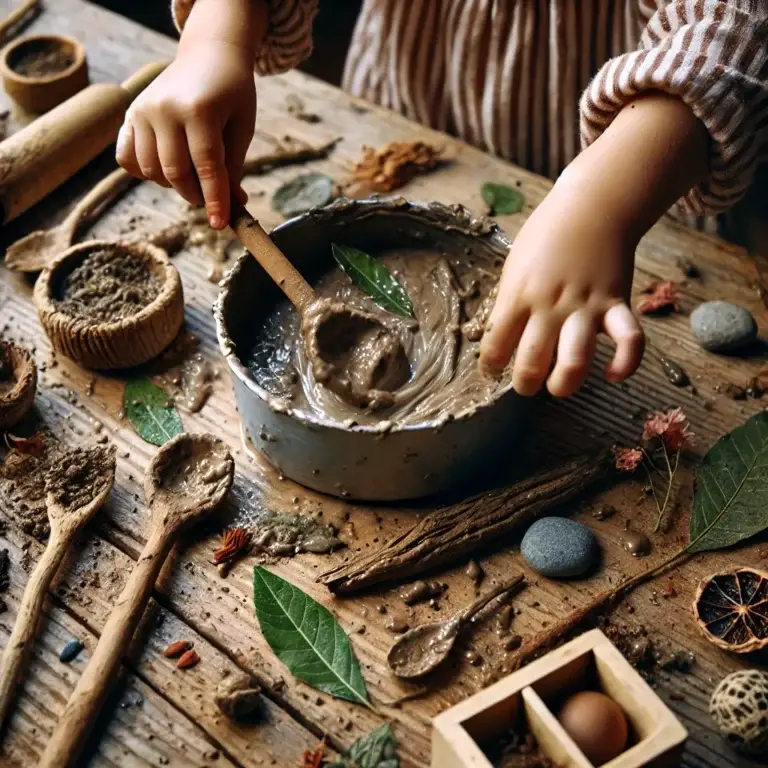
Sensory Development: Play with mud, water, and leaves to stimulate the senses to develop motor skills in the child.
Outdoor time: Interact children more in outdoor time, away from screens, and connect them with nature.
Problem solving: From gathering ingredients for making recipes, the children learned simple problem solving and decision-making.
Materials to build a mud kitchen
How to Build a Mud kitchen doesn’t have to be a complicated affair. Many things used in constructing it can be sourced from recyclables or items you might already have lying around. Here’s what you need:
Basic Materials:
Wooden Pallets or Planks: To make the framework of the kitchen.
Screws or Nails: To hold everything together.
Hammer or Drill: To assemble the kitchen.
Basin or Large Plastic Tub: This is where your mud kitchen will have its “sink”.
Hooks and Nails: You can hang your utensils and tools with a combination of hooks and nails.
Outdoor-Friendly Paint (optional): Protect and design your mud kitchen with outdoor-friendly paint.
Old Pots, Pans, and Utensils: Scavenge through your old kitchen items that you can repurpose for play.
Optional Add-ons:
Garden Hose: Because you know just how important water is.
Shelving or Cupboards: Provide additional storage for an authentic look.
Chalkboard or signs: so your kids can write their “menu” or recipes.
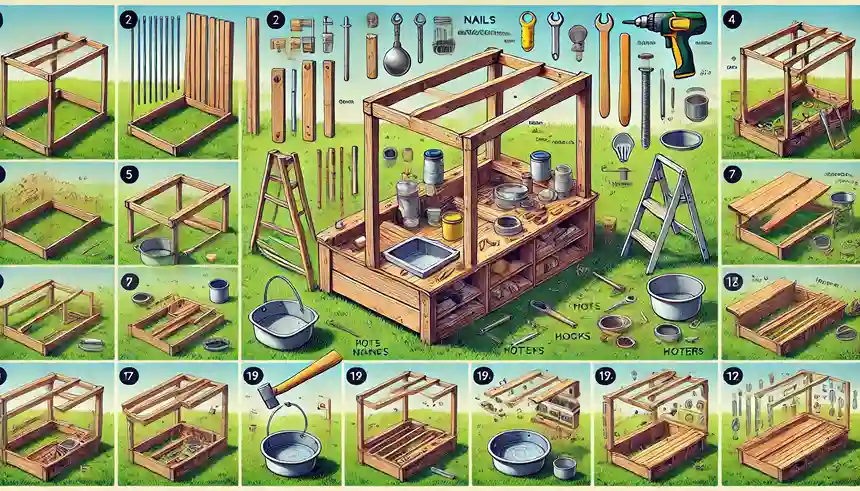
Step-by-Step Guide: How to Build a Mud Kitchen
Well, now that you have all the materials, it’s time to get to work How to Build a mud kitchen. Take a look at these easy instructions on how to build a sturdy and functional mud kitchen that the kids will love.
Step 1: Choose a Location
First, choose a corner of your yard or garden How to Build a mud kitchen will be. Ideally, it should be in a shaded area, close to water sources, spacey enough, and so on. Step 2: Building of the Kitchen Frame
Make a simple structure of your mud kitchen with wooden pallet or planks. If you use a pallet, the frame, countertop, and also the backboard for your kitchen could be made of the same material. Here is how to do it:
Countertop: It’s a flat, sturdy wooden plank where the basin will be positioned.
Backboard: A vertical wooden plank or pallet is attached at the back for utensils or tools to hang on.
Attach legs to the bottom of the structure, holding the countertop about 2-3 feet off the ground.
Tip: You can sand the wood for any rough edges so that the surface is smooth and safe for kids.
Step 3: Sink Installation
With the frame built, it is now time to install the “sink”. Well, it is actually a large plastic tub or basin. That’s not very hard:
Cut a hole in the countertop that is your basin size.
Fit the basin into the hole and it should fit snug in the hole.
Really get creative by attaching a faucet with a garden hose attached to a piece of PVC pipe or even just a plastic tap.
The sink, it adds this really realistic touch to your How to Build a mud kitchen and is well suited for all kinds of messy play.
Step 4: Add Shelving and Storage
Add next, shelves or storage for all the pots, pans, and utensils:
Lower Shelf : Put a wooden plank under the countertop for storing more massive items such as bowls and buckets.
Hooks : Screw hooks on the backboard to hang more minor utensils such as spoons, ladles, spatulas.
Cupboards or Drawers (Optional): If you feel really fancy, you can reuse old cupboards or drawers to add more shelves or drawers.
Shelves will make the How to Build a mud kitchen look more like an actual kitchen and keep the space clean and organized.
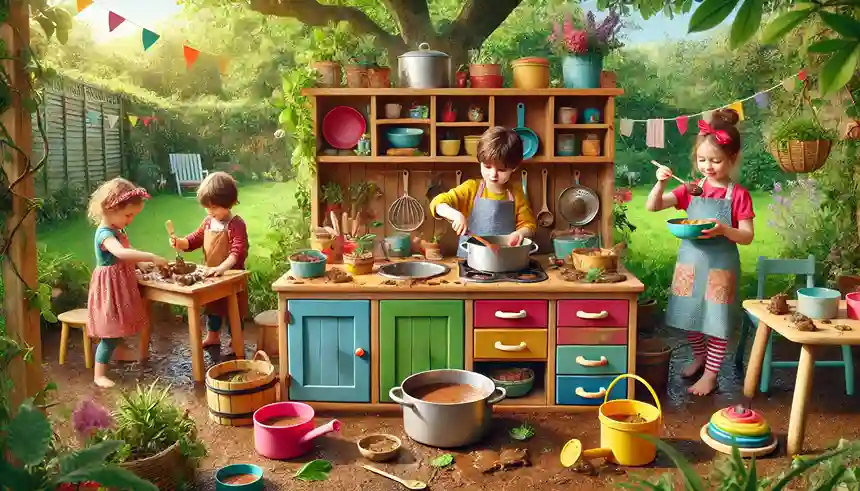
Step 5: Decorate the Mud Kitchen
How to Build a mud kitchen your own! Paint it colors that remind you of sunshine, or get the kids in on the fun and enjoy it as family art project. If using outdoor-friendly paint, consider adding to your design:
Fun Designs: Stencils, patterns, or nature-inspired images like flowers or leaves.
Chalkboard: Suspend a tiny chalkboard from the backboard so children may write their “menu” or recipes.
Adding these fun, decorative embellishments makes the mud kitchen all the more irresistible to kids to play in.
Step 6: Stock the Kitchen
How to Build a mud kitchen built and now decorated, it’s time to stock it with everything your child will need for hours of imaginative play:
Kitchen Utensils: Utilize old utensils from your kitchen, such as spoons, spatulas, whisks, and ladles.
Pots and Pans: Scavenge for some older pots and pans the kids can use to “cooking”.
Play Ingredients: Fill up bowls or containers with water, dirt, leaves, flowers, and small pebbles—if a child finds that helpful.
Pro tip: Let the kids go out and collect their own “ingredients” in the yard; it’s awesome to see them explore and connect with nature.
How to Build a Mud Kitchen Play and Learning
How to Build a mud kitchen is built, the playing options are endless. Here are some fun ideas to keep your kids entertained and learning along the way:
- Mud Pie Bakery
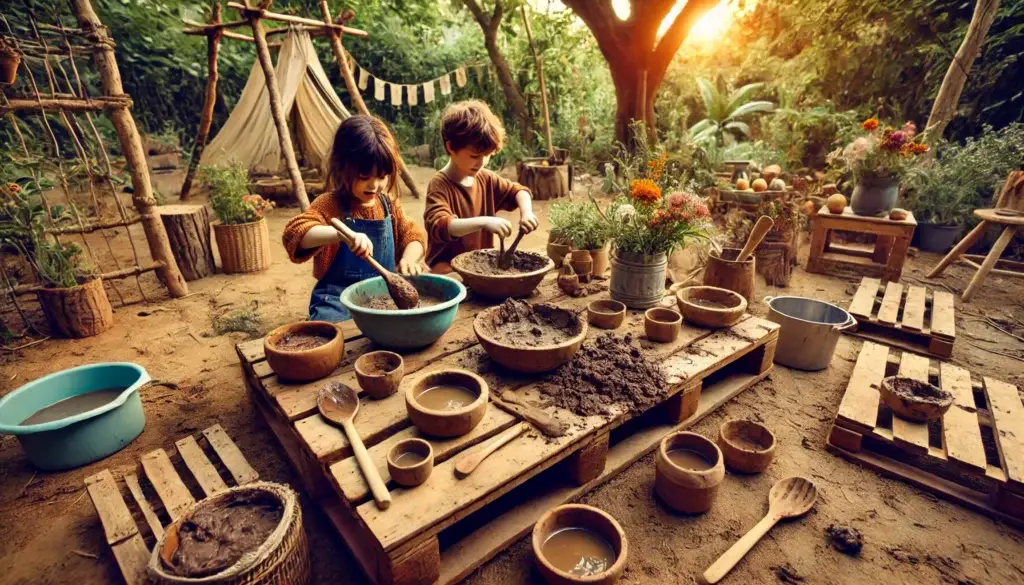
Encourage your kids to make their very own mud pies, cakes, or cookies with dirt, water and leaves and flowers among other natural elements. Then they can “bake” their creations in pots and pans and then deliver them to friends and family members. - Nature Soup
Provide bowls and spoons for the children to mix water, mud, and collected items like sticks, pinecones, or flower petals. Let the children experiment with different “recipes” and learn about textures and combinations.
- Outdoor Science Lab
How to Build a mud kitchen become the science laboratory for kids and what it does, which is experiment with various materials. It can even mix water and dirt to transform the consistency or create their own paint by adding water.
- Sensory Play
You can also introduce kids to textures through the mud kitchen by adding sand, pebbles, or crushed leaves. Such a material helps develop cognitive skills as well as fine motor skills.
Cleaning Up After Playtime
Now that the fun’s over, How to Build a mud kitchen has to be cleaned before it is left in the storage for a long time. Here are some cleaning tips:
Wipe Down: Use a damp cloth and wipe off excessive mud and dirt on the surfaces.
Dry: All the items in the kitchen have to be dry before storage so that wood will not become warped or deteriorate.
Store Utensils: Collect all the pots and pans together with utensils and store them on their respective shelves or hooks. So things will be in their proper place for the next time to play.
Creative Variations for how to build a mud kitchen
Now that you know how to build a mud kitchen, it is time to look at some fun variations. These creative twists will make your mud kitchen even more exciting for your kids and give it the unique touch that blends in with your family style.
- The Nature-Themed How to Build a Mud Kitchen
One of the ways to elevate your mud kitchen experience is by introducing elements that mirror the natural environment. Consider the features that reflect the nature setting:
Wooden Counters: Remove the planks and use driftwood or reclaimed branches as a countertop material.
Stone Sink: Instead of the plastic tub, use a shallow stone basin for that cruder look. It is stronger and adds to its aesthetic.
Leaf Roof: Tie a few long branches and leaves together, then build a roof over the kitchen. It’s adorable and shades your kids when they play outside.
- The Adventure How to Build a Mud Kitchen
If your children are into adventure stories or think of themselves as explorers, design their mud kitchen as an explorer station. Turn it into an expedition station:
Treasure Chest Storage: Convert an old chest or wooden crate into a store container for utensils and tools.
Map Table : Paint a world map on the countertop to encourage creative play. Kids can “travel” to different regions by creating dishes from different cultures.
Compass and Telescope: Hang a toy compass and telescope in the back. It fits well into the theme of exploration. Challenge your kids to discover “new” ingredients in the garden and include those in their recipes.
- The Farmhouse How to Build a Mud Kitchen
The mud kitchen should look like a mini farm. That’s the best moment to teach your child sustainable life and the idea of farm-to-table food with fun methods:
Vegetable Patch: A small garden bed is placed next to the mud kitchen where children can grow their own herbs or small vegetables.
Mini Market Stand: Create a market stand next to the kitchen with baskets holding pretend or real produce. Children may pick veggies and use them in their mud pies and stews.
Milk and Eggs Station: Play a milk bottle and egg cartons. Give kids the feel of fresh harvesting ingredients in their meals.
More over these creative variances add new dimensions to the fun and learning linked with playing in the mud kitchen. If your child loves nature, adventure or farm life, it might make outdoor games so much more exciting.
Safety Tips for Building and Using a Mud Kitchen
How to Build a mud kitchen is not a very complicated process, but there are a few points you might want to consider about safety in the play environment for your kids:
- Safe Material Usage
All the materials you use to build your mud kitchen should be safe for children in your view. Here are some considerations:
Non-Toxic Paints: If you are painting the kitchen, use outdoor/non-toxic child-safe paints that can stand the climatic elements.
Smoothened Surface: Remove any rough or splintered edges of wood to prevent cuts or injuries.
Sturdy Kitchen: Ensure that your kitchen is well-secured and not wobbly. If it is wobbly, add more screws or braces so that it stands firm.
- Close Supervision of Water Play
One of the activities that characterize How to Build a mud kitchen is water play. It is messy and slippery at the same time. Thus, it should always be under close supervision especially when young children engage in water usage in the kitchen. Non-Slip Surface: Place non-slip mats around the mud kitchen to prevent accidents when the ground gets wet.
Keep Track of Water Usage: If a hose or faucet is being used, just keep an eye on the wastage of water. Teach them to play with just small drops of water.
- Teach Good Hygiene How to Build a mud kitchen
Mud play is fun but very unhygienic! Teach your children good hygiene practices in order to keep them safe and healthy:
Hand Washing: Always make sure your children wash their hands using soap after playing in the mud kitchen.
Sanitized Toys: The play utensils and pots have to be cleaned in turn every few days with warm water and soap for maintaining hygiene.
Environmental Friendly How to Build a Mud Kitchen Tips
Mud kitchen can be an excellent opportunity for kids to understand environmental friendly living and respect for nature. Here’s how you can create an eco-friendly mud kitchen for your children:
- Recycled Material
One of the easiest and also most environmentally friendly ways to make a mud kitchen is through the use of recycled or upcycled materials:
Old Furniture. Use old tables, chairs, or cabinets as the structure for your kitchen.
Scrap Wood. Look in old projects or renovation sites for free scrap wood instead of buying new timber.
Recycled Containers. Use old yogurt containers, jars, or plastic bottles as storage bins or pretend “ingredient” containers.
- Create a Compost Station
Introduce composting. Install a mini-composting bin near the mud kitchen. Encourage kids to collect leaves, small plant scraps, or unwanted pieces of mud pies to be thrown into the compost. Great when showing the kids a sight of wastage reduced and earth-nourishing.
- Solar Powered Features
To raise the bar on your green initiative, you can add a small solar-powered water feature. Incorporate a solar-powered water pump to design a sun-powered faucet-a great and enjoyable means of educating children about solar energy while still keeping the mud kitchen alive.
Fun Engaging Ways of Learning Activities in the Mud Kitchen for Kids
It’s not play. It’s also an excellent tool for learning. Here are some educational activities you can incorporate into How to Build a mud kitchen play:
- Math Skills with Measurements
Turn your mud kitchen into a mini math classroom. You can encourage kids to measure their ingredients in: count scoops. Ask your child to count how many scoops of mud it takes to fill a bowl or a cup.
Measuring Cups: Use actual measuring cups and spoons to have children explore concepts in volume as well as fractions.
- Language and Vocabulary
Introduction to new cooking and natural surroundings words:
Recipe Writing: Have older children write down their “recipes” on a chalkboard or notebook. They can list ingredients such as water, mud, grass, and rocks to even refine their spelling and language.
Descriptive Play: Encourage the child to describe their mud creations in terms of texture, smell, and color. All this generates descriptive language and sensory learning.
- Science Experiments
The mud kitchen will lead to experiments on fundamental principles:
Mud Constancy: Attempt to alter the water content added to dirt. What is the effect when there is too much water? Or not enough? This leads to understanding in matters of cause and effect.
Nature Collection: Set up a scavenger hunt around the backyard to collect “ingredients” for the mud kitchen in nature. Explain the different plants and materials to them, teaching kids about biology and the environment.
- Social Skills and Cooperation
A really good teaching tool of how to work with others to develop social skills:
Shared Play: Encourage your child to invite friends or siblings to join in the kitchen. They can take turns being the chef and the customer, bringing about cooperation and communication.
Role-Playing Games: Set up scenarios where kids have to work together to create a meal for their “restaurant.” This will help develop teamwork and patience as they take on different roles in the game.
Advanced How to Build a Mud Kitchen Projects for Parents and Kids
Once you are familiar with the basic installation of building How to Build a mud kitchen, you may want to undertake more complex constructions and add to the complexity and enjoyment of the setup.
Here are some ideas to take your muddy kitchen to the next step:
- Plumbing system with running water
To make it really look like a kitchen, you can install an easy plumbing system in your kitchen. This will require the addition of a working faucet.
Garden Hose Faucet: Connect a garden hose to an impromptu faucet. You can use PVC pipe for the faucet and insert the hose into that.
Drainage System: Place a drainage pipe under the sink that feeds into a bucket. This allows kids to use their water play without making a huge mess.
- Custom Built-In Oven
If your kids love baking, you can build a small brick oven in the mud kitchen. You and your kids can build a pretend oven using small stones or bricks that you build under a countertop for kids to “bake” their mud pies under.
- Rainwater Collection
You can make muddy cooking transform into a sustainable lesson in installing a rainwater collection system. Additionally, you can install a rain barrel beside the mud kitchen, encouraging kids to collect and harvest rainwater for their cooking. The best part is that it’s quite eco-friendly and thus an excellent tool to learn.
Conclusion
Building memories with you How to Build a mud kitchen
How to Build a mud kitchen is so much more than just a fun DIY project-it creates long-lasting memories for you and your children. You will be able to witness the boost in their confidence and imagination as they explore the wonders of outdoor play, creativity, and hands-on learning. On top of that, it will give you a chance to bond with the little ones, whether you are gathering materials together, painting the kitchen with them, or whipping up a batch of “mud soup.”
By undertaking this step-by-step guide on how to build a mud kitchen, you will create outdoor space where your little one can indulge in hours full of play. Best of all, this is budget-friendly and sustainable as well as a creative way toward fostering the development of your child.
So, what are you waiting for? Grab your tools and get started on creating your family’s very own How to Build a mud kitchen today!
FAQs: How to Build a Mud Kitchen
Q: How long to put a mud kitchen together?
A: An hour or two, a whole weekend. Little depends on your design, but realistically, a basic mud kitchen can be built in an afternoon, though plumbing or shelving will take longer.
Q: At what age is it too early to expose a child to a mud kitchen?
A: Mud kitchens are appropriate for 2-year olds and above. However, with younger children, there is also much adult supervision needed, yet toddlers can still appreciate the sensory exploratory elements of this play.
Q: Can the use of a mud kitchen include any weather?
A: Yes! They do mud kitchen/running outside. It’s not really weather dependent; just be sure to store the more delicate things or utensils if it becomes heavy rain or snow.