Introduction tomud kitchen plans from pallets
Recently, the notion of a mud kitchen appears to be gathering interest, particularly amongst the young families. To put it simply, a mud kitchen is an outdoor workstation for kids involving dirt, water and other materials to create a workshop that is both functional and sensory. Such creations allow kids to unleash their ancestors and let their imagination take over as they build, combine and mix different textures, which helps in the improvement of their minds and coordination.
The increase in use of mud kitchens is consistent with the reasons as to why there is an increase in their usage. Sensory play is an enjoyable experience, and even more important is the fact that such an activity is important for growth. When children are exposed to a whole range of functioning materials and new environments, they learn values like logic, critical thinking and even socialization. Also, by having mud kitchen plans from pallets, children grow an appreciation for nature by encouraging outside play.
There are many ways to go about building a mud kitchen plans from pallets, and using pallets as the main material is perhaps one of the easiest. Pallets are not only eco-friendly but are also readily available and cheap to convert into a well designed outdoor playing area. The use of pallets also fits into the larger picture of environmental issues as it cuts down on waste and provides afforable options for parents who want to enhance the backyard experience of their children.
As we explore more of the ins and outs of DIY mud kitchen plans from pallets, we will get to other amusing concepts and useful tips on how to build these interesting kitchenettes. The process of putting together a mud kitchen plans from pallets will surely change the appearance of your backyard to a much more informative and entertaining one which will facilitate endless opportunities for imaginations and fun.
Gathering Materials: Choosing the Right Pallets
The step of obtaining pallets during the construction of a DIY mud kitchen is essential as it guarantees the safety, longevity, and fun that the outdoor facility would be used for. It can also be turning away from local farmers and getting ready made mud kitchen plans from pallets. As a result of this, there seems a to be a wide adopted understanding of constructing the last mile infrastructure proving to be expensive. Not every pallet has suited norms and standards thus is imperative for one to know how to choose them. Considering the same, aspects such as the type of material, condition and whether or not it is suited for outdoors should be a few of the questions.
For starters, ensure that the pallets you select are free from nasty chemicals and are tagged as low risk for food contact. There was a treatment performed to eliminate pests but without applying nasty chemicals, which is why it has HT stamp. There is also a mention of some asbestos which is dangerous and has an MB stamp. Moreover, every pallet is made with a structural allowance and ought to be better in terms of structure without slack or rot.
Pallets for your mud kitchen plans from pallets project can be sourced from a number of places including local businesses, local warehouses, and retail outlets. Most pallets are often sold cheaply or given away since they are in surplus. Other great options for sourcing pallets include reclamation yards. Additionally, even social media groups are a great place to find people looking to sell or giveaway pallets. As a best practice, it is a good idea to inspect the pallets and confirm that they meet your quality and safety standards.
Alternatively, if durability is your concern,it’s worth recalling that a mud kitchen plans from pallets that’s solidly constructed will not only last long, but will also provide many years of functionality for children. In comparison to thin softwood pallets, thick hardwood pallets tend to have better durability, and longevity. If you follow all the procedures outlined above, you will have suitable pallets which will work for all your backyard adventures including your first DIY mud kitchen.
Designing a Mud Kitchen: Arrangements and Components: mud kitchen plans from pallets
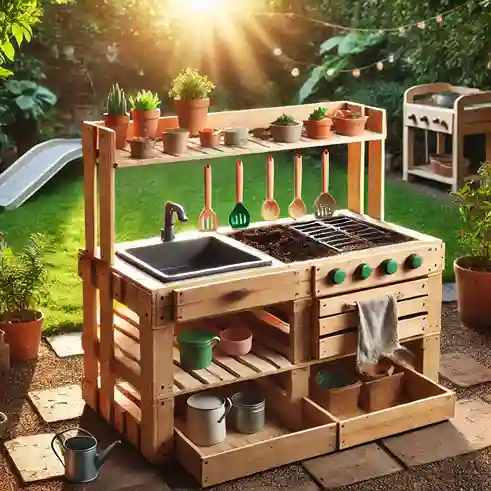
Constructing a mud kitchen could be an interesting undertaking that not only beautifies your yard but offers your kids a new stimulating play outdoors. When thinking about a layout of the mud kitchen plans from pallets, the first thing you should evaluate is the size and the kind of materials you want to use, especially the pallets as they are cost effective and easily reusable. Start by considering the dimensions of the kitchen, making sure it is accessible enough for all children to reach every feature. It is rather common to construct the kitchen in an L-shape or, U-shape order so as to make interaction more workable.
Sufficient workspace should be an important consideration when planning your kitchen as it allows various activities such as mixing, pouring and creating mud pies. This should be constructed using smooth and durable pallets that will aid in enhancing the cleanliness of the kitchen and the safety of the children using it. The need for storage facilities is also important; there should be crates or shelves to store the utensils, pots and other equipment. It would be nice to envision a storage space for implements and another one for natural materials that children routinely incorporate in their play like leaves or stones.
A splash area, in which water is available to children for play, is also critical. It is possible to design a discrete area with a small basin or waterproof tarpaulin which would let children play with water while leaving the rest of the environment tidy. Interchangeable mud trays should make cleaning more convenient; such trays can be made of pallet wood or other containers which collect the overflow of excess mud and water and thereby distort the aesthetic.
Just as critical is the enhancement of the mud kitchen plans from pallets’s ability to be customized. Adapt the construction according to the space available in the yard and the children’s preferences. Add suggestions in the form of a herb garden for cooking outings or different textures and colors to make it realistic. This way you not only make them feel important but also expand their imaginations when looking at their outdoor kitchen as a place to mess around with.
Tools and Safety Preparations for Building: mud kitchen plans from pallets
There are crucial safety and preparation procedures and tools needed for a successful and secure service building a DIY mud kitchen using pallets. The following outline the basic woodworking tools and safety precautions to take for removing the pallets and putting together the structure of your mud kitchen plans from pallets.
A pallet dismantling tool or crowbar removes the pallet’s boards while exerting minimum force and damage to the structure. Instead, the use of a hammer may be needed to pull out remaining nails more deeply embedded into the pallet. After all the pallets have been taken apart, a hand saw or a power saw can be used to cut the wood into the shapes and sizes that are necessary for the construction of your mud kitchen plans from pallets. Furthermore, the use of an electric sander will smooth out edges which if left rough can cause potential harm to children when they are playing.
For starters, strong gloves will serve as a barrier for your hands, this will protect them from splinters and hard edges that are bound to be exposed while removing the pallet. A pair of goggles is another safety requirement, it protects users from wood chips and saw dust that may get into eyes when the wood is being sanded or cut. It would also be beneficial to have a dust mask on standby, particularly for activities exposing you to fine dust that can be detrimental to the lungs, such as sand masking.
When looking for materials and tools, it’s best to keep in mind the need for working in a well ventilated space and if possible outdoors. Doing so will not only encourage enough ventilation but will also reduce indoor clutter. Clutter free environment helps in cutting down chances of mishaps. Don’t skip the crucial steps of inspections – before starting the construction process, all tools should be checked for malfunctions and the person should be educated on how to use the tools to prevent accidents.
Ultimately, proper tools and safety preparedness are essential in the successful construction of your DIY mud kitchen plans from pallets. Safety should be your first priority as it certainly will make the building process more enjoyable and at the same time allows kids to have a great outdoor experience.
Step by Step Construction Process.
Building a mud kitchen plans from pallets from pallets is a great do it yourself project which gives you the chance of creating a fun outdoor area for kids. To start off, make sure you have the following materials: a minimum of five pallets, wood screws, a power drill, sandpaper, and an appropriate exterior-grade sealant. Make sure the pallets are clean, devoid of any splinters or nails sticking out and are in good condition.
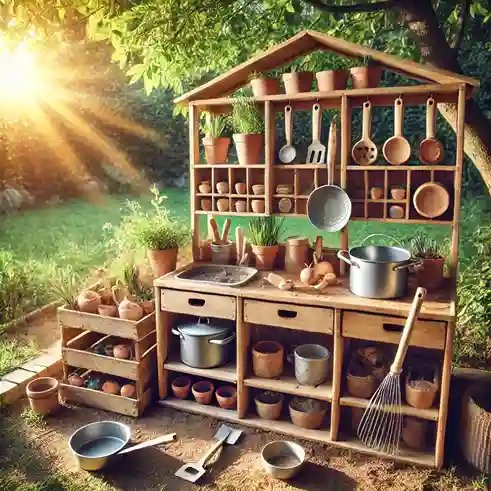
Begin by preparing the pallets for the construction. Smooth rough edges by sanding and then place them flat. After smoothing them, plan out the configuration of your mud kitchen plans from pallets. A mud kitchen usually has a surface for working on it, storage for tools, and a place where the mud mixes can be prepared.
For the next phase, construct the base. Start by standing up against two pallets to use them as the sides of your kitchen. Fasten them to each other with wood screws to keep them stable. A height that makes the kitchen easy to use should be around the waist. Then add a third pallet horizontally on top to be used as the work surface. It is important to fasten this pallet to place with several screws to prevent any possible movement or shaking.
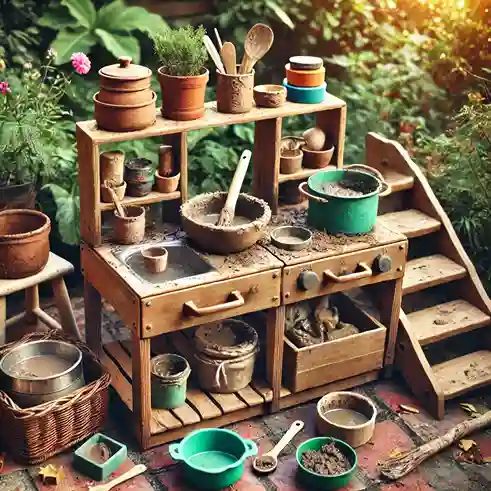
Once the base has been constructed, think about building features such as a sink and shelves. A sink can be placed on top by either cutting a hole into an extra pallet or securing a plastic container on top instead. Shelves can also be created by securing smaller pallets to the side at different points for easy storage of pans, pots, or any other play materials.
To finalize, anchor your mud kitchen where you want it to be in the garden. Make sure it is placed on leveled ground to form the ideal usable playing area. After the construction of the mud kitchen, apply UV protectant on the wood for enhanced durability. Then, the kids can be permitted to fully engage their imaginations in the mud kitchen plans from pallets and utilize it to get their hands dirty, making it an engaging outdoor experience.
Last Steps: Applying Paint and Decoration
A DIY pallet mud kitchen is not complete without the last two steps of painting and decoration which will help to complement the overall design and functionality. Paint selection is important here; use child friendly, non toxic and waterproof materials–Giving the kitchen the durability it needs in harsh weather conditions. Furthermore, these paints not only shield the kitchen from weather exposure but also perform its other crucial role of attracting children’s attention and persuading them to have fun in the mud kitchen plans from pallets.
When painting the wooden pallets, please ensure that all surfaces are smooth and splinter-free. It is also vital to use a primer, which is specifically recommended for outdoor use as well since it supports the paint and promotes an even surface and neat finish. Dried primer will then allow you to apply the particular colors of your choice. Choosing bright and happy colors will also enhance the encouraging atmosphere that is a necessary aspect when working towards enhancing creativity. The many different colors that are employed may also add to separately colored sections of the mud kitchen plans from pallets that are visually appealing to kids.
In case children do not prefer engaging in regular play, then they can personalize the area due to the appealing name tags that children would want to create. It could also come as a surprise that many children would prefer to create simple name tags and have it planned out due to the preference of taking ownership of the space around their active play. A good way of achieving that could be simple wooden pieces, making them into head chef or mud master name plaques could be crafted from leftover pallets and fixing them on children’s names would encourage creativity. Furthermore, you might want to add some colorful touch to the surrounding such as painted pebbles, patterned tiles or even decals that accentuate the child’s interests which would further engage them with the area.
Think about other interesting elements such as planters with herbs for children to have a sensory experience or chalkboards simply for scribbling or drawing. These features also promote pretend play whereby children may also become active participants when learning about how plants grow or when practicing their writing skills. In the end, the only requirement after a mud kitchen plans from pallets has been built is painting it and personalising it in any possible way to allow children to have a unique space to play in.
Integrating Sensory Play: Suggestions and Techniques: mud kitchen plans from pallets
Building a mud kitchen plans from pallets using pallets not only gives kids a chance to role play, but also provides opportunity to experience their senses. This is critical because sensory play for kids provides a means through which they can develop cognitively, enhance motor skills and promote creativity. If you want to enhance the advantages of sensory play, ensure that you provide some unique items that will allow the stimulation of different senses.
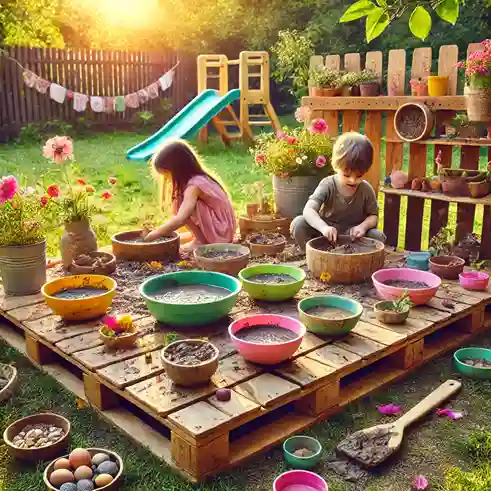
Sand is one of the best materials that are recommended to be used in the construction of a kindergarten mud kitchen. The kinesthetic qualities sand possesses enable kids to shape, form and even scoop which in turn helps in the development of fine movements and deeper understanding of space. To add more enhancement to the sensory play one can also consider placing a mud kitchen plans from pallets next to the sandbox this way it provides a different type of sensation. When sand is mixed with water it creates a very peculiar mixture that enables you to do even more experimenting.
Another key aspect is water play. For example, a small water station with buckets, cups, and various utensils can allow children to pour, splash and measure, and also, help in the development of issues more related to sensory and mathematical concepts. Additionally, consider including natural objects like leaves, stones, or even flowers to expose the children more with different textures, color or smell.
Spatulas, bowls, and spoons can become objects of construction when mud kitchen plans from pallets are built. They can be utilized to mix the mud and sand, or they can be part of the imaginary role-playing scenarios where children can use them as props. This will eventually allow the children to draft their own “recipes” using natural materials that will spur their creativity and use of language as well in describing their play.
Lastly, some plants or edible flowers can be added in which children would be able to smell and taste them. You are establishing a groundwork of rich exploratory learning that mothers and small children can engage with meaningfully.
Maintenance and Care of Your Mud Kitchen: mud kitchen plans from pallets
An important factor that contributes to the long life of your mud kitchen plans from pallets made out of pallets and any other pallets for that matter, is regular care and attention. Creating a washing plan that allows to remove any dirt and residual substances left over after play, is the priority now. With a simple solution of soap and water, it is very likely that any surfaces can be cleaned and made safe for future use. Trying to wash your fingers and hands particularly those parts which touch food such as mud pies or plants, removing any parts of plants should be the order of the day to keep away the pests.
Inspections should be carried out on a scheduled basis such as on a weekly basis, where you should check the mud kitchen plans from pallets for things such as exposed nails as well as rot, to minimize the risks present. Children would better be more careful when using splintered wood, as the damage it can cause is quite significant, once the edges are sanded off as well as the damaged parts with wood sealant, this allows the risk to be minimized. In addition, mention should be made when looking for pallets at the condition of the wooden pallets. In the event that wood is missing or rotting, it is highly likely that there are repairs that need to be conducted, such as repleting missing or damaged wooden parts so that they are usable and safe to use in future.
The weather in one or another way affects the condition of the mud kitchen hence sheltering it from outside exposure is a necessity. Applying a weatherproof finish over the surface make s it easy to protect the mud kitchen from wear and tear caused by moisture and UV deterioration over the years. Where feasible, remove occasional vessels or play materials and keep them indoors, for it expands their longevity. Protecting your mud kitchen plans from pallets from the harshness of weather and thunderstorms goes a long way in giving your child a friendly and secure area to play in.
Nevertheless, the necessity of periodical strategies and practices can never be negated; doing so guarantees not only the increased service of your mud kitchen plans from pallets, but also promotion of outdoor play. Following the recommended procedures and processes would mean the backyard adventure remains perfect for explorations and imaginations.
Conclusion and Motivation to Hoard the Resources: mud kitchen plans from pallets
In this segment of my presentation, I focus on palletunoemi with the aim of stressing the positives about enabling even a toddler an outdoor stop-le-mud kitchen plans from pallets environment. Such paleotelia activities definitely allow a child to grow free of imaginative constrains as contact with the nature always adds value to wellbeing. Young children, in essence, need very little instruction and therefore an imaginative kitchen sets the stage for unstructured free play, during which such children would get inspired, create their own narratives and more importantly, discover the world around them.
Building this one with the use and throw pallets and butchered wood is both inexpensive and ecologically friendly. Pallets which are mostly deemed as waste can be made into some beautiful wastage kitchen wet play structure. This diy is not just limited in terms of the construction of the building as a play area, but it also aims at developing this love of outdoor play and care of nature, in young children. The point is that such a construction is cheap, and in many places, the abundance of pallets means that the families need not put considerable financial spending and thus it becomes possible to encourage children to play outside the box of construction with so many advantages to mankind.
In addition, starting this journey can be an important bonding time for the families. By having the children get hands on in the building process, they learn important lessons about construction, teamwork, and taking ownership. The completed mud kitchen plans from pallets is not only a proof of one’s creativity but also offers a rich avenue of creative play for many years. We entice you to start thinking about where your next backyard trip will be. Collect the materials here, get the children into it and see their creativity spring up.
As you bring your adventure to life, it would be nice to know how and what your experiences have been. Perhaps you want to show your kids how to make mud kitchen plans from pallets or join like-minded people in creating and making stuff outside. Together we can lead in encouraging other people to do such works, cultivating the spirit of making, being creative and caring for habitable surroundings.