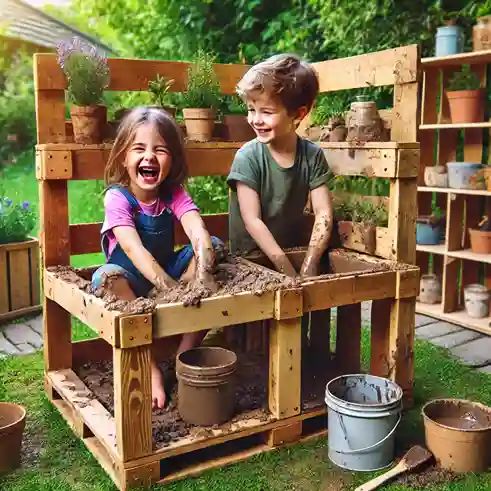
Outdoor plays are a very vital part of a child’s life. Creativity, even physical skills, and social bonding are developed. Among the fabulous ways kids can engage in sensory-rich outdoor activities is by a DIY Mud Kitchen with Pallets. These kitchens enable kids to mix mud with water and other natural elements while pretending to cook, experiment or run a restaurant. However, the price of a ready-to-assemble DIY Mud Kitchen with Pallets is pretty pricey. That’s where the pallet DIY mud kitchen with Pallets comes in—a cost-free, eco-friendly, and creatively really inspiring solution that is easy to build at home by parents and any other DIY enthusiast.
We’re going to get it deep into the top 5 DIY mud kitchen with pallets ideas that save you from expensive sets found in stores while allowing you to design something in your own unique way. This is how easy and simple materials like wooden pallets make a functional and fun outdoor play space for your kids.
Why DIY Mud Kitchen with Pallets?
Before we begin with the designs, we must acknowledge why a pallet mud kitchen is great:
It is economical to make a pallet mud kitchen with Pallets compared to buying a ready-made DIY Mud Kitchen with Pallets in the market. Pallets are either free or cheaply gotten from nearby organizations.
Reuse of Pallets Contributes to Environmental Sustainability: You are ensuring the environment is sustainable when you reuse pallet wood to make your outdoor DIY Mud Kitchen with Pallets. Pallet wood is strong and sturdy, suitable for outdoor use.
Customizable: A DIY project gives you the chance to create it to your specifications to fit the space you have available in your yard, from a small backyard to a football field-sized garden.
Creative Play: When you make a DIY Mud Kitchen with Pallets, you are able to bring creativity into the design and the play. You can include your children in the designing and building of the kitchen, hence developing teamwork and creativity.
Now, let’s take a peek at the top 5 DIY mud kitchen with pallets for inspiration to make that outdoor play area your children will surely fall in love with.

Simple Pallet DIY Mud Kitchen with Pallets for Small Spaces
One that is easy, using a pallet DIY Mud Kitchen with Pallets, will be suitable for anybody who has less space or who wants a quick and easy do-it-yourself project. The compact design doesn’t overlook whatever a child needs for creative outdoor play. The kit only requires one or two pallets for the purpose of building a functional mud kitchen which can include a sink to allow water pouring, a counter space for mixing, and storage shelves for various mud-making tools.
How to Build
Step 1: You start with splitting a pallet in half to become the basis of the kitchen.
Step 2: Attach the other half side-wise as the back of the kitchen, to which you can hang hooks or small shelves.
Step 3: Attach a plastic basin at the center to be used as a sink.
Step 4: Add small shelves or hooks for utensil storage on the back.
Why It Works for Small Spaces
This is also an amazing design for people with little space to spare in their garden or backyard. It’s actually pretty compact and uncomplicated but still has enough room for creative play. You can quite easily relocate it if the need arises.
Materials Needed
Two wooden pallets
A plastic basin for the sink
Hooks and nails
Outdoor paint (optional)
Time Needed
Approximately 3-4 hours
Cost
Under $50. It all depends on where you source your pallets, needless to say.
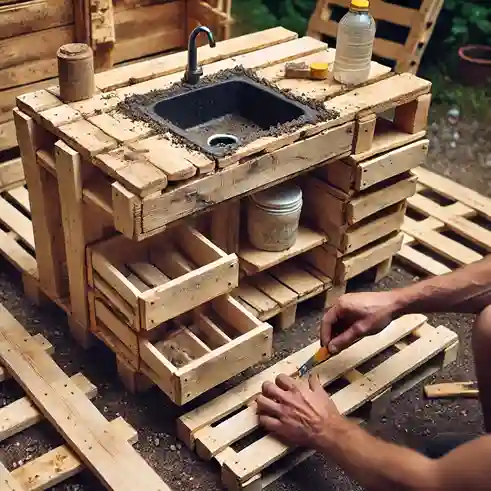
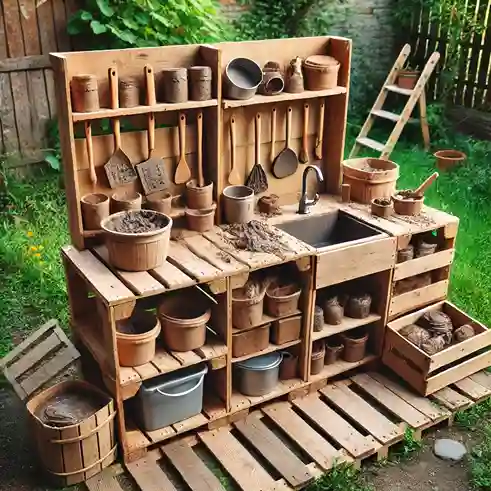
Rustic Mud Kitchen with Storage Shelves
It adds extra storage shelves to your pallet DIY mud kitchen with Pallets, thus making it much more functional. The design involves adding additional areas for storing pots, pans, and tools that the child would need to use in his or her activities; hence, it becomes a practical and organized setup for a longer time of playing.
How to Build:
Step 1: Take two full pallets. One is going to be your primary countertop, and the other is going to act as your backing.
Step 2: Cut further pallet slats and align them horizontally for storage shelves. You can also set up different shelf heights to accommodate various items.
Step 3: Make the sink more deep so that children can mix a larger quantity of mud with water.
Step 4: Paint or seal the kitchen using exterior-friendly paint or sealant for protection against rain and other extreme weather conditions.
Why It’s Great for Storage:
The added shelves will provide ample space for toys, kitchen utensils, and mud-mixing materials. It is ideal for kids that love well-organized play areas, as well as despising parents.
Materials Needed:
Three wooden pallets
Nails, screws, and a hammer
A deep plastic or metal basin
Outdoor-friendly paint or sealant
Time to Complete:
About 6-8 hours
Budget
About $75
Two-Level Pallet DIY Mud Kitchen with Pallets for Many Kids
If you have several children and more often than not do playdates, then you should create a two-level pallet mud kitchen. This design offers more space to play, so the activity isn’t crowded and some kids can, therefore, engage in it simultaneously.
How to Make Them
Step 1: Use two pallets and make the base and attach an extra pallet vertically for the backboard.
Step 2: Construct a second level of the same tall countertop, though using pallet slats. This upper level may become additional cooking area or even more storing space for supplies.
Step 3: Add at least two basins so that more than one child can “get their hands dirty” being the cook.
Add hooks for hanging pots, pans, or even toy aprons.
Why this is just so fantastic for multi-kids:
Here, the diy mud kitchen with pallets accommodates more children; therefore, the chances of a fight over space are reduced. Both levels are different, so kids can operate differently in various parts of the kitchen at the same time.
Materials needed:
Four Wooden Pallets
Two plastic or metal basins
Hooks, Nails, Screws, and other tools
Paint or Wood Sealant
Time to Complete:
Approximately 8-10 hours
Budget:
$100 to $120
Eco-Friendly Mud Kitchen with Planters
If you want to teach your kids the importance of sustainability and gardening, consider the use of planters in your DIY mud kitchen with pallets. This design will feature some small planters where your kids can grow herbs or flowers, making it both an exercise in the garden and imaginative play.
How to Make:
Step 1: Use two full pallets as the base and the backing of the kitchen. Make sure that the pallets are tightly attached to each other.
Make small cuts in a third pallet. Place both as planter boxes next to the kitchen.
Install a basin for the sink with small shelves containing gardening tools and utensils.
Fill the boxes with dirt, add herbs or flowers you can easily grow from the box, like basil or marigold, to your new planter boxes.
Why It Is Awesome For Gardening:
It challenges kids to play outside the DIY Mud Kitchen with Pallets as well, exposing them to more natural activities. The planters teach children the fundamentals of watering and looking after plants when growing something.
The planters add a beautiful display to the kitchen and are easily incorporated as a beautiful and functional decoration in any garden.
Materials:
Three wooden pallets
Soil, seeds, or small plants
Gardening tools (optional)
Basin, screws, tools
Time Needed:
About 6-8 hours
Cost:
$80 to $100
- Deluxe Pallet Mud Kitchen with Chalkboard
One perfect detail to complete the ultimate DIY project is a chalkboard in your pallet diy mud kitchen with Pallets. This board can be used by kids as they try to write recipes, draw pictures, or even create menus for their imaginary restaurant. That’s just another interactive element that really will enhance that play time.
How to Make:
Step 1: Use two big pallets to make the base and back of the kitchen. Connect with screws and nails.
Step 2: Attach the back of the kitchen with a chalkboard. You may either have a small chalkboard or you could paint an area on the wood with chalkboard paint.
Step 3: Make more storage shelves using pallet slats for storing chalk, erasers, and other kitchen utensils and gadgets.
Step 4: Add a large trough for the sink and paint or decorate the kitchen to make it more personalized.
Why It’s Awesome for Creativity:
The chalkboard takes DIY Mud Kitchen with Pallets creativity to a whole new level. Children will be able to pretend to run their own café, take “orders,” and even write daily specials. It’s a great fun feature that also encourages literacy and artistic expression.
Materials Needed:
Three wooden pallets
A small chalkboard or chalkboard paint
A large bucket
Nails, screws, and tools
Time Needed:
8-10 hours
Costs:
$100-$120
How to Build and Maintain Your Homemade Pallet DIY Mud Kitchen with Pallets
Once you have chosen a design, there are a few steps that will ensure that your homemade pallet DIY Mud Kitchen with Pallets is safe, sturdy, and withstand the elements.
- Use Weather-Resistant Materials
Since the DIY Mud Kitchen with Pallets will be outdoors, you also have to weather proof the pallets. You can apply sealant or outdoor-friendly paint that would prevent wood from getting moist from the rain, as well as the scorching rays of the sun. This way, it won’t warp or rot with time.
- Sand the Wood
Before constructing, sand the pallets off of all the ragged edges and splinters. This can be a process that should have been taken care of at the very beginning to prevent rough handling, more so where little children are going to spend some time in the kitchen. On flat wood surfaces, there won’t be injuries, which will make it easier to spend some more time in the kitchen.
- Fit All Thing Properly
All shelves and basins should be well secured to the frame. Chipped or loose items might be hazardous, making the kitchen less durable. Strong nails, screws, and brackets can keep any piece in place, and rough play will not be a problem.
- Involvement of Your Kids
Another great activity with the kids for a DIY Mud Kitchen with Pallets: let them be creative and involved in the design and construction process. Let the little ones paint the pallets, select the accessories or even plant herbs in the planters. This way, you make the result even more meaningful to your family.
Benefits of DIY Mud Kitchens with Pallets
Making a DIY mud kitchen using pallets has its several benefits:
Saves on cost: Using pallets in making your mud kitchen is very cost-effective. Most of the pallets can be acquired free, and one can source basins and chalkboards to be as cheap as possible.
Sustainability: Pallets are a material to make a DIY Mud Kitchen with Pallets, making them sustainable. Since it reduces wood from the landfill site and instills the thinking in people that they should reuse, sustainability is created.
Customization: A DIY project allows you to make it exactly as you want because you are not hiring someone else. If you want more storage, planters, or chalkboard, you can make whatever you want.
Creative Play: Dirt kitchens enhance imaginative play, sensing, and socialization. Kids can experiment with different materials, role-play, and even improve their life skills through play.
Conclusion
This is a DIY mud kitchen with pallets that is one option that provides your children with hours of outside fun while offering sustainability and creativity. With very simple designs for small spaces and deluxe types that come with chalkboards and planters, the opportunities are limitless. These top 5 DIY mud kitchen with pallets ideas will allow you to build a functional and fun outdoor play space for your children that will fire up their creativity while saving you money.
Be it a small-sized kitchen or a fully-fledged setup, these designs will provide your child with an invaluable opportunity to engage in creative, sensory-rich play. Gather your pallets, tools, and begin creating the ultimate pallet mud kitchen for your backyard today!
Frequently Asked Questions (FAQs)
- What is a DIY mud kitchen with pallets?
A pallet-made DIY mud kitchen is a children’s play outdoor kitchen from wooden pallets that helps create an imaginative space for mixing mud, water, and other natural materials while pretending to cook. Such mud kitchens are cost-effective and completely eco-friendly, and one can customize it according to space and need.
- Why should I build a mud kitchen made from pallets instead of buying one?
It is very cost-effective to build a mud kitchen by using pallets instead of purchasing one that comes with a set. This project also gives you the freedom to design and/or customize the appearance of your mud kitchen according to your space, feature your child’s favorite elements, while reusing materials in an eco-friendly manner.
- Where can I source pallets for a DIY mud kitchen?
Wood pallets can generally be sourced free or for next to nothing through local businesses, warehouses, or recycling centers. Several hardware stores or home improvement retailers may also have unwanted pallets. Be sure to look for clean, untreated, and safe pallets.
- What equipment will I need to construct a mud kitchen with pallets?
Some of the most basic tools you will need include a hammer, nails or screws, a saw, and a drill. You may also require some sandpaper to give that smooth edge of the wood, outdoor-friendly paint or sealant to protect it, and other items such as hooks, basins, or storage containers.
- How long does it take to make a DIY mud kitchen with pallets?
Depending on the design complexity, this do-it-yourself mud kitchen can be built in a few hours. Some advanced designs with added features like shelves, planters, or chalkboards may take up to 10 hours.
- Do the pallets need to be weatherproofed for outdoor use?
It is advisable to varnish the pallets if they are going to be placed outside, as it is probably to face rain, sunlight, and the other power elements of nature. Sealant or a nice layer of outdoor paint also helps preserve the wood from warping, cracking, or rotting, so the kitchen lasts way longer.
- Can I involve my children during the construction of the mud kitchen?
Absolutely! Involving your children will make the process more enjoyable and meaningful. They can assist in painting, choosing what to depict, or even helping with planting herbs if there are planters involved in the kitchen. That adds to their sense of ownership and pride over the end product.
- Is a mud kitchen safe for my kids?
Yes, if made with care. Always make sure the wood is smoothed down so it will not hurt their hands or have splinters, make sure all parts are securely fastened, and use only non-toxic materials. A mud kitchen made at home will be safe and enjoyable for the kids to play in the outdoors if done correctly.
- How do I maintain a pallet mud kitchen?
Cleaning the mud kitchen often after use keeps it in a good condition. Dishing up all the basins, surfaces to be wiped clean, and small accessories to be placed indoors prevents damage to them. From time to time you will have to apply weatherproofing treatments as well for protecting the wood.
- What is the benefit of a mud kitchen for children?
These mud kitchens promote imaginative play, sensory exploration, and social interaction. They also develop the child’s motor skills as well as problem-solving while exercising creativity skills. Children learn different things playing with natural materials like mud and water for tactile learning as well as outdoor experiences.