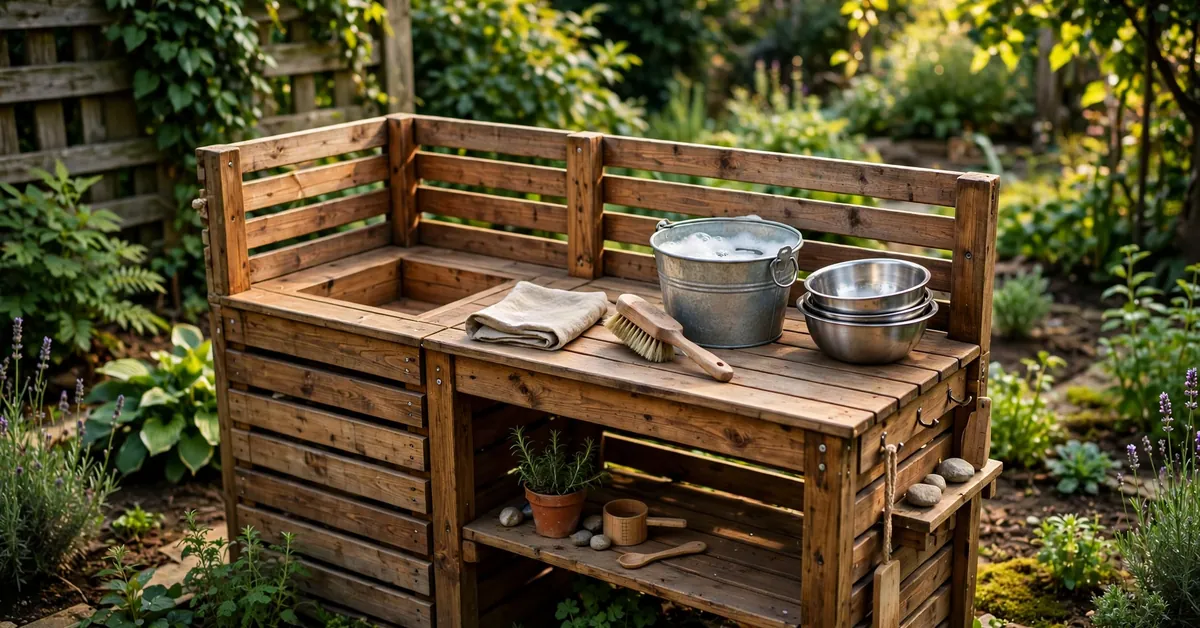
Our first mud kitchen nearly died in its second year. Not dramatically — it just went quietly downhill: green film on the worktop, a wobble in one leg, hinges stiff with rust, a smell about the water container that nobody wanted to investigate. By spring it looked like something abandoned in a wood. One Saturday of unglamorous maintenance brought it back, and it’s still in service now.
A wooden mud kitchen outdoors is like decking or a garden bench: it doesn’t need much, but it needs it little and often. This is the routine that works — five minutes weekly, an hour a season, half a day once a year — plus the repairs that actually come up, honest notes on rot (the one real killer), and how to store the whole thing through winter so March starts with a working kitchen instead of a project.
The Two Routines (and How They Differ From Safety Checks)
This site already has a mud kitchen safety checklist, and the two routines overlap a little — deliberately. The difference is the patient: the safety routine is about the child (fresh water, clean utensils, washed hands). This one is about the kitchen itself — the wood, the fixings, the moving parts. Do them on the same day and they take ten minutes between them.
Weekly: Five Minutes That Prevent Everything Else
- Empty every drop of water. Bowls, sink, jugs, the reservoir — tipped out onto a bed or the base of a tree. Standing water is what turns a kitchen green, smelly and mosquito-friendly, and it’s what freezes and splits containers in winter.
- Scrub the sink bowl and worktop with a stiff brush. Mud left to dry in the grain is what makes a worktop permanently grubby rather than honestly muddy.
- Check the standing patch. Sweep or rake the area in front; it’s where spills, dropped screws and the odd sharp stone collect.
- Containers upside down or lidded. Anything that can hold rain gets stored so it can’t.
That’s the whole weekly list. If you do nothing else in this article, do this.
Monthly in Season: The Fixings Round
Weather works on a mud kitchen constantly: wood swells and shrinks, screws loosen, legs settle unevenly into the ground. Once a month while the kitchen is in use:
- Push test: shove the frame from the side and front. A slight flex is normal in a light frame; a rock or a creak means a fixing has gone. Tighten every screw you can see — two minutes with a driver.
- Protruding hardware: run a hand over edges for screw heads and nail points that have worked proud of the wood. Tighten, punch in, or replace. (This is also a safety item — it’s in the safety checklist too, because it matters twice.)
- Hinges and lids: open and close everything. Stiff hinges get a drop of oil; a lid that slams gets a felt pad or comes off entirely — ours did, in year two, and nobody has missed it since.
- The water system: flush the container and any tubing; a green tinge inside means algae, which means a scrub with a bottle brush and a proper dry-out. Pump and tap mechanisms get the detailed treatment in my mud kitchen with working tap guide.
Wood Care: The Annual Hour That Adds Years
Cleaning off the green
Algae and mildew film is cosmetic at first and structural eventually — it holds moisture against the wood. Scrub it off with a stiff brush and warm water with a splash of washing-up liquid; stubborn patches come off with a vinegar solution. Avoid pressure washers on soft wood: they shred the surface fibres and the wood goes rougher and greener faster afterwards. Let it dry fully — a full sunny day — before treating.
Sanding
Rough patches, splintery edges and raised grain get 120-grit sandpaper, five minutes at a time, as you find them. Pallet wood needs this most and most often — it’s the price of the bargain, and it’s in the build guides for a reason.
Oil or paint? The honest answer
- Exterior wood oil (child-safe once cured): my default. It feeds the wood, doesn’t peel, and re-coating is a wiped-on half hour with no sanding back. Expect to re-oil once a year, ideally at the spring refresh.
- Exterior paint: better colour, more work. It will crack and peel outdoors in two to three years and then needs sanding before repainting. If you love the colour, accept the cycle.
- Nothing at all: untreated pine or pallet wood greys and slowly rots — fine for a kitchen you expect to last two seasons, a waste of a good build otherwise. Cedar and larch are the honorable exceptions; they weather grey and last.
Whatever you use, check the tin says suitable for children’s play equipment / toys once cured, and let it cure fully before the chefs return.
Rot: Spotting It, and the Two Fixes That Matter
Rot is the only thing that truly kills a mud kitchen, and it starts where water sits: feet and end grain. Prevention beats repair by a mile:
- Get the feet off the soil. Stand the kitchen on pavers, bricks or plastic feet caps so no leg end sits in damp ground. This single change is worth more than any treatment you can buy — legs standing on patio or stone rot at a fraction of the speed.
- Seal end grain. The cut ends of legs drink water. An extra coat of oil or exterior glue-and-oil on the feet at build and refresh time is five minutes well spent.
If you find rot — wood that a screwdriver pushes into easily, soft and dark — the honest options are: cut it out (a small rotten section of a non-structural board can be cut back to sound wood and patched or the board replaced entirely; legs and frame members are cheap to swap one at a time), or accept and plan (a frame with rot in two or more legs is at the end; salvage the sink, hooks and hardware for the next build, they’re the expensive bits). Wood hardener products exist and will buy a season on surface rot, but they don’t restore strength — don’t let a child climb on a hardened-but-rotten frame.
Rust gets the same practical treatment: wire-brush it off hinges and screws, and when you replace hardware, buy stainless or coated exterior screws. The extra cost is pennies and it’s the last time you’ll touch them.
Winter Storage: The November Half-Hour
You don’t need to dismantle the kitchen for winter. You need to do this:
- Empty and dry everything — every container, the sink, the reservoir, and drain pumps and tubing (water left in a pump body freezes and cracks it).
- Bring the small stuff in: utensils, fabric items, pump and tap fittings, and anything with batteries go to the shed or garage. These are the parts that vanish, crack or corrode over winter.
- Cover the frame — breathable, not sealed. A tarp tied so air moves a little, or a breathable furniture cover. Plastic sheeting sealed tight traps condensation and grows mildew against the wood; the green spring discovery is usually this, not the weather.
- Feet up, still: if the kitchen stands on soil, winter is when you slide the pavers under the legs.
- One coat of oil before covering is the pro move if the autumn was wet — treated wood sheds a winter far better.
If you’re short on space and the kitchen is small, the shed or garage roof-over version is simply all of the above indoors — but honestly, a covered frame on pavers winters outside perfectly well in most climates. Ours has done four winters that way.
The Spring Refresh: Half a Day, Once a Year
This is the maintenance that makes people ask if it’s a new kitchen:
- Uncover, and scrub everything — frame, worktop, sink, containers — with brush and warm soapy water. Dry in the sun.
- Push test and fixings round; replace any suspect screws with stainless.
- Sand rough patches; spot-treat or full re-oil.
- Flush and scrub the water system; check pumps, taps and seals before the first fill.
- Restock the ingredients and tools — the full list is in my mud kitchen setup guide, whose two-minute reset routine keeps it that way.
- Check the standing patch: fresh bark or a hosed patio, soak-away clear.
Done in a morning, with the small helpers “helping”, and the kitchen is ready before the season’s first warm weekend rather than after it.
Repair or Replace? The Honest Line
Repair while it’s one thing at a time: a leg, a board, a hinge, a sink. Replace (or rebuild) when two or more structural members are rotten, when the frame racks even after tightening, or when the worktop itself is soft. Everything else — and it’s a longer list than most people expect — is maintenance, not decline. A well-kept wooden mud kitchen should give five-plus years easily; I’ve seen pallet builds, oiled yearly and standing on stone, outlast expensive bought ones left standing in wet grass. The difference was never the price. It was the half-hours.
FAQs
How often should you oil a wooden mud kitchen?
Once a year for exterior wood oil — the spring refresh is the natural moment — and before winter covering if the autumn has been very wet. Painted kitchens need repainting every two to three years once the finish starts to crack. If water stops beading on the worktop and soaks straight in, the finish has gone and it’s time, whatever the calendar says.
Can you leave a mud kitchen outside all winter?
Yes — ours has wintered outside for four years. Empty and drain everything, bring utensils and pump/tap fittings indoors, stand the legs on pavers rather than soil, and cover with something breathable rather than sealed plastic. The two real winter killers are standing water freezing in containers and condensation trapped under a sealed cover, and both are avoidable in half an hour.
How do I stop a mud kitchen going green and mouldy?
Green film is algae growing where moisture lingers, so the fixes are all about drying: empty water daily, scrub the worktop weekly, position the kitchen where it gets some sun and air movement, and never seal it under plastic for months. Existing green scrubs off with a stiff brush and warm soapy water (vinegar solution for stubborn patches) — avoid pressure washers on soft wood, which shred the surface and make regrowth faster.
How long should a wooden mud kitchen last?
Five years and more with basic care: feet off the soil, an annual oil, screws tightened monthly in season. Left standing in wet grass untreated, a softwood kitchen can be rotten at the feet in two to three years. The frame usually fails at the legs first, which is why leg care and pavers matter more than any product.
What is the best cover for a mud kitchen?
A breathable cover — a purpose-made breathable furniture cover, canvas, or a tarp rigged with an air gap — sized to reach the ground and tied against wind. Avoid wrapping tightly in plastic sheeting: it traps condensation against the wood and you’ll uncover mildew in spring. Whatever you use, empty and dry the kitchen first; a cover over wet contents preserves the wet.