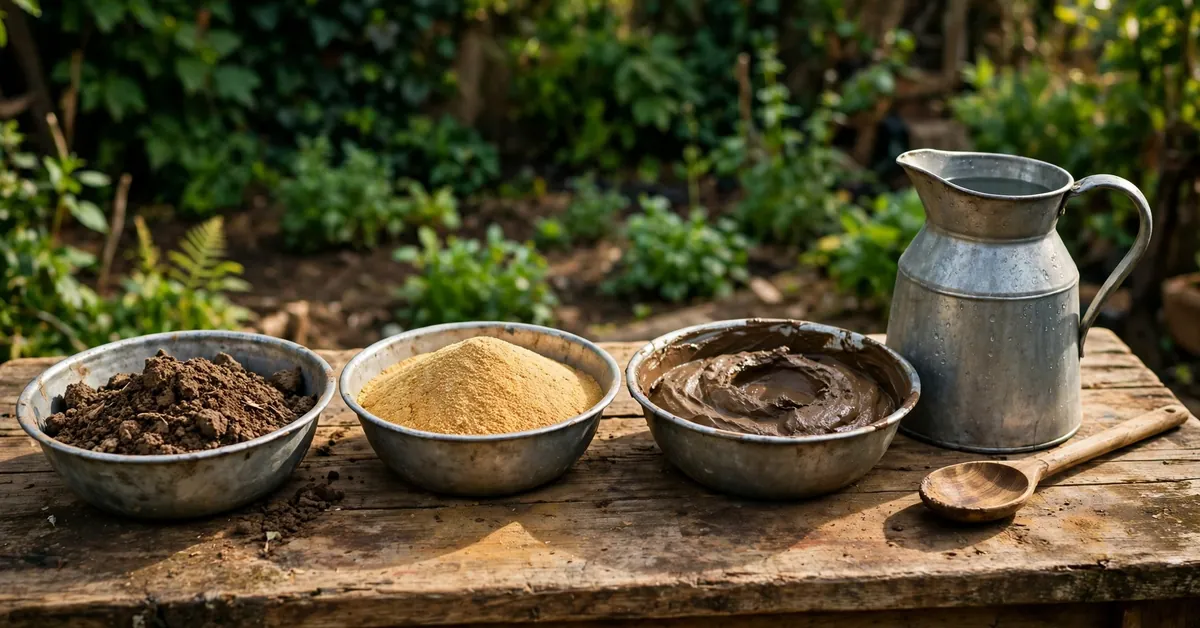
Every mud kitchen post on this site talks about the kitchen. Almost nobody talks about the mud — which is odd, because the mud is the main ingredient, the thing small hands are actually in for hours, and the difference between pies that hold their shape and a grey soup nobody wants to touch is entirely in the mix.
I learned this the unglamorous way. Our first batches were made with whatever came out of the nearest flower bed: one week a sticky clay that glued itself to everything including the child, the next a gritty dust that wouldn’t hold a pie for ten seconds. It took a season of fiddling — ratios, sieves, a sand experiment, one bag of bought topsoil — to land on the simple system below. Here it is, so yours takes a weekend instead.
What Mud Actually Is (Thirty Seconds of Theory That Pays Off)
Mud is soil plus water, and soil is a mixture: mineral particles (sand, silt and clay, in that order of size), a little organic matter, and air. The proportions decide everything:
- Clay-heavy soil makes smooth, sticky, sculptable mud that holds detail — and glues to hands, clothes and hair, and dries like cement.
- Sandy soil makes crumbly, gritty mud that won’t hold a shape but drains beautifully and washes off easily.
- Loamy soil — the balanced middle most garden topsoil sits in — makes the mud you actually want: packs, holds, releases, rinses.
You rarely get to choose your garden’s soil. The good news: you can adjust any of them with two cheap levers — sand and bought topsoil — as the fixes below show.
Choosing the Soil: What to Dig, What to Buy, What to Avoid
Garden topsoil from a bed you know is the default, and it’s free. Dig from an established bed or the compost corner, not from under a hedge that’s been a dumping spot for a decade. Pick out stones, roots and the inevitable Lego.
Bought topsoil or plain compost is the fix for bad gardens — pure clay, pure sand, rubble-filled new-build soil, or any patch whose history you don’t trust. A bag costs about $5 / £4 and fills a mud supply tub generously. This is also the right call if your soil’s history is a genuine question (old paint, industrial past) — the full reasoning is in my mud kitchen safety checklist, but the short version is: known soil, lidded tub, hands washed after.
Avoid:
- Soil from freshly manured or fertilised beds — wait until it’s weathered into the garden, or just take from elsewhere.
- Any patch cats use. If in doubt, that area is retired; the lidded-tub system below removes the issue permanently.
- Potting compost straight from the bag for toddlers. It’s mostly fine for older children, but bagged composts often contain perlite (the white bits), slow-release fertiliser granules and occasionally sharp bark — none of which belong in a mouthing two-year-old’s play. Sieve it or choose plain topsoil for the under-threes.
The Basic Recipe
For a washing-up bowl of good all-purpose mud:
- 3 parts soil — sieved if you can face it (a garden sieve or an old colander; two minutes that transforms the texture, especially for younger children).
- 1 part play sand (optional but recommended — see below).
- Water, added gradually — start with about half a part, mix, then add a splash at a time. You can always add water. Removing it means adding soil or waiting, and waiting is where sessions die.
The squeeze test tells you when it’s right: grab a handful and squeeze. Perfect pie mud holds together in a lump when you open your hand, keeps a rough fingerprint, and doesn’t ooze water between your fingers. Oozing = too wet (add soil). Crumbling apart = too dry (add water, a splash at a time, and give it two minutes to drink).
Make the batch in the morning and let it rest ten minutes if you can — fresh-mixed mud improves as the water distributes, like pastry. The mud supply for the week lives in a lidded tub at the kitchen alongside the rest of the kit on my what to put in a mud kitchen list: cool, damp, ready.
The Sand Question
Play sand is the mud-maker’s secret weapon, and a bag lasts a season:
- Texture: a part of sand to three of soil takes the glue out of clay-heavy mud and gives sandy mud something to bind to.
- Better pies: sanded mud releases from moulds and buckets cleanly instead of suctioning itself in forever.
- Colour and feel: it lightens dark soil and makes the mix feel like the stuff children instinctively prefer — closer to wet beach sand than to potting soil.
Use washed play sand (sold for sandpits), not builder’s sharp sand, which is gritty with sharp grains and sometimes dusty with cement residue from the yard. Rinse a handful: play sand runs clean.
Four Consistencies for Four Kinds of Play
One mix does not fit all. Once the basic batch exists, children adjust it themselves with a jug of water and a trowel of dry mix — but it helps to start them near the target:
- Pie mud (firm): the squeeze-test standard above. Holds moulds, stacks, “bakes”. This is the default.
- Soup and café mud (wet): basic mud plus water until it pours slowly off a spoon. For stone soups, teas and café drinks — most of the mud kitchen recipes on this site run on this consistency.
- Potion mud (runny): thinner still, almost a slurry, so petals, glitter-substitutes (flower heads, crushed chalk) and colour show up in it. Lives in jugs and bottles, not bowls.
- Brick mud (stiff, clay-leaning): basic mud with extra soil and less water, packed into small boxes or ice-cube trays and left in the sun. By afternoon: bricks. By the weekend: a wall. This is the gateway to construction play for the five-plus crowd, and it is weirdly compelling.
Colour and Scent: The Natural Add-Ins
Plain mud is brown, and brown gets old. The additions that work:
- Cocoa powder — a spoonful turns a bowl into “chocolate” mud, darker, richer-smelling, and the gateway to every cake game. (Also the taste-safe colouring, if a little gets tasted.)
- Crushed chalk — white or coloured, stirred in for pale, pastel muds and “icing”. Cheap, washes away, doubles as pavement art afterwards.
- Petal and leaf confetti — colour that floats in potion mud and presses into pie tops.
- Coffee grounds — dark, fragrant, and a genuinely different texture; ask any café for a bag of used grounds, they’re usually glad.
- Turmeric and paprika — real colour, real staining. Older children, dark clothes, outdoors only. You have been warned by a man with a yellow patio.
Storing Mud (and Knowing When to Retire It)
Made mud keeps well if you treat it like sourdough starter rather than dirt:
- Lidded tub, always. Keeps cats out, rain out, and moisture in — the lid is doing three jobs.
- Keep it just damp. A cloth laid over the surface, or a splash of water when you pass, stops the top crusting. A dried-out batch isn’t dead, though: break it up, re-wet, rest ten minutes, and it’s mud again.
- Smell is the retirement test. Good mud smells earthy, like rain on soil. A sour, stagnant smell means it’s gone anaerobic (usually a too-wet batch left sealed in heat) — that batch goes on the garden and you start fresh. In practice, a weekly-used tub gets topped up with fresh soil often enough that full retirement is a couple-of-times-a-summer event.
There’s also a dry-store version worth knowing about: a second tub of pre-mixed dry soil and sand (three-to-one, sieved, bone dry) kept in the shed. Scoop out what a session needs, add water in the bowl, and the leftover wet mud goes back on the garden rather than into storage. Wet mud stores well for weeks; the dry mix stores forever, and it’s the fastest route to a spontaneous ten-minute session because there’s nothing to dig, sieve or hunt for.
Troubleshooting: The Four Failures and Their Fixes
- Too sticky (glues to everything): clay-heavy. Work in play sand a handful at a time, and let it rest. A dusting of dry soil on hands before play helps the chefs, too.
- Too crumbly (pies collapse): too dry, or too sandy. Add water a splash at a time and rest it; if it still won’t bind, stir in a trowel of your richest, darkest bed soil — that’s where the clay and silt live.
- Too gritty (nobody wants hands in it): stones and coarse sand. Sieve the batch. Two minutes, transformative, and the bits you remove make excellent “ingredients” for the dry store.
- Grey and dusty (looks dead, plays dead): that’s subsoil or worn-out mix. Subsoil — the pale layer under the topsoil — has no organic matter and makes miserable mud; dig shallower, or replace with bought topsoil. A tired old batch improves with a third fresh soil stirred in.
FAQs
What is the best soil for a mud kitchen?
Ordinary garden topsoil from a bed you know — loamy, dark, sieved of stones — is the best base there is, and it’s free. If your garden soil is pure clay, pure sand, rubble-filled or of unknown history, a $5 / £4 bag of plain topsoil in a lidded tub gives you known, consistent mud all season. Avoid subsoil (the pale layer underneath), freshly manured beds, and any patch cats use.
Can you use potting compost for mud kitchen mud?
Yes for older children — it makes dark, light mud that mixes easily — with two caveats. Sieve out perlite and fertiliser granules, and don’t use it for toddlers who still mouth everything, since bagged compost can contain both. Plain topsoil is the safer default for under-threes, and the cheaper one at tub scale.
How do you make mud less sticky?
Add washed play sand, a handful at a time, until a squeezed handful holds together without gluing itself to your palm — about one part sand to three parts soil fixes most clay-heavy gardens. Resting the mix for ten minutes after adjusting helps more than people expect. Sticky mud is a clay problem, and sand is the answer every time.
How long can you keep a batch of mud?
Weeks, kept in a lidded tub and just damp — top it up with fresh soil as levels drop and it effectively renews itself. Retire a batch when it smells sour or stagnant rather than earthy (a too-wet batch sealed in warm weather), or when it’s become mostly grit and dust. Dried-out mud isn’t finished: break it up, re-wet it, rest it, and play on.
Is play sand safe to mix into mud kitchen mud?
Yes — washed play sand sold for sandpits is the right product, and it’s what I use. Avoid builder’s sharp sand: the grains are sharp rather than rounded, and it can carry dust and residues you don’t want in hand-play. If a handful of your sand rinsed under a tap runs clean and feels smooth, it’s the right stuff.