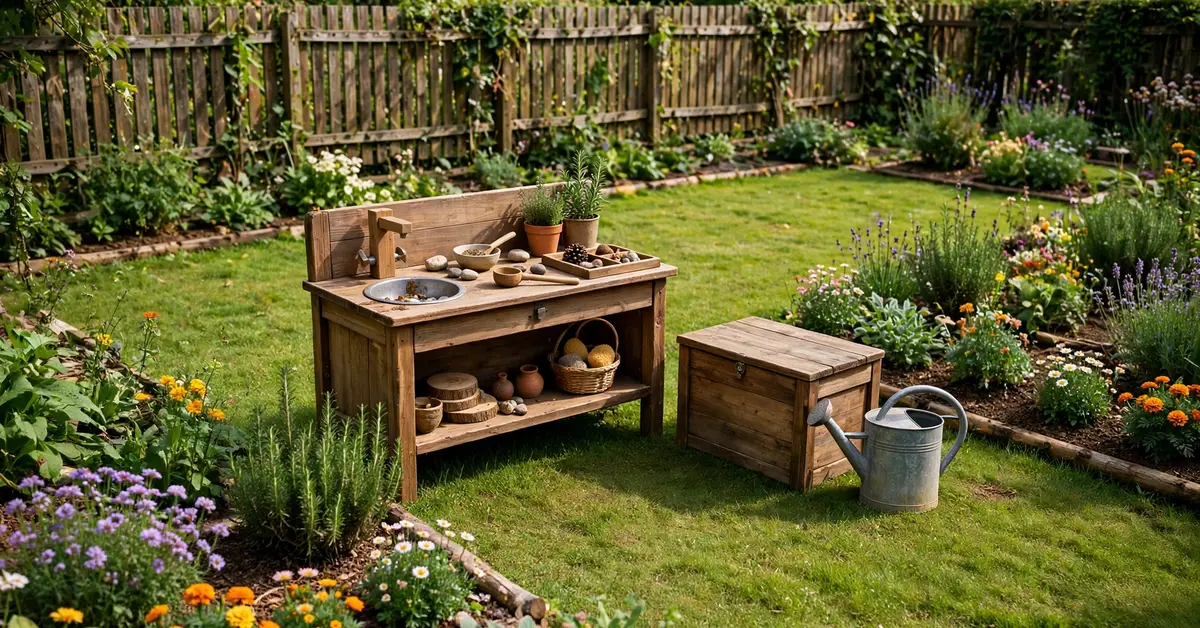
Two families can buy the same mud kitchen and end up with completely different results — one in daily use, one gathering spiders by October. The difference is rarely the kitchen. It’s where it stands, what surrounds it and how the space is arranged. Setup is the unglamorous half of the project, and it’s the half that decides everything.
I know this because our first kitchen stood in the wrong place for a full season: a beautiful build, in a shady corner behind the shed, facing a fence, forty paces from the tap. It was used perhaps six times. We moved it eleven metres — to the edge of the patio, in morning sun, in sight of the kitchen window, six steps from the outdoor tap — and it became the most-used thing in the garden. Nothing about the kitchen changed. Everything about the setup did.
Here’s how to arrange yours, whether it’s arriving this weekend or already standing in the wrong corner.
Step 1: Pick the Spot — Five Things That Matter
Sight-lines from the house
Put it where an adult can see it from wherever adults actually are — the kitchen window, the patio chairs, the back door. Not so you can supervise every stir, but so a child feels connected and you can glance up from a cup of tea. A mud kitchen a child has to play at alone, out of sight, gets a fraction of the use. This single factor beat every other one in our garden.
Sun and shade
Morning sun and afternoon shade is the dream, but take what you have with one rule: avoid full-day baking sun (water vanishes, mud turns to brick, children overheat) and avoid permanent deep shade (everything stays damp, grows algae and feels uninviting by autumn). Under a tree’s dappled edge, or on the side of the garden that loses the sun after lunch, is usually right. A cheap shade sail over the top is a legitimate fix for a sun-trap garden — about $20–$30 / £15–£25 and twenty minutes to rig.
Distance to water
Every litre your child uses arrives by bucket unless the kitchen is near the tap. Six to ten paces from the outdoor tap or water container is the sweet spot: close enough for a five-year-old’s supply run, far enough that the tap area and the mud area don’t merge into one swamp. If the tap is far away, a lidded water container stationed at the kitchen (filled by an adult each morning) closes the gap — more on the water station below.
Ground surface and drainage
The square metre in front of a mud kitchen receives more water than any other patch of garden. Plan for it:
- Grass works if the spot drains; on heavy clay it will churn into a mud slick by June. Play bark over the standing area (a bag or two, $8–$12 / £6–£10 each) absorbs splash and tops up cheaply once a year.
- Pavers or a patio edge is the low-maintenance winner: mud hoses off, feet stay cleaner, nothing to replace. Standing the kitchen at the patio’s edge with its “floor” as patio is the arrangement I’d choose again.
- Gravel drains beautifully and hoses clean, but small gravel migrates into every pot and is miserable in bare feet. Large, flat stepping stones over gravel are the compromise.
- Whatever you choose, give spilt water a route away: a very slight slope, or a shallow gravel soak-away pit behind the kitchen (a 40 cm hole filled with stones) for the bucket-emptying habit.
Near the mess-tolerant zone
Muddy footprints travel about ten steps in every direction. Put the kitchen near flower beds that appreciate spare water and muddy hands — not beside the back door, the pale patio furniture or the route to the washing line. Think of it as zoning: the kitchen belongs to the garden’s working end, not its show end.
Step 2: Arrange the Zones
Inside the kitchen’s footprint, arrangement matters as much as it does in a real kitchen. Four zones, left to right for a right-handed child (mirror it for a left-hander):
- The wet zone — sink, water container or pump, jugs. Put this at one end, so splashes have a home and the dry stores don’t live in the splash radius.
- The worktop — the main empty stretch of bench, kept clear. This is where mixing and making happen; if it fills up with storage, play migrates to the ground.
- The “oven” and serving end — the flat space, shelf or upturned crate where finished creations are displayed and served. Children take this end seriously out of all proportion.
- Storage underneath and behind — hooks on the backboard for the daily tools, tubs underneath for dry ingredients, a draining crate for the rest.
Keep the walkway in front completely clear: the chef’s runway between kitchen and “customers” is high-traffic and usually involves carrying a full bowl with both hands.
Step 3: Get the Heights Right
A badly sized kitchen arranged beautifully is still a badly sized kitchen. The short version: the worktop should sit just below your child’s elbow height — roughly 40–45 cm for a two-year-old, 50–55 cm for a four- to five-year-old, and up to 60 cm for older children, with the sink rim a touch lower and shelves reachable without climbing. The full age-by-age measurements, and how to adapt a kitchen as they grow, are in my mud kitchen dimensions guide — measure your actual child rather than trusting any chart, mine included.
Two arrangement points the charts don’t cover: leave toe room at the base (a small recess or just an overhanging worktop edge) so children can stand close without leaning, and keep the heaviest items — water containers especially — where their weight is over the frame’s legs, not cantilevered off a shelf’s edge.
Step 4: Set Up the Water Station
Where the water lives at the kitchen is a setup decision, separate from which system you chose. The rules that work:
- One step, not a trek. The container, pump or hose end belongs at the kitchen itself, reachable from the worktop without the child crossing the garden with a full jug.
- At the wet end, over drainage. The fill point goes above the sink or at the wet-zone end, so every spill lands where spills already live.
- Adult-refillable. You will refill it more than you expect; position it so an adult with a hose or kettle reaches it without stepping through the play zone.
- Off the ground for toddlers, on a shelf for older children — high enough to pour from, low enough to be safe when full and heavy.
If you haven’t chosen a water system yet — tap container, pump, gravity feed, hose or plumbed — the honest comparison of all five, with costs and the swamp-avoidance drainage maths, is in my mud kitchen with running water guide.
Step 5: Storage That Keeps It Alive
Covered in depth in my what-to-put-in-it list, but the arrangement principles belong here too: hooks at child height on the backboard for the five most-used tools, a draining crate (holes, always holes) for everything else, lidded tubs for dry stores underneath, and a two-minute end-of-session tidy that is the child’s job. A setup that resets itself in two minutes is a setup that gets used tomorrow.
The Small-Garden (and Balcony) Variant
Everything above shrinks. What survives the shrinking:
- Footprint: a 80–100 cm kitchen against a wall or fence rail. One zone merges into another, and that’s fine.
- Surface: a washable mat, a large shallow tray under the whole setup, or the corner of a patio — the tray version means the entire kitchen can be hosed down and the water carries away.
- Water: a tap container only. Hoses and big reservoirs are the first casualties of small spaces, and gravity never complains.
- Storage: one crate, wall hooks, and the discipline of everything living in them. In a small space, storage isn’t a zone — it’s the whole game.
- Neighbours: a balcony kitchen sits against the rail with the splash zone inward; a watering-can fill in the morning replaces the tap run.
The 20-Minute Setup Check
Before the first session — and once a season after — walk this list:
- Can I see the kitchen from where I’ll actually sit?
- Does it get some shade in the afternoon?
- Is water within ten paces, or stationed at the kitchen?
- Where does a spilt bucketful go? (If the answer is “the back door mat”, move something.)
- Is the worktop clear, the wet zone at one end, storage underneath?
- Is the worktop at or below elbow height for my child?
- Full water container: is it secure, over the frame’s legs, and can an adult refill it easily?
- Is there a clear runway in front for a child carrying a full bowl?
Eight yeses and you’re done. In our garden, moving the kitchen and running this list took one Saturday morning — and undid a season of wondering why nobody played with the beautiful kitchen behind the shed.
FAQs
Where is the best place to put a mud kitchen?
Within sight of the house (kitchen window or patio), in morning sun with some afternoon shade, within about ten paces of a water source, and on a surface that drains — a patio edge or bark over grass. The spot matters more than the kitchen: the same build gets ten times the use in the right place.
Should a mud kitchen go on grass, patio or gravel?
A patio edge is lowest-maintenance — mud hoses off and nothing wears out. Grass works if it drains, with play bark on the standing patch to prevent a slick. Gravel drains well but migrates and is hard on bare feet; large flat stones over it are the compromise. Avoid anywhere water pools.
How do I stop the mud kitchen area turning into a swamp?
Four things: catch water in the sink bowl and empty it onto beds or trees, give overflow a gravel soak-away pit, put a draining surface (pavers or bark) where children stand, and rotate where buckets get emptied. Most swamps are one patch receiving every litre, every day.
My garden is tiny — can a mud kitchen setup still work?
Yes. Go small (80–100 cm against a wall), use a tap container for water, put a large shallow tray or washable mat underneath, and make one crate plus wall hooks the entire storage system. Small-space setups live or die on storage, not size.
How long does it take to set up a mud kitchen properly?
Arranging an existing kitchen — choosing the spot, levelling, zones, hooks, water station — takes one to two hours, most of it deciding. Moving a kitchen from a bad spot to a good one took me a single morning and was the highest-value morning I’ve spent on ours.