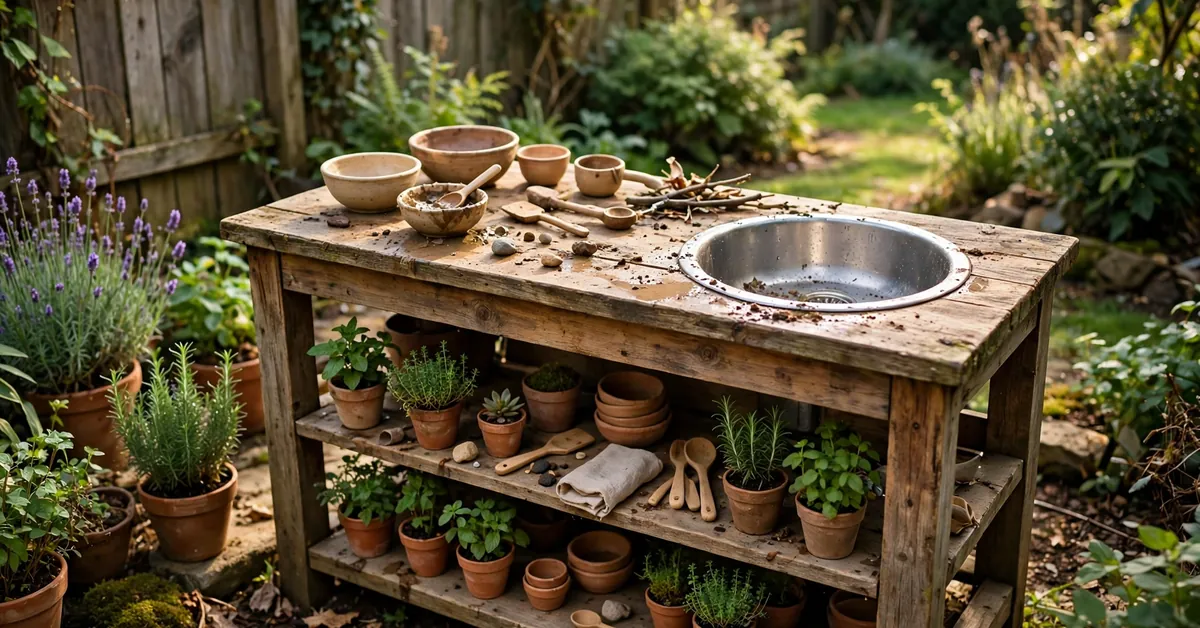
Our second mud kitchen was never meant to be a mud kitchen. It was my wife’s potting bench — a solid timber thing she’d used for seedlings for years — and when she upgraded to a greenhouse bench, the old one sat against the fence for a spring, slowly going green. Our youngest, then three, started standing on a crate in front of it, filling its pots with soil and “cooking”. The conversion took one Saturday, cost very little, and honestly produced a better kitchen than the flat-pack one we’d started with.
A potting bench is the closest thing the garden centre sells to a mud kitchen that hasn’t admitted it yet: a slatted worktop at a working height, a lower shelf for storage, and uprights at the back that are crying out for hooks. There is exactly one real job in this conversion, and it’s the one people skip. Here it is, honestly.
Why a Potting Bench Works (and the One Thing Wrong with It)
The good news first:
- Slatted worktop. Mud and water fall through the gaps instead of pooling. A solid worktop on a children’s kitchen is a swamp in waiting; slats drain themselves.
- A proper lower shelf. Potting benches come with a full-width lower shelf rated for bags of compost — more storage, and sturdier storage, than most purpose-built mud kitchens offer.
- Back uprights and rails. The shelf unit at the back of a potting bench is where seed trays lived. It’s also exactly where café signs, hooks and a row of utensils want to live.
- It’s built for outdoor life. Timber chosen to stand outside full of wet soil is timber that will shrug off mud kitchen duty — and second-hand ones are everywhere, because gardeners upgrade.
Now the catch, and it’s the whole conversion: a potting bench is the wrong height. It’s built for a standing adult, with a worktop around 85–95 cm. A mud kitchen worktop should sit just below your child’s elbow — roughly 40–45 cm for a two-year-old, 50–55 cm at four or five. The full measurements by age are in my mud kitchen dimensions guide. Everything else in this project is decoration. Cutting the legs down is the conversion.
What to Look For (New, or Better, Second-Hand)
Second-hand is the sweet spot here — benches appear constantly on selling groups in spring, usually $30–$60 / £25–£50 against $90–$180 / £70–£140 new. Either way, check:
- Solid timber, not thin slats stapled to hope. Pine and acacia benches are common and fine. Pick it up by one corner and twist gently: a good bench barely moves. A racky one will only get worse full of water.
- A slatted or replaceable worktop. You want slats you can lift out (for the sink trick below) or a worktop you don’t mind cutting a hole in.
- A lower shelf that’s actually supported on rails, not hanging from the legs.
- Height in the legs. You need enough leg below the lower shelf to cut down and still have clearance — about 20 cm minimum under the shelf after cutting.
- Avoid benches with a mesh metal worktop (mud falls through, everything smaller than a bowl is lost forever) and anything with peeling coloured paint of unknown age on the worktop itself. Old paint plus small children plus mud pies deserves a sand-back and a fresh coat, which is fine — just know it’s in the job list.
You Will Need
- The bench (above).
- A washing-up bowl or cheap stainless sink bowl — measure before you cut anything; a standard washing-up bowl is about 32 × 26 cm and costs $5 / £4.
- A saw (a handsaw works; a jigsaw makes the sink hole much easier), tape measure, pencil, drill/driver.
- Sandpaper, 120-grit, and child-safe exterior wood oil or paint for the finish.
- Hooks and a short rail or peg strip for the back — $8 / £6 of hardware-store bits.
- A water container with a tap (the camping-shop kind, 10 litres) — about $12 / £10 — or one of the other systems on my mud kitchen with running water page.
- Total realistic cost: $50–$100 / £40–£80 with a second-hand bench; under $30 / £25 if the bench is free from your own fence line, which is the correct price for garden furniture that was about to be firewood.
The Conversion, Step by Step
1. Set the height and cut the legs
Decide whose kitchen it is and take the worktop height from the dimensions guide — I’ll use 52 cm here, our four-year-old’s size. Measure the bench’s current worktop height, subtract your target, and mark that amount off the bottom of all four legs. Cut square. Two things this achieves beyond the obvious: the lower shelf drops to a crawl-in height children adore (it becomes the “oven” or the shop counter), and the back shelves come down to where a child can actually reach the hooks. Do not skip this step and plan to “let them use a step stool” — a stool plus a full bowl of water plus muddy feet is a fall rehearsed.
2. Sand it like you mean it
A garden bench that’s lived outside has raised grain, splinters and grey weathering. Twenty minutes with 120-grit on the worktop, edges and anything a small hand will grip. This is the step that separates a conversion from a hand-me-down — and check pallet-style edges twice, the way the mud kitchen safety checklist insists, because a used bench’s history is unknown.
3. Fit the sink
Two routes. The easy one: if the worktop slats lift out, remove two or three, and drop the washing-up bowl into the gap so its rim rests on the remaining slats or on two battens screwed across underneath. No cutting, fully reversible. The tidy one: mark the bowl’s outline on the worktop (trace the bowl upside down, then draw your cut line about 1 cm inside it so the rim catches), drill a starter hole, and jigsaw the opening. Drop the bowl in; the rim holds it. Either way, the bowl lifts out for emptying — non-negotiable, because of the standing-water rule you’ll meet in the safety checklist.
4. Build the back into a café wall
Screw a row of hooks along the back rail at child height: ladle, whisk, sieve, the good spoon. Add a small shelf or a crate on the top shelf for dry ingredients (a tub of the dry soil-and-sand mix from my mud-making guide lives here perfectly). If the bench has no back shelf, a length of board screwed between the rear uprights creates one in ten minutes.
5. Give it water
The bench’s top shelf was made for a watering can; swap in a tap container and gravity does the rest — position it above and slightly behind the sink bowl so drips land where drips belong. If you want the full working-tap treatment, the plumbing options (and their honest costs) are in my mud kitchen with working tap guide; for a conversion, the tap container gets you 90% of the joy for $12.
6. Oil it, then let the chefs in
One coat of child-safe exterior oil on the cut ends and sanded areas especially — cut leg ends drink water and rot first. Let it cure properly (the tin will say; usually 24–48 hours). Then run the ten-minute safety pass: stability shove, protruding screws, splinter check with your own palm.
Three Mistakes I Made (So You Don’t Have To)
- Cutting the legs before checking the shelf. On my first attempt — a friend’s bench, since converted twice more — I cut to the mark and only then noticed the lower shelf now sat 4 cm off the ground, useless for crates and perfect for trapping leaves. Measure where the shelf lands after the cut, not just where the worktop does; if the shelf would end up under about 10 cm, raise the bench on pavers instead of cutting less leg.
- Fitting the sink before sanding. Bowl in, looking great — then every sanding stroke rained grit into it and the rim rebate I’d cut collected it all. Order matters: cut, sand, then fit.
- Oiling before the hardware. Hooks and battens screw in far better through bare wood than through fresh oil, and oil on screw threads helps nothing. Finish the carpentry first; the oil is the full stop, not a comma.
What Ours Taught Me
The converted bench outplayed the purpose-built kitchen for a simple reason I didn’t expect: it’s wider. Potting benches run 100–120 cm, wider than most children’s kitchens, and two children can cook side by side without the elbow wars. If your household has siblings or a queue of visiting cousins, the humble potting bench may be the best mud kitchen format there is — and it was already standing in the garden, going green, waiting to be noticed.
FAQs
How much does a potting bench mud kitchen conversion cost?
With a second-hand bench ($30–$60 / £25–£50), a bowl, hooks and oil, the realistic total is $50–$100 / £40–£80. With a free bench it’s under $30 / £25. New benches push it to $120–$220 / £95–£175, at which point compare honestly with a purpose-built kitchen — the conversion wins on width and sturdiness, not price.
What height should I cut the legs to?
Worktop just below your child’s elbow: roughly 40–45 cm for a two-year-old, 50–55 cm for a four- to five-year-old, up to about 60 cm for older children. Cut once for the child you have; legs can come off again next year, but they don’t grow back — if two children of different ages will use it, cut for the younger and let the elder kneel like the rest of us.
Can I do this conversion without power tools?
Mostly, yes. A handsaw cuts the legs and a brace of patience cuts the sink hole if you drill a row of holes inside the line and join them up — or use the lift-out-slats route and skip cutting the worktop entirely. A drill/driver earns its keep on hooks and battens but screws can go in by hand. The one tool I’d call essential is the sander’s poor cousin: sandpaper and time.
How long does the conversion take?
One Saturday morning for the full job: an hour of measuring and cutting, an hour of sanding and sink-fitting, an hour of hooks, water and oil, spread around drying time. The no-cut version (legs only, bowl dropped between slats) is a genuine one-hour project.
Is a metal potting bench any good for this?
Honestly, not really. Metal benches usually have mesh tops that swallow small utensils, thin frames that flex, and edges that get hot in sun and sharp where they rust. The conversion idea works because timber benches are solid, cuttable and kind to small hands. If a metal bench is what you have, it makes a fine ingredient-and-equipment station next to a kitchen — just not the kitchen itself.