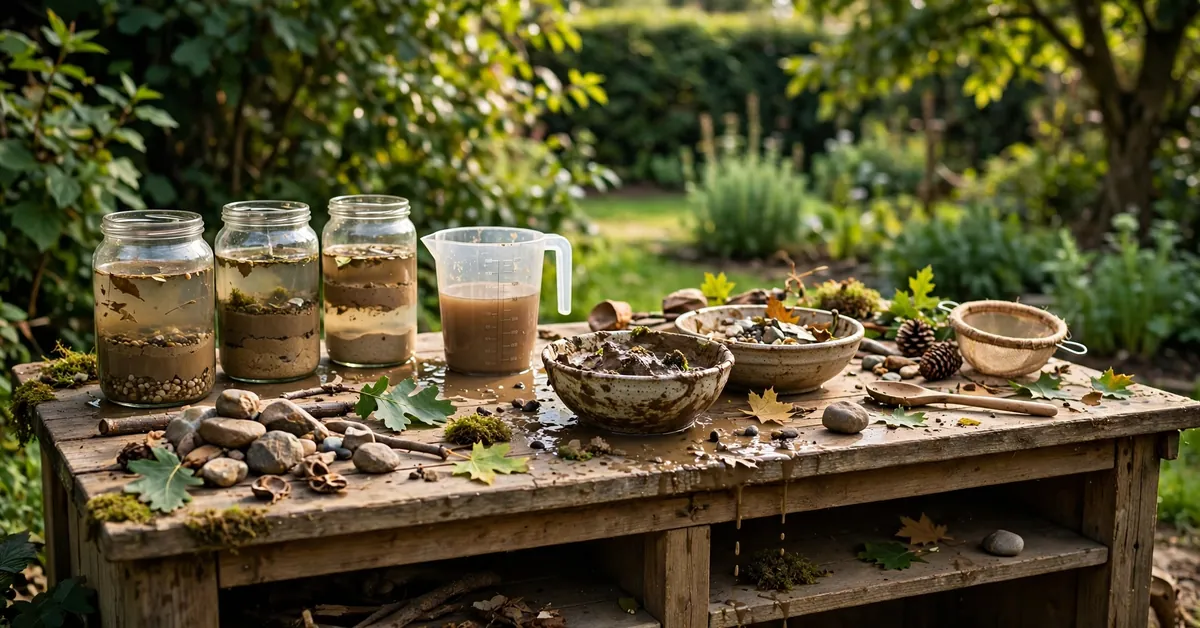
There’s a moment in every mud kitchen’s life when the café closes early and a different kind of play takes over. Ours arrived when our eldest, aged five, held up two bowls — one of stones, one of petals — and asked which would sink. We spent the rest of the afternoon finding out, then the next afternoon finding out why the muddy water went clear in the “special jug”, and by the weekend there was a volcano behind the sink and a notebook involved.
This is a different post from my mud kitchen recipes. The recipes are pretend — stone soup nobody eats, tea nobody drinks. These experiments are real: a genuine question, a guess, a test, and an answer you can watch happening. It’s the same mud, the same kitchen, and a completely different kind of thinking. Here’s the set that has survived repeated testing at our house, in the order I’d introduce them.
The Only Rules That Matter
- Predict first. Before anything is dropped, poured or fizzed, ask “what do you think will happen?” The guess is the science. A wrong guess that gets tested teaches more than a right answer handed over.
- Keep a record a child can make. A notebook with drawings, a photo of the brick that held the book, tally marks for sinkers and floaters. Under-fives draw; over-fives start wanting to write the result down, which is its own quiet miracle.
- Same safety rules as always. Nothing from the kitchen gets tasted (the volcano especially — it looks delicious and is not), hands washed at the end, and the soil rules from my mud kitchen safety checklist apply to everything below.
Experiment 1: Sink or Float, Garden Edition
You need: a big bowl of water and a collecting basket.
Fill the basket on a garden hunt: stones, sticks, leaves, petals, a pine cone, a feather, a shell, a lump of dry mud, a wet one. Predict each one — say it out loud, write it on the list — then drop them in, one at a time.
What happens: stones sink, most leaves and petals float, sticks can’t decide, and the pine cone does something wonderful — it floats, then slowly waterlogs and sinks over an hour, which gives you a reason to keep checking back like it’s a television programme.
The idea underneath: heavy-for-its-size sinks, light-for-its-size floats. You don’t need the word “density” for a four-year-old; you absolutely have one by the time a six-year-old is testing whether a big stick floats higher than a small stone. (It does. The argument about why is the education.)
Experiment 2: The Muddy Water Filter
You need: a cut-down plastic bottle (adult cuts it), a coffee filter or an old cloth, gravel, play sand, and the muddiest water you can make.
Invert the bottle top into the base as a funnel. Layer in cloth, then sand, then gravel. Pour muddy water through slowly and watch what comes out the bottom.
What happens: the water emerges dramatically clearer — not clean, never drinkable, say so clearly — because each layer catches smaller bits than the one above. Re-filter the same water twice and compare bowls side by side: clearest, middle, original swamp.
The idea underneath: this is genuinely how water treatment starts, and children who have built one never look at a muddy puddle the same way. Set the layers up wrong once — sand on top of gravel — and the comparison teaches more than the success does.
Experiment 3: The Mud Volcano
You need: a small cup or bottle, bicarbonate of soda (baking soda), vinegar, a spoon of cocoa powder for colour, and a lot of mud.
Build a mud cone around the cup — proper volcano architecture, crater at the top. Three spoons of bicarb and the cocoa go in the cup. Predict. Pour in the vinegar.
What happens: a brown, foamy eruption that slides down the cone and gets rebuilt, on our count, about eleven times in the first session. The cocoa makes it look like the real thing; the smell makes very clear it isn’t food.
The idea underneath: an acid and an alkali making gas — the bubbles are the same gas that makes bread rise. That’s the entire explanation a young child needs; the rest is lava management.
Experiment 4: The Great Dissolving Race
You need: four clear jars of warm water, and a spoon each of salt, sugar, play sand and flour.
Same amount in each jar, same number of stirs (count them out loud), then watch. Predict the finishing order first — sand is the favourite every time, and it finishes a glorious last.
What happens: salt and sugar vanish (dissolve), flour makes a cloudy suspension that slowly settles, sand sits at the bottom entirely unbothered, having never entered the race. Warm water rematch: everything dissolves faster, which is a second experiment hiding inside the first.
The idea underneath: some things mix into water so completely you can’t see them anymore — but the salt water still tastes of salt if an adult checks — and some never will. This one quietly explains half of what happens in a mud kitchen bowl every single day.
Experiment 5: The Brick Strength Test
You need: the brick mud from my how to make mud guide, three ways — plain mud, mud with extra sand, mud with chopped straw or grass mixed in.
Pack each mix into the same small box or mould, dry them in the sun for a day (two if your weather is British about it), then test: stand each brick on end and stack books on top until it fails. Record the scores in the notebook with due ceremony.
What happens: plain mud bricks crumble early, sandy ones do better, and the straw mix — the one that looks worst — usually wins by a distance. Builders have known this for thousands of years; adobe and cob are exactly this recipe.
The idea underneath: fibres hold mud together the way steel holds concrete. A child who has tested it understands something real about how houses get built, and will inform you of this at length.
Experiment 6: The Evaporation Detectives
You need: two identical bowls, the same amount of muddy water in each, one in full sun and one in shade, and a stick to mark levels.
Mark the water level on each bowl in the morning. Check at lunch, at tea, the next day. Measure the drop with the stick, mark it again.
What happens: the sunny bowl empties visibly faster, and as it dries, the mud surface cracks into plates — the same patterns as a dried lake bed, in miniature, by Thursday. Add one more bowl covered with a lid and the mystery deepens usefully: where did the sun bowl’s water go?
The idea underneath: the water cycle, happening on your patio at a speed a child can actually witness. This is the slowest experiment here and the one that gets checked most often, entirely unprompted.
Experiment 7: The See-Through Garden
You need: a clear jar, mud pressed around the inside walls, dry soil or compost in the middle, and a few quick seeds — cress, radish or beans.
Pack the mud in a layer against the glass all the way round, fill the centre with soil, plant the seeds in the gap between mud and glass, water lightly, and stand the jar somewhere bright.
What happens: within days, roots come down where small eyes can see them — white, branching, feeling their way — and the shoot goes up to meet them. The mud layer is doing the one job that matters here: holding moisture against the glass so the roots stay visible instead of drying out.
The idea underneath: half of a plant is hidden, and this is the one mud kitchen experiment that unhides it. It takes the longest and changes the slowest, which is precisely its power — the jar gets visited daily, like a pet.
A Word on Age
Under-threes get Experiment 1 and a bowl to supervise — prediction is a nod and a point, and that’s enough. Three- to five-year-olds run 1, 3 and 4 with an adult reading the scores. Five and up can genuinely own 2, 5 and 6, including the notebook — and at that point your job shrinks to supplying vinegar, asking “what do you think will happen?”, and applauding collapses in the right places.
FAQs
What age are mud kitchen science experiments suitable for?
Sink or float works from about two, with an adult running the bowl. The volcano, dissolving race and filter suit three- to five-year-olds as a shared activity. The brick test and evaporation detective work reward five- to seven-year-olds most, because both involve waiting, measuring and writing down a result — but every experiment here scales down to “watch what happens” for younger scientists.
Do I need to buy any special equipment?
Almost nothing. Jars, bowls, a cut-down bottle and a cloth are already in your kitchen; the consumables are bicarbonate of soda, vinegar and a spoon of cocoa — a few dollars or pounds a term. The notebook is the one purchase I’d actually recommend: a cheap hardback that lives at the mud kitchen turns scattered play into a body of research its owner is unreasonably proud of.
How is this different from mud kitchen recipes?
The recipes are pretend play: stone soup and leaf tea follow the rules of café, not chemistry, and that’s their value. These experiments ask real questions and let the garden answer them — the brick really does hold more books, the filtered water really is clearer. Both belong at the same kitchen; they feed different hungers, often on the same afternoon.
Is the mud volcano safe?
Yes, with the standard rules. Bicarbonate of soda and vinegar are kitchen ingredients, the eruption is foam rather than anything hot or forceful, and the cocoa is there for colour. The real rule is the same one as everywhere at a mud kitchen: it isn’t food, it doesn’t get tasted, and hands get washed at tidy-up time — the volcano just needs saying out loud, because it genuinely looks edible.
What if my child just wants to make a mess instead?
Then the experiment has already worked at the level it needed to. Prediction and observation are habits, not lessons: a child who has watched a pine cone sink over an afternoon carries that into every future bowl of water. Run the messy play, park a jar of muddy water somewhere visible, and let curiosity arrive on its own schedule — it will.