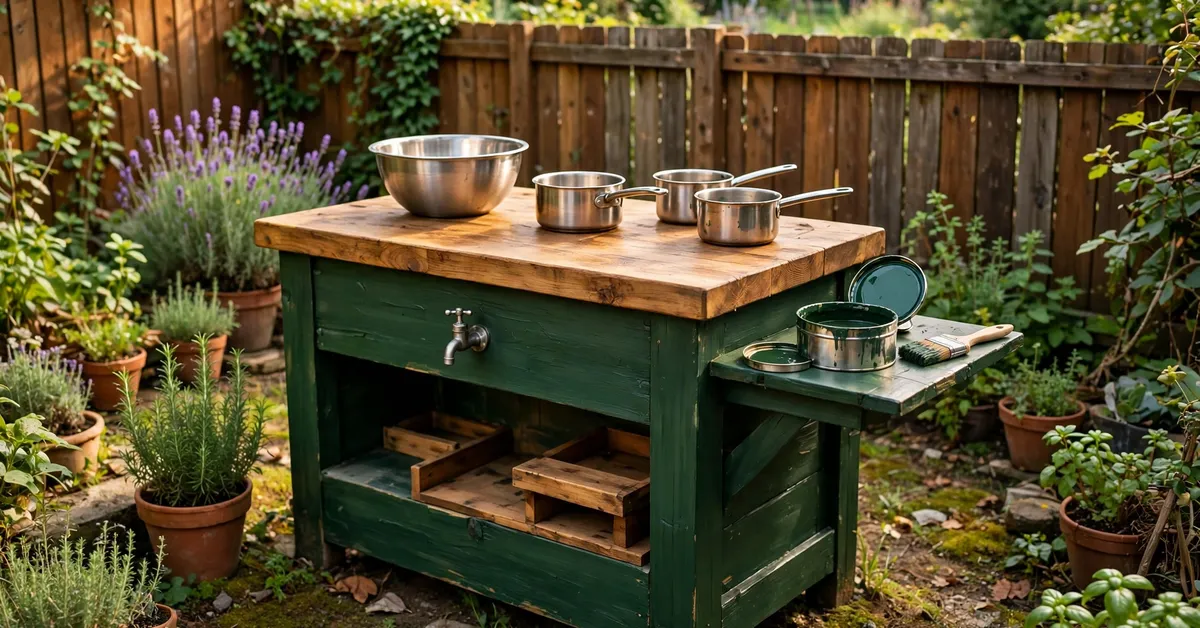
A painted mud kitchen divides opinion in our house. My view: the wood doesn’t care, the children barely notice, but a kitchen that looks good in the garden gets used more — because the adults keep it stocked, visible and in service instead of quietly exiling it behind the shed. There’s also one situation where painting isn’t decoration at all but rescue: a grey, weathered second-hand kitchen that a coat of colour brings back from the brink. This post is the practical guide either way — which finishes are actually safe and durable on a surface children chew, stir against and hose daily, which are a waste of a weekend, the preparation that decides whether any of it is still there in two years, and colour schemes that survive both fashion and weather.
Paint or Oil? Decide Before You Buy Anything
This is the fork in the road, and most disappointment in painted mud kitchens starts here:
- Exterior wood oil soaks in, feeds the wood and keeps the natural colour — the finish the mud kitchen maintenance routine is built around. It doesn’t peel, ever, because there’s no film to peel. It just fades gracefully and wants a fresh coat every year or so. If you love the wood, oil is the honest choice, and everything else in this post is optional.
- Paint sits on the surface as a film. It gives you colour — real colour, the children’s names over the door kind of colour — but a film outdoors lives a hard life: water sits on worktops, utensils scrape, sun works on it daily, and a cheap film answers all of that by flaking. Painted well with the right product, it lasts years. Painted casually, it lasts a season and takes your goodwill with it.
- The hybrid most of ours end up with: painted frame and back board for the colour, oiled worktop where the actual work happens. The worktop is the highest-wear, wettest surface on the kitchen; it’s the one place a film finish earns its keep worst and oil earns its best.
Choosing a Paint That’s Safe and Stays Put
Two filters, applied in order:
Safety first, and read the tin, not the shelf talker. You want a water-based exterior paint or garden-furniture paint that states it is suitable for children’s toys or play equipment once cured — the standard to look for on European and UK tins is EN 71-3 (toy safety, migration of certain elements), and reputable ranges print it on the label or the product page. “Low VOC” is good for the painter and the planet but is a different claim from toy-safe; the words you need are about the cured finish being safe for play equipment. Child-safe exterior wood oils carry the same toy-safe markings — the refresh routine for second-hand kitchens in my second-hand mud kitchen guide specifies them for the same reason. Let any finish cure fully — days, per the tin — before the chefs arrive. Cured is the operative word in every safety claim.
Durability second. Exterior-grade, flexible, and made for garden furniture or wooden play equipment. Interior paint, craft acrylic and leftover emulsion are the three classic false economies: all three will be off a worktop by autumn. Chalk-style garden paints look beautiful in photographs and are fine on a sheltered back board; on horizontal, water-holding surfaces they wear exactly as fast as you’d fear.
Preparation: The Saturday Morning That Decides Everything
Paint doesn’t fail; preparation does. The sequence that works:
- Clean first. Scrub the whole kitchen with a stiff brush, warm water and washing-up liquid — the same opening move as the second-hand refresh — and let it dry properly, a full sunny day if you can. Painting over algae, grease or damp is just scheduling the peeling.
- Sand the surfaces you’re painting. 120-grit, until the wood feels even and your palm finds no splinters — on a play surface this step isn’t cosmetic, it’s safety work. You are also giving the paint something to grip: glossy old varnish sanded dull holds paint; glossy old varnish unsanded sheds it.
- Deal honestly with old paint. Sound, modern paint in good condition can be sanded and painted over. Flaking paint comes off back to firm edges. And the one hard rule from the upcycling work: suspect paint on pre-1980s furniture may contain lead — a kitchen from that stock should be stripped to bare wood completely or not painted-and-played-with at all; the full reasoning is in my upcycled mud kitchen guide. When in doubt, don’t sand mystery paint into dust around a children’s toy.
- Mask and mind the moving parts. Tape the sink bowl rim and hinges, take hooks off rather than painting round them, and keep paint out of the drawer runners — the furniture-conversion trick of waxing runners applies here too.
The Painting Itself
Thin coats, plural. Two thin coats of a decent exterior paint beat one thick one in every dimension that matters — adhesion, drying, durability, and how it looks by August. Brush with the grain on the frame, use a small roller on the back board for the flat, poster-like finish that photographs so well, and keep a wet edge so you don’t get lap marks on the big surfaces. Between coats, a light rub with fine sandpaper (240-grit) once the first coat is dry transforms the second coat’s grip; it’s the professional’s trick and it costs four minutes.
One more professional trick, free: paint the feet and the bottom few centimetres with extra care — two coats minimum, or stand the kitchen on pavers afterwards. Feet are where every wooden kitchen dies first, and paint that ends neatly at ankle height leaves the executioner a door.
Colours That Work in a Real Garden
Children will vote for rainbow. You live with the result in all weathers, so negotiate like a professional:
- Deep green (our house colour family) disappears into planting, hides mud splashes best of any colour ever tested, and makes metal bowls and pale wood utensils look like a magazine. The grown-up’s choice and, in practice, the longest-lasting-looking.
- Sage and soft greys read calm and modern, show mud moderately, and suit small gardens where the kitchen is always in view.
- Cream and off-white are beautiful for exactly one photograph. Every splash is a headline. Choose with open eyes or restrict to the back board only.
- The two-colour scheme solves the politics: adult colour on the frame, the children’s chosen colour on the inside of the back board, the shelf fronts or the drawer — the bits they see while working. Both parties win, and the children’s colour is the cheapest to repaint when tastes change, as they will, loudly, by next summer.
- Lettering and names belong to the signs themselves — a painted board or two from my mud kitchen signs guide hangs on any colour scheme and can be replaced without repainting the kitchen.
Keeping a Painted Kitchen Looking Painted
Add these to the standard annual routine: wash the painted surfaces down when you do the spring clean (a film finish traps dirt in its texture if it’s never washed), touch up chips and scrapes as they appear rather than in an annual panic — ten minutes with the leftover tin in June beats a full repaint in year three — and renew any oiled sections yearly as usual. Expect a well-painted frame to want a full fresh coat every three to five years; a worktop painted against my advice will want one every year, which is the tuition fee for that particular lesson.
What It Costs
One tin of toy-safe exterior garden paint (750 ml covers a typical kitchen frame twice over) runs $15–$30 / £12–£25, plus brushes and tape you probably own: call it under $35 / £28 all-in per repaint — roughly the price of one new utensil set, for the finish that decides whether the kitchen is the garden’s feature or its apology.
FAQs
What paint is safe to use on a mud kitchen?
A water-based exterior paint or garden-furniture paint that is labelled suitable for children’s toys or play equipment once cured — look for the EN 71-3 toy-safety standard on the tin or the product page. Child-safe exterior wood oils carry the same kind of marking. Low-VOC is a different claim (about the painting process, not the cured surface). Whatever you use, let it cure fully, for the full time the tin states, before children play on it.
Is it better to paint or oil a mud kitchen?
Oil for the wood and the worktop, paint for colour on the frame, is the combination that lasts. Oil never peels, feeds the wood and is renewed in an hour a year, but gives you no colour. Paint gives colour but forms a film that wears on wet, scraped surfaces — so keep it off the worktop and on the frame and back board, where a good exterior paint, properly prepared, lasts three to five years.
Can you paint over an old, weathered mud kitchen?
Yes — grey weathered wood is the best rescue candidate there is, provided the wood is still sound. Scrub it clean, let it dry fully, sand to an even surface, and paint in two thin coats. What you can’t paint over is rot: soft feet and spongy worktops fail under any finish. And never sand or overpaint suspect pre-1980s paint without dealing with the lead question first — strip to bare wood or retire the piece.
How long does paint last on a mud kitchen?
On a properly prepared frame in a reasonable position: three to five years before it wants a full fresh coat, with small touch-ups in between. On a horizontal worktop that holds water and takes daily scraping, expect a year — which is why the worktop gets oil instead. Feet painted thin or left standing in wet grass fail first whatever you use; pavers and a double coat at the base are the cheapest insurance.
What colour should I paint a mud kitchen?
Deep green hides mud best, blends into planting and ages most gracefully; sage and soft grey are the calm modern options; cream shows every splash and suits only the sheltered back board. The household peace treaty is a two-colour scheme: the adults’ colour on the frame, the children’s colour on the inside of the back board and drawer fronts — the parts they face while playing, and the cheapest parts to repaint when tastes change.