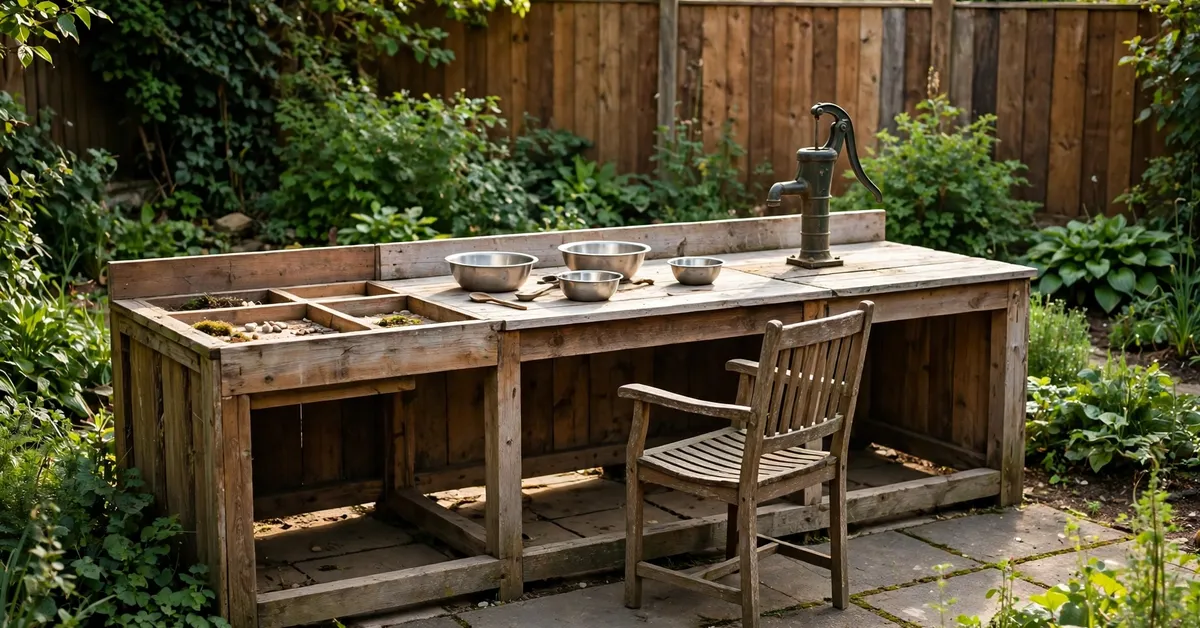
Mud play is one of the most naturally inclusive activities there is. It has no reading level, no score, no right answer and no timer — a child can stir, pour, pat and pretend at exactly the level that’s theirs that day. What excludes children is rarely the mud. It’s the furniture: a worktop at the wrong height, a bowl too heavy to lift, a muddy slope between the child and the kitchen, tools that need two strong hands. This post is about removing those barriers deliberately — adapting a mud kitchen for wheelchair users, for children with limited grip or one-handed play, for children who need the sensory volume turned down (or up), and for children who simply do better when the game is predictable. Most of it costs little or nothing. All of it starts from the same principle as every post on this site: the child should be doing the playing, not watching it happen nearby.
Start with the Route In, Not the Kitchen
Access is usually lost before the kitchen is reached. Work through the approach first:
- A firm, level path. Mud kitchens live in the muddiest corner by definition, but the route to it should be passable in all weathers: slabs, a boardwalk of decking boards, or compacted gravel rather than a lawn that turns to soup. If a wheelchair or walking frame uses the garden at all, it needs to reach the kitchen in November, not just in June.
- A hard standing pad at the kitchen. A metre and a half of slabs or decking in front of the worktop, level with the path. Wheels and frames on soft, wet ground sink and stick; on a pad, the child arrives at the same worktop as everyone else, from their own chair.
- Room to turn and room to stay. Leave clear space beside the working position for a chair, a frame or a sibling — access that requires the child to be parked and left fails the whole point. The general layout principles are in my mud kitchen setup guide; the accessible version adds width, firmness and turning space to the same thinking.
Heights, Reach and Working from a Chair
The standard worktop heights by age are in my mud kitchen dimensions post; adapting for seated play or a specific child is a matter of matching the surface to their seated or standing elbow height, and there are three honest routes:
- Build or convert to measure. A simple bench-style build from the mud kitchen DIY plans, or a furniture conversion, can put the worktop exactly where it’s needed and — the detail that matters — leave clear knee space underneath rather than a cupboard, so a chair pulls in close and the work happens in front of the child, not at arm’s length.
- Raise the child, not the kitchen: a stable platform or a chair with a firm cushion at the existing worktop works for many standing-frame and smaller-child situations, provided it passes the same stability test as the kitchen itself.
- Bring the kitchen down to the play: a low, wide tray table or the worktop of a portable mud kitchen box on a stand — some of the best seated mud play I’ve seen happened at a groundsheet-and-box setup at exactly lap height, because the whole system was sized to the player from the start.
Whatever the route: a raised lip or edge on the worktop (a strip of batten along the front and sides) is the single highest-value adaptation in this post. It stops bowls sliding away from a child who can’t chase them, contains the mud at the front edge, and turns spills from a disaster into a shrug.
Tools for Grip, Strength and One-Handed Play
The kit list in my what to put in a mud kitchen guide is the starting point; the accessible edit is about weight, grip and stability:
- Light before strong. Small metal or sturdy plastic bowls a child can lift one-handed when full — test them filled with wet mud, not empty, because wet mud is heavy and it’s the full weight that decides.
- Chunky handles and D-handles. Thick-handled spoons, jugs with a proper closed handle, and trowels with D-grips are easier for limited grip than thin utensils; foam tubing slipped over a handle fattens any grip in seconds.
- Everything stabilised. A bowl that sits in a ring stand, a washing-up bowl wedged in its cut-out, non-slip matting under trays — a child playing one-handed needs the container held still so their one hand can do the stirring. Suction bases and a friend’s hands are options; a kitchen designed so the bowl can’t wander is better.
- Pumps and levers over lifting and carrying. A hand pump or a container with a tap at working height removes the heaviest job in mud play — moving water. The options are the ones in my mud kitchen with a working tap post, chosen here for independence rather than novelty.
Turning the Sensory Volume Up or Down
Mud play is a sensory firehose, and different children need it at different settings. This is a cousin of the approach in my mud kitchen for reluctant kids guide — that post is about temperament and mess-aversion; here it’s about matching the input to the child in front of you:
- To turn it down: dry ingredients first (soil, sand, lentils), tools as distance, gloves available, warm water rather than cold, small quantities in one bowl rather than a full tub, and a predictable seat at the end of the worktop where splashes from enthusiastic neighbours don’t arrive uninvited.
- To turn it up: for the sensory seeker, deep tubs to plunge arms into, heavy work (carrying the watering can, patting down brick mud), textured additions — gravel, shells, pinecones — and jobs with resistance and rhythm. Mud kitchen work is gloriously heavy, squeezable and proprioceptive; it’s one of the few play setups that can be more regulating turned up than down.
- Either way, the child controls the tap. Sessions end when they say, the wash station is always in reach, and nobody is ever held in mud “for their own good”. The exit rules are the same ones in my mud kitchen safety checklist, and they matter most for exactly the children this post is about.
Predictability: Routines, Pictures and the Same Again
Many children play best when the game has a shape they already know. The mud kitchen lends itself to this beautifully:
- A visual routine on the back board — four or five simple pictures or photos: apron on, choose a recipe, play, wash hands, towel. Real photos of this kitchen and this child beat any printed symbol set for making the sequence theirs.
- A recipe of the day, chosen from the usual mud kitchen recipes and set out in order — bowl, ingredients, tools, in a row — turns open-ended play (overwhelming for some) into a completable task with a proud ending, while the child next to them free-ranges. Same kitchen, two games, both legitimate.
- The same seat, the same hook for the towel, the same apron. Consistency isn’t a limitation here; it’s the ramp that lets the child arrive already knowing how this works, with all their energy left for the play itself.
A Word on Honesty
Adaptations like these are practical, parent-tested common sense — they are not therapy, and this post isn’t dressing them up as such. If your child has an occupational therapist or physiotherapist, they’re the people to ask about heights, seating and grip for your child specifically, and in my experience they are delighted to be asked about play equipment — it’s a better question than they’re usually brought. What I can promise from the garden side is this: every adaptation in this post has been chosen because it increases the amount of playing the child does themselves, with their own hands, at their own pace. That — not the equipment — is the whole point of the thing.
What the Adaptations Cost
Most of this post is free: it rearranges, substitutes and thinks before it buys. The spend, when there is any: slabs or boards for the pad ($20–$50 / £15–£40 if you don’t have them), a pump or tap container ($15–$40 / £12–£30), non-slip matting and foam grip tubing ($10 / £8 or so), and possibly a made-to-measure worktop if the build route is yours — materials on the usual DIY scale. Order of magnitude: $0–$100 / £0–£80 depending almost entirely on the path and the pad.
FAQs
What height should an accessible mud kitchen worktop be?
Match it to the child’s elbow height in their playing position — seated in their chair, or standing — rather than to any age chart. For wheelchair users, leave clear knee space under the worktop so the chair pulls in close and play happens in front of the child, not at arm’s length. A conversion or simple build lets you hit the measurement exactly; a low tray setup at lap height is a perfectly good alternative.
How do you make a mud kitchen wheelchair accessible?
Work from the route in: a firm, level path that stays passable in wet weather, a hard standing pad of slabs or decking at the kitchen, turning space beside the working position, clear knee space under the worktop, and water available by pump or tap at working height so there’s no carrying. Add a raised lip on the worktop so bowls can’t slide out of reach.
What are the best mud kitchen tools for a child with limited grip?
Lightweight bowls (tested full of wet mud, not empty), chunky or D-shaped handles, foam tubing slipped over ordinary handles to fatten the grip, and containers that can’t wander — bowls in ring stands, non-slip matting under trays. A child playing one-handed needs the bowl held still by the setup, not by a second hand they don’t have spare.
Can mud play work for a child who is overwhelmed by sensory input?
Yes — turned down. Start with dry ingredients, tools as distance, gloves available, small quantities, warm water, and a seat at the end of the worktop away from other children’s splash zones, with the wash station always in reach and the child in control of when the session ends. The gradual ladder in the reluctant-kids guide applies here too; it was built for temperament, and it adapts to sensory needs with the same steps.
Does an accessible mud kitchen cost a lot to set up?
Usually not. Most adaptations are rearrangement and substitution — the route, the pad, the stable bowls, the visual routine — rather than purchases. Realistic spending is on the path and pad materials, a pump or tap container and small items like grips and matting: anywhere from nothing to about $100 / £80. Ask your child’s OT or physio about exact heights and seating; the play equipment itself stays cheap.