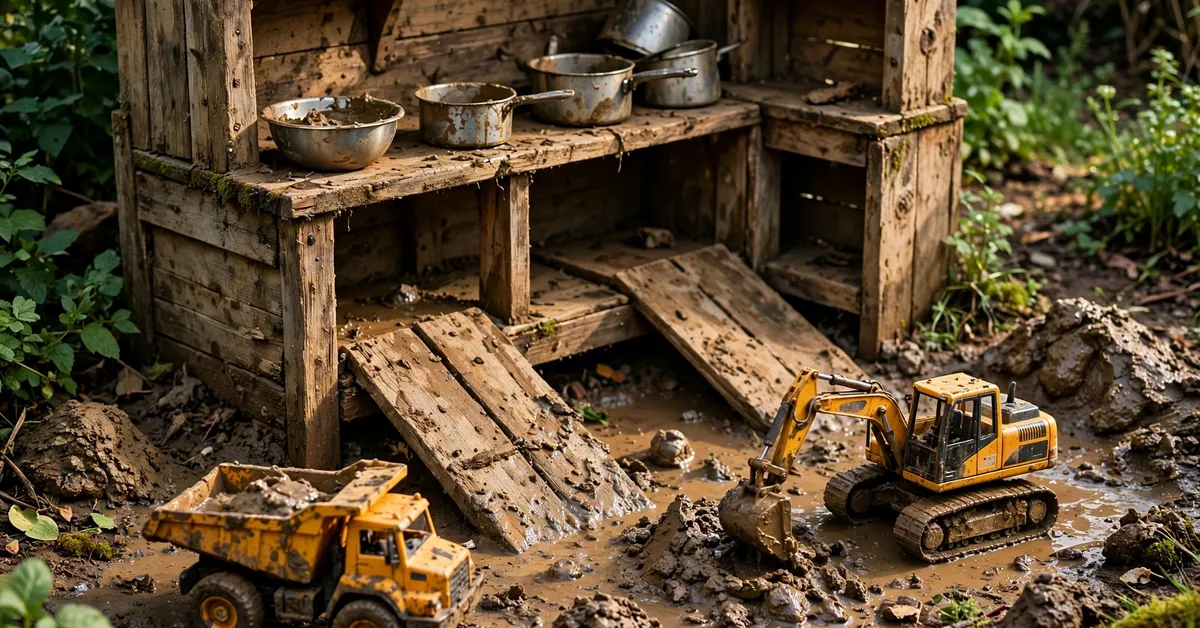
Every mud kitchen eventually becomes a building site, usually without anyone planning it. A child brings a toy digger to the mud, the digger digs, a truck arrives to carry the spoil away, and within ten minutes there is a road, a hole, a pile and a very serious site manager giving orders. It is the most natural crossover in children’s play: mud is the building material, vehicles are the machines, and the mud kitchen is the yard where it all happens. Yet most parents treat it as an accident — diggers tolerated, not planned for — when a little planning turns it into the best play the kitchen offers.
This post is that plan: how to set up a construction corner in or beside the mud kitchen, which vehicles actually survive mud (and which do not), the building projects that keep children busy for hours, and the sharing rules that stop the whole thing collapsing into a fight over the one good digger. It is not a café post — my café-play coverage lives elsewhere, and this is a different game entirely: building, hauling, digging and engineering, with mud as concrete and toy trucks as the workforce.
Why Diggers Belong in a Mud Kitchen
Vehicle play and mud play fit together because they answer the same urge from opposite ends. Mud play is sensory and open-ended: squashing, pouring, mixing, feeling. Vehicle play is purposeful: load, carry, dump, build, repeat. Put them together and each one fixes the other’s weakness. Pure mud play can drift — children run out of ideas and start throwing things. Pure vehicle play on a clean floor runs out of material — there is nothing to load. A mud kitchen construction site gives vehicles something real to do and gives mud play a job, and jobs are what keep children playing for an hour instead of ten minutes.
There is also a developmental honesty to it. Real building sites are how the adult world visibly works — diggers, trucks, cranes, roads — and children watch them with total fascination whenever one appears on their street. A mud kitchen site lets them run their own version at their own scale, with real weight (a loaded truck is heavy), real resistance (wet mud is hard to dig) and real consequences (a badly built ramp collapses, and they learn why). The projects in my mud kitchen science experiments post cover the experiment side of this — bricks, dams, water flow — and this post covers the vehicle side: the machines, the site and the jobs.
One more reason, for parents of children who “don’t like” mud kitchens: a digger is often the way in. A child who will not touch mud with their hands will happily drive a digger through it, and a child who finds potion play boring will spend an hour building a road. If your mud kitchen has a reluctant player, my mud kitchen for reluctant kids guide has the full approach — and a toy truck is one of the best tools in it, because it lets a child join the mud on their own terms, with a machine between them and the mess.
Setting Up the Site: Zones That Make It Work
A construction site works when it has zones, because zones stop every vehicle ending up in the same hole fighting over the same pile. You do not need a big garden — a corner of the mud kitchen area, or a patch of ground beside it, is enough — but you do need four places, and they need to be in the right relationship to each other.
The dig pit comes first: a shallow pit or a deep tray of loose, damp mud where digging actually happens. If your kitchen has a ground tray or a spare crate, that is the pit; if not, a dug-out hollow in the lawn edge works, lined with an old towel or tarpaulin to keep the mud contained. The pit needs the loosest, wettest mud on the site, because digging dry mud is miserable and digging soup is pointless — the how to make mud guide has the mix, and for digging you want it wetter than pie mud.
Next to the pit, the haul road: a flat strip of ground, a plank, or a path of flattened mud where trucks travel between the pit and the building area. Roads matter more than adults expect — children will spend longer building and repairing a road than doing anything else on the site, and a road with a ramp (a plank on a brick) and a bridge (a plank over a puddle) is a project in itself. Then the building area: a flat patch where structures go up — towers, walls, houses — with a pile of building materials beside it (sticks, stones, pinecones, small bricks). And finally the wash station: a bucket of clean water and a brush where vehicles get cleaned at the end of play, because a truck caked in dried mud is a truck that stops working, and the wash station is also where the session naturally ends.
Water deserves a word here, because a construction site uses water differently from a café kitchen: it needs a steady supply for mixing building mud, but it must not flood the site. A container tap at the edge of the site, as in my mud kitchen with working tap guide, or a watering can kept full, is enough — and a mud kitchen water wall beside the site gives older children a pouring job that doubles as the site’s water supply.
The Fleet: Which Vehicles Survive Mud
Not all toy vehicles survive a mud kitchen, and buying the wrong ones is the fastest way to waste money on this play. The rule is simple: chunky, simple, washable. The vehicles that last are the ones with few moving parts, big wheels, no electronics and no tiny pieces: sturdy plastic diggers and dump trucks, wooden trucks, metal Tonka-style trucks that can be hosed down. The ones that die are the ones with batteries, remote controls, small wheels that clog, or delicate parts — a remote-control truck in mud lasts one session, and a detailed model car lasts about ten minutes before a wheel jams with grit.
Size matters too. Vehicles need to be big enough to carry a real load — a truck that can only carry one spoonful of mud is a decoration, not a machine — but small enough for a child to push through mud without help. The sweet spot for most children is roughly hand-sized to two-hands-sized: big enough to load with a trowel, small enough to drive one-handed. Buy two or three workhorses rather than twenty vehicles: one digger, one dump truck and one loader or crane cover nearly every job, and duplicates of the most popular vehicle (usually the digger) prevent more arguments than any other purchase on the site. The full stocking logic — buy the working items twice — is the same principle as my mud kitchen for siblings post, and it applies to vehicles exactly as to whisks.
Cleaning is part of the fleet, not an afterthought. At the end of play, vehicles go to the wash station: a dunk in the bucket, a brush over the wheels, left to drip-dry. Vehicles left caked in mud seize up, rust if metal, and smell if plastic — and a child who cleans their own truck learns the unglamorous half of every real job, which is a lesson worth more than the play itself. Keep a dedicated brush and bucket for vehicles, separate from the kitchen’s washing-up, and the fleet will last years instead of weeks.
Building Projects That Last an Hour
With zones and a fleet, the projects run themselves — but a few starters help, especially the first time a child meets the site.
Roads and ramps are the first project and the longest-lasting: flatten a strip of mud, edge it with stones, add a ramp of plank-on-brick and a bridge over a puddle, then test it with every vehicle in the fleet. A road that survives a loaded truck is an engineering achievement, and children will rebuild it five times to get it right. Towers and walls come next: mud bricks pressed into a mould or shaped by hand, stacked with sticks for reinforcement, tested by driving a truck into them (the scientific method, aged five). Dams and waterways use the site’s water supply — a channel dug through mud, dammed with stones, released with great ceremony — and they teach more about water flow in twenty minutes than a classroom does in a week.
Bigger projects grow out of these: a whole village with roads, houses and a quarry; a quarry itself, dug deeper each session until it needs shoring with sticks; a mountain with a tunnel (a pipe or a hollow log) that trucks drive through. The trick for adults is to resist directing: suggest a project, supply the materials, then step back. A site that a child designed themselves gets played with for weeks; a site an adult designed gets played with once. And when the session ends, leave the structures standing if you can — a village that survives overnight is a village children run back to in the morning, while a site cleared flat every evening has to be re-imagined from nothing each time.
Sharing Rules: Stopping the Digger Wars
Every construction site has one problem, and it is always the same: the best vehicle. There is one digger everyone wants, one truck that carries the most, and a queue of children who have all decided that sharing means “I get it first.” The systems that work are boring, visible and decided before play starts — exactly the systems in the siblings post linked above, applied to vehicles.
First, duplicate the star: two diggers, or a digger and a loader that does nearly the same job, removes the single point of failure. Second, assign jobs, not vehicles: one child is the digger driver, one is the truck driver, one runs the wash station or the quarry, and the jobs rotate every fifteen minutes or by a timer everyone can see. A job rotation works where “sharing the digger” fails, because a job is a role with status, not a turn with a countdown. Third, make the rules physical: a parking bay marked with sticks where vehicles wait between jobs, a job board (a piece of card with names that move), and a rule that a vehicle left in the parking bay is available to anyone. Children respect a system they can see far more than a rule an adult repeats.
When it still goes wrong — and some days it will — the fallback is the same as for any mud kitchen dispute: separate the players, not the play. A second small site (a tray with its own pit and truck) a few metres away turns a fight over one digger into two sites with two bosses, and the children usually merge back together within half an hour, on better terms. The adult’s job on a construction site is the same as everywhere else in mud play: set up the zones, supply the fleet, agree the rules before the first engine starts, and then get out of the way and let them build.
FAQs
What age is mud kitchen construction play best for?
It works from about two (pushing a chunky truck through mud) to about eight (full site management with jobs and projects). Toddlers drive and dump; preschoolers build roads; older children run the whole site with roles. The vehicles and zones just need sizing to the child — low pit and big trucks for toddlers, proper projects for older children.
Which toy trucks actually survive mud kitchen play?
Chunky, simple, washable ones: sturdy plastic diggers and dump trucks, wooden trucks, and metal trucks that can be hosed down. Avoid anything with batteries, remote controls, tiny wheels that clog, or delicate parts — they last one muddy session. Buy two or three workhorses (a digger, a dump truck, a loader) rather than twenty vehicles.
How do I clean muddy toy trucks?
A wash station: a bucket of clean water and a brush, used at the end of every session, with vehicles left to drip-dry. Do not leave vehicles caked in mud — they seize, rust or smell. A dedicated vehicle brush and bucket, separate from the kitchen’s washing-up, keeps the fleet working for years.
Do I need a separate area for construction play?
Not a big one — a corner of the mud kitchen area or a patch of ground beside it, with four zones (dig pit, haul road, building area, wash station), is enough. If space is tight, a deep tray as the pit and a plank as the road give you a complete site in about a square metre.
What if children fight over the digger?
Duplicate the star vehicle first, then assign jobs (digger driver, truck driver, wash station) that rotate on a timer, rather than “sharing” one vehicle. Make the rules physical — parking bays, a job board — and if it still fails, set up a second small site a few metres away. The full sharing systems are in my mud kitchen for siblings post.